
5.3

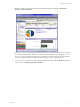
Table Of Contents
- Copyright
- About This Book
- Preparing for Installation
- Installing VCM Using Installation Manager
- Upgrading VCM and Related Components
- Getting Started with VCM Components and Tools
- Getting Started with VCM
- Discover, License, and Install Windows Machines
- Verifying Available Domains
- Checking the Network Authority
- Assigning Network Authority Accounts
- Discovering Windows Machines
- Licensing Windows Machines
- Installing the VCM Windows Agent on your Windows Machines
- Performing an Initial Collection
- Exploring Windows Collection Results
- Getting Started Collecting Windows Custom Information
- Discover, License, and Install UNIX/Linux Machines
- Discover, License, and Install Mac OS X Machines
- Discover, License, and Collect Oracle Data from UNIX Machines
- Customize VCM for your Environment
- How to Set Up and Use VCM Auditing
- Discover, License, and Install Windows Machines
- Getting Started with VCM for Virtualization
- Virtual Environment Configuration
- ESX 2.5/3.x,vSphere 4, and ESXi Servers Collections
- vCenter Server Collections
- Configuring Agent Proxy Virtualization Collections
- Configuring Agent Proxy Machines
- Configuring ESX/vSphere Servers
- Configuring Web Services for ESX/vSphere Server Communication
- Performing an Initial Virtualization Collection
- Exploring Virtualization Collection Results
- Configuring vCenter Server Data Collections
- About the vSphere Client VCM Plug-in
- Further Reading
- Getting Started with VCM Remote
- Getting Started with VCM Patching
- Getting Started with Software Provisioning
- VMware vCenter Configuration Manager Package Studio
- Software Repository for Windows
- Package Manager for Windows
- Overview of Component Relationships
- Installing the Software Provisioning Components
- Using Package Studio to Create Software Packages and Publish to Repositories
- Using VCM Software Provisioning for Windows
- Related Software Provisioning Actions
- Further Reading
- Getting Started with VCM Management Extensions for Assets
- Getting Started with VCM Service Desk Integration
- Getting Started with VCM for Active Directory
- Getting Started with VCM for SMS
- Getting Started with Windows Server Update Services
- Accessing Additional Compliance Content
- Installing and Getting Started with VCM Tools
- Maintaining VCM After Installation
- Troubleshooting Problems with VCM
- Configuring a Collector as an Agent Proxy
- Index

n
PORTNUMBER: Installs the Windows Agent on the port number specified, using HTTP instead of
DCOM. For HTTP installs, where PORTNUMBER is set, you must also specify a certificate file using the
syntax: CERTIFICATEFILE=”x:\[mypath]\[mycert].pem”. For example:
msiexec.exe /qn /i "C:\temp\CMAgent[VersionNumber].msi" PORTNUMBER=2666
CERTIFICATEFILE=”x:\mypath\mycert.pem”
n
INSTALLDIR: Changes the default root directory specification (%SystemRoot%\CMAgent). For
example:
msiexec.exe /qn /i "C:\temp\CMAgent[VersionNumber].msi" INSTALLDIR="C:\VCM"
n
CERTIFICATEFILE: Specifies the Enterprise Certificate. For example:
CERTIFICATEFILE=”x:\[mypath]\[mycert].pem” or CERTIFICATEFILE=”SKIP”
For more information about the command line options and descriptions, click Start | Run | msiexec or
visit http://www.microsoft.com.
You must specify optional parameters using UPPERCASE letters, following the required "/i" parameter.
Quotation marks are necessary only when a path includes spaces. For example, when one or more spaces
exist in the source file location and the INSTALLDIR parameter. The optional parameters can be specified
in any combination and order.
Disabling UAC for Agent Installation
The following steps are required only if you are installing the Agent on a Windows 2008 or Vista machine.
When installing the Agent on Windows 2008 or Vista, you must disable the User Account Control (UAC),
install the Agent, and then re-enable the UAC.
Disabling UAC on One Machine
1. On the target Windows 2008 machine, click Start | Run. The Run dialog box appears.
2. Type msconfig in the Open text box.
3. Click OK. The System Configuration dialog box appears. (This dialog box differs for Windows 2008
R2 machines.)
4. Click the Tools tab.
5. In the Tool Name list, select Disable UAC.
6. Click Launch. A Command window displays the running action. When the command is completed,
close the window.
7. Close the System Configuration dialog box.
Getting Started with VCM
VMware, Inc. 65