
Technical data

VSPEX Configuration Guidelines
VMware Horizon View 5.3 and VMware vSphere for up to 2,000 Virtual
Desktops Enabled by Brocade Network Fabrics, EMC VNX, and EMC Next-
Generation Backup
120
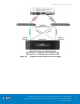
All switches in an Ethernet fabric can be managed as if they
were a single logical chassis. To the rest of the network, the fabric
looks no different from any other Layer 2 switch (Logical Chassis
feature).
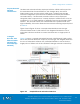
Brocade VDX switches are available in both port side exhaust and port
side intake configurations. Depending upon the hot-aisle, cold-aisle
considerations you should choose the appropriate airflow models for your
deployment. For more information refer to the Brocade VDX 6740
Hardware Reference Manual as provided in Appendix C.
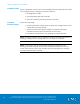
Listed below is the procedure required to deploy the Brocade VDX 6740
switches with VCS Fabric Technology in VSPEX End-User Computing
deployment for up to 2000 Virtual Machines.
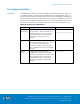
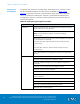
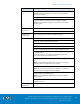
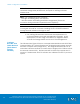
Brocade VDX 6740 Configuration Steps
Brocade VDX Configuration Steps
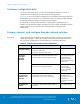
Step 1: Verify and Apply Brocade VDX NOS Licenses
Step 2: Configure Logical Chassis VCS ID and RBridge ID
Step 3: Assign Switch Name
Step 4: Brocade VCS Fabric ISL Port Configuration
Step 5: Create vLAG for ESXi Host
Step 6: vCenter Integration for AMPP
Step 7: Create the vLAG for VNX ports
Step 8: Connecting the VCS Fabric to existing Infrastructure through
Uplinks
Step 9 Configure MTU and Jumbo Frames (for NFS)
Step 10: Enable Flow Control Support
Step 11- Auto QOS for NAS
Refer to Appendix C for related documents.