
User guide

Working with the AppAssure 5 Core | 77
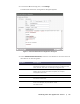
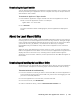
3. In the upper-left corner of the AppAssure Local Mount Utility window, click Add
Core.
4. In the Add Core dialog box, enter the requested credentials described in the
following table.
5. Click Connect.
6. If adding multiple cores, repeat Step 3 through Step 5 as necessary.
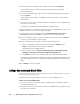
Mounting a Recovery Point Using the Local Mount Utility
Before mounting a recovery point, the local mount utility (LMU) must connect to the
Core on which the recovery point is stored. As described in the procedure “Adding a
Core to the Local Mount Utility” on page 76, the number of cores that can be added to
the LMU is unlimited; however, the application can connect to only one core at a
time. For example, if you mount a recovery point of an agent protected by one core
and then mount a recovery point of an agent protected by a different core, the LMU
automatically disconnects from the first core to establish a connection with the
second core.
Complete the following procedure to mount a recover y point on a remote core using
the LMU.
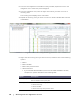
To mount a recovery point using the Local Mount Utility
1. From the machine on which the LMU is installed, launch the LMU by double-
clicking the desktop icon.
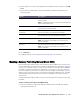
Option Description
Host name The name of the Core from which you want to mount
recovery points.
NOTE: If installing the LMU on a core, the LMU automatically
adds the localhost machine.
Port The port number used to communicate with the Core.
The default port number is 8006.
Use my Windows user
credentials
Select this option if the credentials you use to access the
Core are the same as your Windows credentials.
Use specific credentials Select this option if the credentials you use to access the
Core are different from your Windows credentials.
User name The user name used to access the Core machine.
NOTE: This option is only available if you choose to use
specific credentials.
Password The password used to access the Core machine.
NOTE: This option is only available if you choose to use
specific credentials.