
User guide

Protecting Workstations and Servers | 137
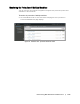
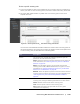
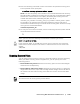
2. In the Mount Recovery Point dialog box, edit the text boxes for mounting a
recovery point as described in the following table.
3. Click Mount to mount the recovery point.
The Active Task dialog box appears.
4. In the Active Task dialog box, click Open Monitor Window to monitor the task for
mounting the selected recovery point, or click Close to dismiss this dialog box.
NOTE: For more information about monitoring AppAssure 5 events, see “Viewing
Events and Alerts” on page 186.
Dismounting Select Recovery Points
Complete the steps in this procedure to dismount select recovery points that are
mounted locally on the Core.
To dismount select recovery points
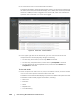
1. Navigate to the AppAssure 5 Core, and then click the Tools tab.
2. From the Tools option, click System Info.
3. Locate and select the mounted display for the recovery point you want to
dismount, and then click Dismount.
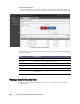
Dismounting All Recovery Points
Complete the steps in this procedure to dismount all recovery points that are
mounted locally on the Core.
To dismount all recovery points
1. Navigate to the AppAssure 5 Core, and then click the Tools tab.
Option Description
Mount Location:
Local Folder
Specify the path used to access the mounted recovery point.
Volume Images Specify the volume images that you want to mount
Mount Type Specify the way to access data for the mounted recovery point:
Mount Read-only
Mount Read-only with previous writes
Mount Writable
Create a Windows share
for this Mount
Optionally, select the check box to specify whether the mounted
recovery point can be shared and then set access rights to it
including the Share name and access groups.