
User`s guide

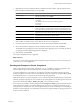
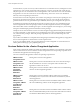
Table Of Contents
- vCenter Chargeback User’s Guide
- Contents
- About This Book
- Introduction to vCenter Chargeback
- Installing vCenter Chargeback
- Hardware Requirements
- Software Requirements
- Prerequisites for vCenter Chargeback
- Download and Extract the vCenter Chargeback Installer
- Install vCenter Chargeback
- Create a vCenter Chargeback Cluster
- Install vCenter Chargeback with an Existing Database Schema
- Upgrading vCenter Chargeback
- Services Related to the vCenter Chargeback Application
- Accessing the vCenter Chargeback Application
- Data Collector
- Uninstall vCenter Chargeback
- Configuring Administration Settings
- Authenticating and Managing Users, Roles, and Permissions
- Managing Chargeback Hierarchies
- Creating a Chargeback Hierarchy
- Managing a Chargeback Hierarchy
- View a Chargeback Hierarchy
- Add a vCenter Chargeback Entity
- Add a vCenter Server Entity
- Rename a Chargeback Hierarchy or a Chargeback Entity
- Delete an Entity from the Hierarchy
- Delete a Chargeback Hierarchy
- Assign Attributes
- Move Entities Within a Hierarchy
- Allocate Computing Resource Units for a Chargeback Entity
- Share Virtual Machine Cost
- Backdate a Chargeback Hierarchy
- View Properties of a vCenter Server Entity
- Managing and Configuring vCenter Chargeback Cost Elements
- Generating Reports
- Monitoring System Health
- Administration Utilities
- Troubleshooting vCenter Chargeback
- Troubleshooting Utility
- Troubleshooting Issues in vCenter Chargeback
- Changed Timezone Setting Is Not Reflected
- Changes to Chargeback Hierarchy Are Not Reflected in the Concurrent User-Sessions
- Changes to the vCenter Server Hierarchy Are Not Reflected in vCenter Chargeback
- Installer Throws the SQL Driver Not Found Error
- LDAP Server Configuration Fails
- Non-English Characters Are Not Correctly Stored in the vCenter Chargeback Database
- Report Does Not Display the Disk Read and Disk Write Information
- Report Does Not Display the Memory Usage Value and the Corresponding Cost
- Report Does Not Display the Network Transmitted and Network Received Information
- Service Temporarily Unavailable Error
- Status of Failed Data Collector Is Not Reflected Immediately on the System Health Tab
- Storage Synchronization Job Fails
- Text and Messages on the vCenter Chargeback User Interface Are Not Correctly Displayed
- Unable to Access the vCenter Chargeback Application
- Unable to Add an LDAP Server
- Unable to Add vCenter Server in vCenter Chargeback
- Unable to Change the Password for the vCenter Chargeback Keystore
- Unable to Configure Another VMware Cloud Director Setup with vCenter Chargeback
- Unable to Connect to the vCenter Chargeback Database
- Unable to Connect to the vCenter Server Database
- Unable to Email Report
- Unable to Fetch the Primary Group of a LDAP User
- Unable to Use Custom SSL Certificates
- Unable to View the vCenter Chargeback Plug-In in the VI Client
- Index

7 (Optional) If you chose to install the VMware Cloud Director Data Collector, enter the VMware Cloud
Director database-related information, and click Next.
Option Description
Database Type
The type of database used to create the VMware Cloud Director database.
The only permissible value is ORACLE.
Database URL
The IP address of the system on which the VMware Cloud Director database
is installed.
The database URL can be in any of the following formats:
IP Address
Host Name
Database Port
(Optional) The port on which the database service is listening for requests.
If the port number is not specified, the installer uses the default port. You
must specify the TNS listener port if you are not using the default port 1521.
Database Name
Name of the database in which VMware Cloud Director stores the
application-specific data. This must be the service name and not the SID.
Database Username
The name of the database user. The database user must have privileges to
read the VMware Cloud Director database objects.
Database Password
Password for the user name that you have provided.
If the installer successfully connects to the database, the next screen is displayed.
8 Provide the password for the administrative account of the existing installation and click Next.
9 Review the information displayed on the Pre-Installation Summary screen, and click Install.
The installer starts upgrading the various components. If the upgrade process is successful, the URL for
accessing the vCenter Chargeback application is displayed.
10 Note the URL, and click Done.
The vCenter Chargeback instance is upgraded.
What to do next
You can now connect to the upgraded vCenter Chargeback setup. Ensure that you clear your Web browser
cache before you access the application.
Post-Upgrade Changes in vCenter Chargeback
When you upgrade an existing vCenter Chargeback 1.0 or 1.0.1 installation to vCenter Chargeback 1.5, the
installer makes changes to the user-defined resources created in the existing installation.
In vCenter Chargeback 1.5, user names are case-insensitive. Therefore, the installer renames users in the
existing setup that have the same name but with different casing. The installer uses the prefix CBM_150_USER_
for the duplicate names. You can rename users with such prefix appropriately.
Unlike earlier release, in vCenter Chargeback 1.5 a user cannot be assigned individual privileges on the entities.
Therefore, privileges assigned to the user on entities are grouped together into roles after upgrade. These roles
have names with the prefix CBM_150_DEFAULT_ROLE_NAME_. You can rename such roles.
If a vCenter Server is added to vCenter Chargeback with the Register as Plugin option selected, then the user
whose authentication details are used when adding the vCenter Server is automatically added to vCenter
Chargeback. Also, vCenter Server users who have generated reports on this vCenter Server are automatically
added to vCenter Chargeback. You can delete the users that are not required and also assign appropriate roles
on the ones that are required.
Chapter 2 Installing vCenter Chargeback
VMware, Inc. 27