
User`s guide


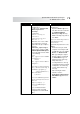
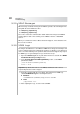
Table Of Contents
- Table of Contents
- Introducing Quest NetVault Backup Plug-in for VMware
- Installing the Plug-in
- Configuring the Plug-in
- Defining a Backup Strategy
- Performing Image-Level Backups
- Performing File-Level Backups
- Restoring Image-Level Backups
- Restoring File-Level Backups
- Troubleshooting

Chapter 8
Restoring File-Level Backups
72
Overwrite Newer Files – By default, the plug-in will overwrite the existing
files on the restore destination with the backed up version in the saveset.
If you do not want to overwrite the files that are available on the restore
destination, clear the check box.
Reset File Timestamps – By default, the plug-in will reset the timestamps for
the restored files to what is recorded in the backup saveset.
If you want to restore the files with current timestamp, clear the check box.
Reset Directory Timestamps – By default, the directory time stamps will be
set to the time of the restore job.
To reset the timestamp to what is recorded in the saveset, select this check
box. You must also select the Reset File Timestamps check box to reset the
timestamps for the restored directories to what is recorded in the backup.
Restore Files Modified During Backup – To restore files that were in a
modified state during a backup, select this check box.
Path to Restore Log – To generate a restore log file, enter the file name. The
log file will provide a list of all files that are selected for a restore. The files
that are restored successfully will be marked with an “o” while the others will
be marked with an “x”. If you specify an existing filename, the plug-in will
overwrite the file. The restore log uses the CSV file format, and includes
details such as file size, date modified, and file type.
Exclusion List Path – To use an exclusion list, enter the full path to the file.
For more information about Exclusion Lists, refer to Quest NetVault Backup
Plug-in for FileSystem User’s Guide.
8.2.4 Finalizing and Submitting a Job
To finalize and submit a restore job, follow these steps:
1. Click the Source, Target Client, Schedule, and Advanced Options tabs,
configure the required options. These options are common to all NetVault
Backup Plug-ins. For more information about these options, refer to the
Quest NetVault Backup Administrator’s Guide.
2. In Job Title, enter a title for the job. Specify a detailed title that allows you to
easily identify the job for monitoring its progress.
3. Click Submit on the toolbar. Alternatively, on the Accept menu, click Submit
Restore.
You can monitor the job progress from the NVBU Jobs window, and view the
logs from the NVBU Logs window. For more information about these
functions, refer to the Quest NetVault Backup Administrator’s Guide.