
User`s guide


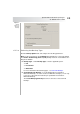
Table Of Contents
- Table of Contents
- Introducing Quest NetVault Backup Plug-in for VMware
- Installing the Plug-in
- Configuring the Plug-in
- Defining a Backup Strategy
- Performing Image-Level Backups
- Performing File-Level Backups
- Restoring Image-Level Backups
- Restoring File-Level Backups
- Troubleshooting

Quest NetVault Backup Plug-in
for VMware User’s Guide
41
and write to the same device. This can cause significant increase in the
overall backup time.
The load of running multiple processes on the NVBU Client can have a
negative impact on performance.
The load of backing up multiple virtual machines from the same datastore
can increase the I/O activity on the datatsore.
The load of backing up multiple virtual machine that are managed by the
same ESX Server can increase the load on the host if you are using the
LAN Transport mode (nbd/nbdssl) for data transfer.
Note: Backup jobs created with a pre-2.5 version of the plug-in will continue to be
backed up sequentially.
5.1.3 Finalizing and Submitting a Job
To finalize and submit a backup job, follow these steps:
1. Click the Schedule, Target, and Advanced Options tabs, and configure the
required options. These options are common to all NetVault Backup Plug-ins.
For more information about options, refer to the Quest NetVault Backup
Administrator’s Guide.
2. In Job Title, enter a title for the job. Specify a detailed title that allows you to
easily identify the job for monitoring its progress or restoring data.
3. Click Submit on the toolbar. Alternatively, on the Accept menu, click Submit
Backup.
You can monitor the job progress from the NVBU Jobs window, and view the
logs from the NVBU Logs window. For more information about these
functions, refer to the Quest NetVault Backup Administrator’s Guide.
5.1.3.a Monitoring Job Progress
To monitor progress of a job, follow these steps:
1. Open the NVBU Jobs window. To open this window:
Click Job Management on the toolbar or Large Buttons panel.
Alternatively, on the Operations menu, click Job Management.
2. On the Status tab, double-click an active job, or right-click and select
Monitor Job.
3. The Job Monitor window displays the following information:
Job Information
Job Title – The title assigned to the job
Job ID – The number assigned to the job
Instance – The current instance of the job