
User guide
The ViPR root account has all privileges that are needed for initial configuration; it is
also the same as the root user on the Controller VMs. The system accounts
(sysmonitor, svcuser, and proxyuser) are used internally by ViPR.
3. Select a transport option for ConnectEMC (FTPS (default), SMTP, or none) and enter an
email address (user@domain) for the ConnectEMC Service notifications.
If you select the SMTP transport option (required by the ViPR approval notification
feature), you must specify an SMTP server under SMTP settings in the next step.
"None" disables ConnectEMC on the ViPR virtual appliance.
4. Specify an SMTP server and port for notification emails, encryption type (TLS/SSL or
not), a From address, and authentication type (login, plain, CRAM-MD5, or none).
Optionally test the settings and supply a valid addressee. The test email will be from
the From Address you specified and will have a subject of "Mail Settings Test".
If TLS/SSL encryption used, the SMTP server must have a valid CA certificate.
5. Finish.
ViPR services restart (this can take several minutes) and the UI opens to the License
page.
6. Browse to and select the license file that was downloaded from the EMC license
management web site and Upload License.
Results
At the end of this procedure you are logged in to the UI as root user, at Admin > System >
Dashboard.
Authentication providers
User authentication is done through an authentication provider added to ViPR.
Except for the special built-in administrative users (root, sysmonitor, svcuser, and
proxyuser) there are no local users in ViPR. Users who can log in, and who are assigned
roles or ACLs, must be found through an authentication provider added to ViPR.
Adding an authentication provider
You need to add at least one authentication provider to ViPR in order to perform
operations using accounts other than the built-in administrative accounts.
Before you begin
This operation requires the Security Administrator role in ViPR. (The root user has this
role.)
You need access to the authentication provider information listed in Authentication
provider settings on page 41. Note especially the requirements for the Manager DN
user.
Procedure
1. Select Admin > Security > Authentication Providers
2. Add.
3. Enter values for the attributes. Refer to Authentication provider settings on page 41.
4. Save.
5. To verify the configuration, add a user from the authentication provider at Admin >
Security > Role Assignments, then try to log in as the new user.
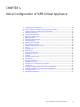
Initial Configuration of ViPR Virtual Appliance
40 EMC ViPR 1.1.0 Installation and Configuration Guide