
User guide


# ViPR Host fully qualified domain name
ViPR_HOSTNAME=example.mydomain.com
# ViPR Port Number
ViPR_PORT=4443
:wq
8. Run the source command to set the path environment variable for the ViPR
executable.
source ./viprcli.profile
9. From the command prompt run: viprcli -h.
If the help for viprcli is displayed, then the installation is successful.
Installing the ViPR CLI on Windows
You can download and install the ViPR command line interface executable directly from
the ViPR appliance onto a supported Windows host.
Before you begin
u
You need access to the ViPR appliance host.
u
You need to be logged in to the Windows host as a user with administrator privileges.
Procedure
1. Log in to the Windows server as <admin user>.
2. Point your browser to http://<FQDN>:4443/cli
Note
For sites with self-signed certificates or where issues are detected, optionally use
http://<ViPR_virtual_IP>:9998/cli only when you are inside a trusted
network. <ViPR_virtual_IP> is the ViPR public virtual IP address, also known as the
network vip. The CLI installation bundle is downloaded to the current directory.
3. Save the CLI installer file ViPR-cli.tar from the path.
4. Extract the ViPR-cli.tar file to a folder of your choice. For example, c:\opt
\vipr\cli.
5. Navigate to the extract folder c:\opt\vipr\cli\Linux\.
6. From the Linux folder, extract the viprcli.tar zip file.
Note
Though the folder name is Linux, it contains the Windows CLI files.
7. Copy the extracted folders and files to the user-defined path before proceeding.
For example, c:\opt\vipr\cli.
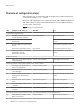
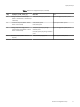
8. Set the following environment variables:
Deployment Steps
24 EMC ViPR 1.1.0 Installation and Configuration Guide