
Specifications

Installing on RHEL or CentOS
7
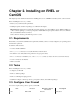
2.10.3. Installing and initializing ZenUp
This release of Zenoss Core includes a recommended patch set (RPS) to fix issues uncovered since it was first made
available. To install and manage patch sets, Zenoss provides the Zenoss Core ZenUp patch management tool, which
must be installed and initialized before you start Zenoss Core.
Follow these steps to initialize ZenUp for this release of Zenoss Core. For more information about ZenUp, refer to
Zenoss Core ZenUp Installation and Administration.
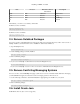
1. Download the following items from the https://support.zenoss.com site.
• The ZenUp RPM file.
• The "pristine" file for this release of Zenoss Core.
• The current RPS (.zup) file.
2. Log in as root, or as a user with superuser privileges.
3. Install ZenUp with one of the following commands:
RHEL/CentOS 5: yum --nogpgcheck localinstall zenup-version.el5.x86_64.rpm
RHEL/CentOS 6: yum --nogpgcheck localinstall zenup-version.el6.x86_64.rpm
4. Log in as user zenoss.
5. Register Zenoss Core with ZenUp by specifying the "pristine" file.
zenup init zenoss_core-4.2.5-XXXX-elX-pristine.tgz $ZENHOME
The zenup command displays messages as it works.
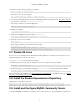
6. Verify the result.
zenup status
ZenUp displays information similar to the following example.
Product: zenoss-core-4.2.5 (id = zenoss-core-4.2.5)
Home: /opt/zenoss
Revision: 0
Updated On: timestamp
2.10.4. Start Zenoss Core and install the RPS
1. Log in as root, and start Zenoss Core.
service zenoss start
2. Stop Zenoss Core.
service zenoss stop
3. Log in as zenoss, and install the latest recommended patch set (RPS).
zenup install zenoss_core-version.zup
4. Start Zenoss Core.
zenoss start