Zenoss Core Installation and Upgrade Release 4.2.5 Zenoss, Inc. www.zenoss.
Zenoss Core Installation and Upgrade Copyright © 2014 Zenoss, Inc., 11305 Four Points Drive, Bldg 1 - Suite 300, Austin, Texas 78726, U.S.A. All rights reserved. Zenoss and the Zenoss logo are trademarks or registered trademarks of Zenoss, Inc. in the United States and other countries. All other trademarks, logos, and service marks are the property of Zenoss or other third parties. Use of these marks is prohibited without the express written consent of Zenoss, Inc. or the third-party owner.
1. Installation Considerations ................................................................................................................ 1 1.1. Which Installation Should You Choose? ................................................................................... 1 1.2. Hardware Requirements ......................................................................................................... 1 1.2.1. Deployments Up to 1000 Devices ................................................................
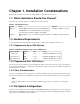
Chapter 1. Installation Considerations Read the following sections to learn more about installation requirements for Zenoss Core. 1.1. Which Installation Should You Choose? Zenoss Core provides these categories of artifacts for a fresh deployment: Table 1.1. Installation Types Artifact Notes Chapters RPM (*.rpm) Standard RPM installation. Requires a Red Hat® Enterprise Linux® (RHEL) or Community ENTerprise Operating System (CentOS)-based Linux installation, and MySQL.
Installation Considerations If possible, create a separate, non-journaled partition for $ZENHOME/perf (for RPM, /opt/zenoss/perf). For more information about file system performance tuning and increasing RRD performance, browse to: http://oss.oetiker.ch/rrdtool-trac/wiki/TuningRRD 1.4. Client and browser support Zenoss Core supports the client operating systems and web browser combinations shown in the following table.
Chapter 2. Installing on RHEL or CentOS This chapter provides detailed instructions for installing Zenoss Core on RHEL or CentOS systems, versions 5 and 6. Before installing Zenoss Core, you must: • Ensure your system meets all requirements. • Install prerequisite software and packages, as outlined in this chapter. Important! This chapter may not define all prerequisite packages for your installation options.
Installing on RHEL or CentOS Port Protocol Direction to Zenoss Core Server Description 8080 TCP Outbound Web interface 514 UDP Inbound syslog 162 UDP Inbound SNMP Traps 25 TCP Inbound zenmail Alternatively, you can choose to disable your firewall. For IPv4, use these commands: service iptables stop chkconfig iptables off For IPv6, use these commands: service ip6tables stop chkconfig ip6tables off 2.4. Remove Outdated Packages Zenoss Core requires at least MySQL 5.5.
Installing on RHEL or CentOS 1. Determine whether other Java pacakges are installed. rpm -qa | egrep -i '(jdk|jre|java)' If necessary, remove the other packages. yum -y remove $(rpm -qa | egrep -i '(jdk|jre|java)') 2. Download the self-installing binary of Oracle Java SE Runtime Environment 6u45 from the Java SE 6 Downloads page. The file to download is jre-6u45-linux-x64-rpm.bin. 3. Add execute permission to the self-installing binary. chmod +x ./jre-6u45-linux-x64-rpm.bin 4. Install the Oracle JRE. .
Installing on RHEL or CentOS Follow these steps to download, install, and configure MySQL Community Server: 1. Download the following Red Hat/Oracle Enterprise Linux (x86, 64-bit) RPM Packages from mysql.com/: • Client Utilities • MySQL Server • Shared components 2.
Installing on RHEL or CentOS 2.10.3. Installing and initializing ZenUp This release of Zenoss Core includes a recommended patch set (RPS) to fix issues uncovered since it was first made available. To install and manage patch sets, Zenoss provides the Zenoss Core ZenUp patch management tool, which must be installed and initialized before you start Zenoss Core. Follow these steps to initialize ZenUp for this release of Zenoss Core.
Installing on RHEL or CentOS 2.11. Getting Started After installation, use your Web browser to browse to the server where Zenoss Core is installed (http:// xxx.xxx.xxx.xxx:8080). Note If you cannot successfully browse to your Zenoss Core installation, then you may need to add an entry to your hosts file for the fully qualified domain name (FQDN) of your installation.
Installing on RHEL or CentOS Figure 2.2. Setup Wizard: Step 1 2.11.1. Set the Administrative Password and Create a User Follow these steps to select a password for the admin account and create your user account. 1. In the Set admin password area, enter and confirm a new admin password. You must enter a password value to continue. Note The admin account has extended privileges, and its use should be limited. Be sure to record the admin password and store it securely. 2.
Installing on RHEL or CentOS Figure 2.3. Setup Wizard: Step 2 (Manually Find Devices) 2.11.2. Add Devices You can add devices manually, or give Zenoss Core network or IP address range information so it can discover your devices. 2.11.2.1. Adding Devices Manually Follow these steps to manually add devices to the system. For each device you want to add: 1. Enter a fully qualified domain name or IP address 2. In the Details area, select a device type from the list.
Installing on RHEL or CentOS 1. Select the Autodiscover devices option. Figure 2.4. Setup Wizard: Step 2 (Autodiscover Devices) 2. For each network or IP range in which you want Zenoss Core to discover devices, enter an address or range. For example, you might enter a network address in CIDR notation: 10.175.211.0/24 or as a range of IP addresses: 10.175.211.1-50 3. If you want to enter multiple addresses or ranges, click +. For each network, you must enter a netmask or IP range. 4.
Installing on RHEL or CentOS Note You can bypass device discovery through the wizard. Click Finish or Skip to Dashboard to go directly to the Zenoss Core Dashboard. Later, you can discover devices by following the steps outlined in Zenoss Core Administration.
Chapter 3. Installing the Virtual Appliance 3.1. System Requirements The system requirements for running the Virtual Appliance are largely the requirements for running the VMware Player. A typical host system used for a VMware installation should meet these specifications: • Dual core system • Minimum RAM - 3GB • Available disk space - 20GB 3.2. Prerequisite Tasks Install the VMware Player. For downloads and installation instructions, go to: http://www.vmware.com/products/player/ 3.3.
Chapter 4. Performance Tuning After installing Zenoss, you can optimize its performance by: • Packing the ZODB • Editing archived event data storage settings • Setting memory caching values • Tuning MySQL • Increasing maximum file descriptors Note Performance tuning procedures assume an RPM installation. If you are using an alternate installation method, details (such as path information) likely will differ. 4.1. Packing the ZODB The Zope Object Database (ZODB) keeps records of all transactions performed.
Performance Tuning 4.4. Tuning MySQL Zenoss Core performance is directly impacted by the performance of the MySQL database that supports the event system. MySQL configuration parameters are located in the/etc/my.cnf file. Zenoss recommends that you run the MySQLTuner Perl script periodically to analyze your MySQL performance. Based on the statistics it gathers, the script provides optimization recommendations. To download the MySQLTuner script, enter this command: wget http://mysqltuner.com/mysqltuner.
Chapter 5. Upgrading This chapter provides instructions for upgrading Zenoss Core installations to version 4.2.5. You may upgrade Zenoss Core 3.2.1, 4.2.0, 4.2.3, or 4.2.4 to version 4.2.5. Version 4.2.5 requires a 64-bit platform. Sections are presented in order, and some are optional. Note Version 3.2.1 upgrades only: Zenoss Core 4.2.x includes a fully redesigned event processing and storage system. Currently, upgrades do not migrate events from version 3.2.1.
Upgrading 8. Upgrade Java. a. Download the self-installing RPM of Oracle Java SE Runtime Environment 6u45 from the Java SE 6 Downloads page. The file to download is jre-6u45-linux-x64-rpm.bin. b. Make the RPM installer executable, install the JRE, and verify the installed version. chmod +x ./jre-6u45-linux-x64-rpm.bin ./jre-6u45-linux-x64-rpm.bin java -version c. Remove the older version of Java. yum -y remove jre-1.6.0_31-fcs.x86_64 5.2.
Upgrading chkconfig --add mysql chkconfig --level 2345 mysql on service mysql restart mysqladmin -u root password '' mysqladmin -u root -h localhost password '' 9. If you are upgrading version 3.2.1, log in to MySQL Server and drop the events database. mysql -u root mysql> drop database events; mysql> quit 5.3. Upgrading Zenoss Core Follow these steps to upgrade the Zenoss Core package. 1. Log in as root, or as a user with superuser privileges. 2. Download the Zenoss Core package from community.zenoss.
Chapter 6. Removing an Instance 6.1. Before You Begin Before removing your Zenoss Core instance, you may want to save data files. For information about saving your files, refer to the backup and archive instructions in Zenoss Core Administration. Use the instructions in the following section to remove a Zenoss Core instance. 6.2. Removing Zenoss Core Use these instructions to remove an RPM installation and all of its components from your system. 1. Enter the following command: yum erase zenoss 2.