
6.2
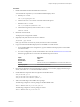


Table Of Contents
- Setting Up Horizon 6 for Linux Desktops
- Contents
- Setting Up Horizon 6 for Linux Desktops
- Installing and Configuring Horizon 6 for Linux Desktops
- Features of a Horizon 6 for Linux Desktop
- Overview of Configuration Steps for Horizon 6 for Linux Desktops
- System Requirements for Horizon 6 for Linux
- Create a Virtual Machine and Install Linux
- Prepare a Linux Guest Operating System for Remote Desktop Deployment
- Install View Agent on a Linux Virtual Machine
- Create a Desktop Pool That Contains Linux Virtual Machines
- Upgrade View Agent on a Linux Virtual Machine
- Configuring Linux Machines for 3D Graphics
- Bulk Deployment of Horizon 6 for Linux Desktops
- Overview of Bulk Deployment of Linux Desktops
- Create a Virtual Machine Template for Cloning Linux Desktop Machines
- Input File for the Sample PowerCLI Scripts to Deploy Linux Desktops
- Sample PowerCLI Script to Clone Linux Desktop Machines
- Sample PowerCLI Script to Install View Agent on Linux Desktops
- Sample PowerCLI Script to Upgrade View Agent on Linux Desktop Machines
- Sample PowerCLI Script to Perform Operations on Linux Desktop Machines
- Sample PowerShell Script to Delete Machines from the Connection Server LDAP Database
- Administering Horizon 6 for Linux Desktops
- Uninstalling and Reinstalling Horizon 6 for Linux Machines
- Configure Lossless PNG Images on Linux Desktops
- Suppress the vSphere Console Display of a Linux Desktop
- Configure a Left-handed Mouse on Ubuntu Desktops
- How to Perform Power Operations on Linux Desktops from vSphere
- Gather Information About Horizon 6 for Linux Software
- Troubleshooting Horizon 6 for Linux
- Collect Diagnostic Information for a Horizon 6 for Linux Machine
- Troubleshooting View Agent Registration Failure for a Linux Machine
- Troubleshooting an Unreachable View Agent on a Linux Machine
- Troubleshooting View Agent on a Linux Machine That Is Not Responding
- Configuring the Linux Firewall to Allow Incoming TCP Connections
- Index

7 Install the NVIDIA VIB.
For example:
# esxcli system maintenanceMode set --enable true
# esxcli software acceptance set --level=CommunitySupported
# esxcli software vib install --no-sig-check -v /path-to-vib/NVIDIA-VIB-name.vib
# esxcli system maintenanceMode set --enable false
8 Reboot or update the ESXi host.
3D Type Description
NVIDIA GRID vGPU
For an installed ESXi host, reboot the host.
For a stateless ESXI host, take the following steps to update the host.
(These steps also work on an installed host.)
Update vmkdevmgr:
# kill -HUP $(cat /var/run/vmware/vmkdevmgr.pid)
Wait for the update to complete:
# localcli --plugin-dir /usr/lib/vmware/esxcli/int
deviceInternal bind
This is a new requirement with the NVIDIA 352.* host
driver:
# /etc/init.d/nvidia-vgpu start
Restart xorg, which is used for GPU assignment:
# /etc/init.d/xorg start
vSGA
a
Restart xorg, which is used for GPU assignment:
# /etc/init.d/xorg start
b Reboot the ESXi host.
9 Verify that the xorg service is running after the host is restarted.
Configure a Shared PCI Device for vGPU on the Linux Virtual Machine
To configure a RHEL 6.6 virtual machine to use NVIDIA GRID vGPU, you must configure a shared PCI
device for the virtual machine.
Prerequisites
n
Verify that the Linux virtual machine is prepared for use as a desktop. See “Create a Virtual Machine
and Install Linux,” on page 12 and “Prepare a Linux Guest Operating System for Remote Desktop
Deployment,” on page 13.
n
Verify that View Agent is not installed on the Linux virtual machine.
n
Verify that the NVIDIA VIB is installed on the ESXi host. See “Install the VIB for the NVIDIA Graphics
Card on the ESXi Host,” on page 20.
n
Familiarize yourself with the virtual GPU types that are available with NVIDIA GRID vGPU, which
you select with the GPU Profile setting. The virtual GPU types provide varying capabilities on the
physical GPUs installed on the ESXi host. See “NVIDIA Virtual GPU Types,” on page 22.
Procedure
1 Power off the virtual machine. and log in to the RHEL 6.6 guest operating system as a local user
configured with sudo rights.
2 In vSphere Web Client, select the virtual machine and, under the VM Hardware tab, click Edit Settings.
3 In the New device menu, select Shared PCI Device.
Chapter 2 Configuring Linux Machines for 3D Graphics
VMware, Inc. 21