
Installation and Setup Guide
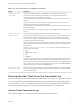

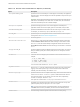

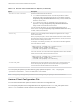
Table Of Contents
- VMware Horizon Client for Windows Installation and Setup Guide
- Contents
- VMware Horizon Client for Windows Installation and Setup Guide
- System Requirements and Setup for Windows-Based Clients
- System Requirements for Windows Client Systems
- System Requirements for Horizon Client Features
- Smart Card Authentication Requirements
- System Requirements for Real-Time Audio-Video
- System Requirements for Scanner Redirection
- System Requirements for Serial Port Redirection
- System Requirements for Multimedia Redirection (MMR)
- System Requirements for Flash Redirection
- Requirements for Using Flash URL Redirection
- Requirements for Using URL Content Redirection
- System Requirements for HTML5 Multimedia Redirection
- Requirements for the Session Collaboration Feature
- Requirements for Using Fingerprint Scanner Redirection
- Requirements for Using Microsoft Lync with Horizon Client
- Requirements for Using Skype for Business with Horizon Client
- Supported Desktop Operating Systems
- Preparing Connection Server for Horizon Client
- Clearing the Last User Name Used to Log In to a Server
- Configure VMware Blast Options
- Using Internet Explorer Proxy Settings
- Horizon Client Data Collected by VMware
- Installing Horizon Client for Windows
- Configuring Horizon Client for End Users
- Common Configuration Settings
- Using URIs to Configure Horizon Client
- Setting the Certificate Checking Mode in Horizon Client
- Configuring Advanced TLS/SSL Options
- Configure Published Application Reconnection Behavior
- Using the Group Policy Template to Configure VMware Horizon Client for Windows
- Running Horizon Client From the Command Line
- Using the Windows Registry to Configure Horizon Client
- Managing Remote Desktop and Published Application Connections
- Connect to a Remote Desktop or Published Application
- Use Unauthenticated Access to Connect to Published Applications
- Tips for Using the Desktop and Application Selector
- Share Access to Local Folders and Drives with Client Drive Redirection
- Hide the VMware Horizon Client Window
- Reconnecting to a Desktop or Published Application
- Create a Desktop or Application Shortcut on the Client Desktop or Start Menu
- Using Start Menu Shortcuts That the Server Creates
- Switch Remote Desktops or Published Applications
- Log Off or Disconnect
- Working in a Remote Desktop or Application
- Feature Support Matrix for Windows Clients
- Internationalization
- Enabling Support for Onscreen Keyboards
- Resizing the Remote Desktop Window
- Monitors and Screen Resolution
- Use USB Redirection to Connect USB Devices
- Using the Real-Time Audio-Video Feature for Webcams and Microphones
- Using the Session Collaboration Feature
- Copying and Pasting Text and Images
- Using Published Applications
- Printing from a Remote Desktop or Published Application
- Control Adobe Flash Display
- Clicking URL Links That Open Outside of Horizon Client
- Using the Relative Mouse Feature for CAD and 3D Applications
- Using Scanners
- Using Serial Port Redirection
- Keyboard Shortcuts
- Troubleshooting Horizon Client

Table 3‑10. PCoIP Client Session Variables (Continued)
Setting Description
Configure the PCoIP
session MTU
Specifies the Maximum Transmission Unit (MTU) size for UDP packets for a PCoIP session.
The MTU size includes IP and UDP packet headers. TCP uses the standard MTU discovery
mechanism to set MTU and is not affected by this setting.
The maximum MTU size is 1500 bytes. The minimum MTU size is 500 bytes. The default value is
1300 bytes.
Typically, you do not have to change the MTU size. Change this value if you have an unusual
network setup that causes PCoIP packet fragmentation.
This setting applies to the agent and the client. If the two endpoints have different MTU size settings,
the lowest size is used.
If this setting is disabled or not configured, the client uses the default value in the negotiation with
the agent.
Configure the PCoIP
transport header
Configures the PCoIP transport header and sets the transport session priority.
The PCoIP transport header is a 32-bit header that is added to all PCoIP UDP packets (only if the
transport header is enabled and supported by both sides). The PCoIP transport header allows
network devices to make better prioritization/QoS decisions when dealing with network congestion.
The transport header is enabled by default.
The transport session priority determines the PCoIP session priority reported in the PCoIP transport
header. Network devices make better prioritization/QoS decisions based on the specified transport
session priority.
When the Configure the PCoIP transport header setting is enabled, the following transport
session priorities are available:
n
High
n
Medium (default value)
n
Low
n
Undefined
The transport session priority value is negotiated by the PCoIP agent and client. If the PCoIP agent
specifies a transport session priority value, the session uses the agent-specified session priority. If
only the client has specified a transport session priority, the session uses the client-specified session
priority. If neither agent nor client has specified a transport session priority, or Undefined Priority is
specified, the session uses the default value, Medium priority.
Enable/disable audio
in the PCoIP session
Determines whether audio is enabled in PCoIP sessions. Both endpoints must have audio enabled.
When this setting is enabled, PCoIP audio is allowed. When it is disabled, PCoIP audio is disabled.
Audio is enabled by default.
Running Horizon Client From the Command Line
You can run Horizon Client for Windows from the command line or from scripts. You might want to do this
if you are implementing a kiosk-based application that grants end users access to desktop applications.
You use the vmware-view.exe command to run the Horizon Client for Windows from the command line.
The command includes options that you can specify to change the behavior of Horizon Client.
Horizon Client Command Usage
The syntax of the vmware-view command controls the operation of Horizon Client.
VMware Horizon Client for Windows Installation and Setup Guide
VMware, Inc. 71