
User manual
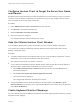
Table Of Contents
- VMware Horizon Client for Mac Installation and Setup Guide
- Contents
- VMware Horizon Client for Mac Installation and Setup Guide
- Setup and Installation
- System Requirements for Mac Clients
- System Requirements for Real-Time Audio-Video
- Smart Card Authentication Requirements
- Touch ID Authentication Requirements
- Requirements for Using URL Content Redirection
- Requirements for Using Skype for Business with Horizon Client
- Requirements for the Session Collaboration Feature
- Supported Desktop Operating Systems
- Preparing Connection Server for Horizon Client
- Install Horizon Client on Mac
- Upgrade Horizon Client Online
- Add Horizon Client to the Dock
- Setting the Certificate Checking Mode in Horizon Client
- Configure Advanced TLS/SSL Options
- Configuring Log File Collection Values
- Configure VMware Blast Options
- Horizon Client Data Collected by VMware
- Using URIs to Configure Horizon Client
- Managing Remote Desktop and Published Application Connections
- Configure Horizon Client to Select a Smart Card Certificate
- Connect to a Remote Desktop or Application
- Share Access to Local Folders and Drives with Client Drive Redirection
- Clicking URL Links That Open Outside of Horizon Client
- Open a Recent Remote Desktop or Application
- Using a Touch Bar with Server, Desktop, and Application Connections
- Connecting to a Server When Horizon Client Starts
- Configure Horizon Client to Forget the Server User Name and Domain
- Hide the VMware Horizon Client Window
- Create Keyboard Shortcut Mappings
- Modify the Horizon Client Mouse Shortcut Mappings
- Modify the Horizon Client Shortcuts for Windows Actions
- Searching for Desktops or Applications
- Select a Favorite Remote Desktop or Application
- Switch Remote Desktops or Published Applications
- Log Off or Disconnect
- Autoconnect to a Remote Desktop
- Configure Reconnect Behavior for Remote Applications
- Removing a Server Shortcut From the Home Window
- Reordering Shortcuts
- Using Drag and Drop with Shortcuts and URIs
- Using a Microsoft Windows Desktop or Application on a Mac
- Feature Support Matrix for Mac
- Internationalization
- Monitors and Screen Resolution
- Using Exclusive Mode
- Use USB Redirection to Connect USB Devices
- Using the Real-Time Audio-Video Feature for Webcams and Microphones
- Using the Session Collaboration Feature
- Copying and Pasting Text and Images
- Dragging and Dropping Text and Images
- Using Published Applications
- Saving Documents in a Published Application
- Using a Touch Bar with Remote Desktops and Applications
- Printing from a Remote Desktop or Published Application
- PCoIP Client-Side Image Cache
- Troubleshooting Horizon Client

Option Action
Allow remote desktops and
applications access to files in your
home directory
Select the Allow access to home-directory check box.
Share USB storage devices with
remote desktops and applications
Select the Allow access to removable storage check box. The client drive
redirection feature automatically shares all USB storage devices inserted in your
client system and all FireWire and Thunderbolt-connected external drives. You do
not need to select a specific device to share.
Note USB storage devices already connected to a remote desktop or application
with the USB redirection feature are not shared.
If this check box is deselected, you can use the USB redirection feature to
connect USB storage devices to remote desktops and applications.
Do not show the Sharing dialog box
when you connect to a remote desktop
or application
Select the Do not show dialog when connecting to a desktop or application
check box.
If this check box is deselected, the Sharing dialog box appears the first time you
connect to a desktop or application after you connect to a server. For example, if
you log in to a server and connect to a desktop, you see the Sharing dialog box. If
you then connect to another desktop or application, you do not see the dialog box
again. To see the dialog box again, you must disconnect from the server and then
log in again.
3 Configure settings for published applications.
a Click the Settings button (gear icon) in the upper right corner of the desktop and application
selection window and select Applications in the left pane.
b Select Open local files in hosted applications to turn on the ability to open local files with
published applications from the local file system.
c Select Run hosted applications from your local Applications folder to turn on the ability to
run published applications from the Applications folder on the client system.
What to do next
Verify that you can see the shared folders from within the remote desktop or application:
n
From within a Windows remote desktop, open File Explorer and look in the This PC folder, or open
Windows Explorer and look in the Computer folder, depending on the Windows operating system
version.
n
From within a published application, if applicable, select File > Open or File > Save As and navigate
to the folder or drive.
The folders and drives that you selected for sharing might use one or more of the following naming
conventions:
n
name on MACHINE-NAME. For example, jsmith on JSMITH-W03.
n
N on MACHINE-NAME. For example, Z on JSMITH-W03.
n
name (N:). For example, jsmith (Z:).
VMware Horizon Client for Mac Installation and Setup Guide
VMware, Inc. 37