
Specifications


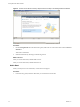


2 On the Getting Started tab, follow the on-screen instructions and click Add a host.
a Type the IP address or name of the ESX host in the Host name field.
b Type the IP address or name of the ESXi host in the Host name field.
c Enter the Username and Password for a user account that has administrative privileges on the selected
managed host.
3 Click Next.
4 To confirm the Host Summary information, click Next.
5 Assign an existing license key to the host and click Next.
6 (Optional) Select Enable Lockdown Mode to disable remote access for the administrator account after
vCenter Server takes control of this host.
Select this check box to ensure that the host is managed only through vCenter Server with root privileges.
7 Click Next.
8 Select a location from the list of inventory objects and click Next.
9 Click Finish to complete adding a host.
The vSphere Client displays a progress bar in the Recent Tasks pane while the host is added. Adding a
new host can take a few minutes and the Status percentage might appear to pause at different increments
during the process.
When a new host is added, the host might appear as disconnected until vCenter Server completes the task.
After the host is added, the status changes to connected, indicating that the host connection is complete.
The host you installed and setup earlier and the virtual appliance you imported are added to the inventory
managed by vCenter Server.
What to do next
You already have a virtual machine in the inventory because you added the host with the virtual appliance to
vCenter Server. Try to create a new virtual machine.
Getting Started with ESXi InstallableESXi EmbeddedESX
VMware, Inc. 35