Table of Contents 1. Welcome 2. Important Safety Information 2. Installation Instructions 3. GPS Packing List 4. Product Description 5. Product Specifications 6. Rearview Mirror GPS Appearance and Function Description 7. Quick Guide 8. Using SD/MM Card 9. Start to Navigate 10. Detailed Instructions 11. Calculator 12. Music Interface 13. Adding Music 14. Video Interface 15. Photo Interface 16. Flash Interface 17. Device settings 18. Time setup 19. Language Setup 20. Volume Adjustment 21.
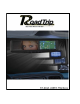
Welcome Congratulations on your purchase of a Vizualogic Rear view mirror with GPS that will provide you with many years of enjoyment. This sophisticated product provides you with vehicle navigation with Bluetooth and a backup camera input without altering the appearance of your vehicle's original interior. Reviewing this owner's manual thoroughly prior to operation will provide you with the best performance and help explain the simple requirements for proper care.
GPS Packing List Components Mirror with GPS Navigation Cable with a filter Power Cable User's Manual Car Charger(optional) Bracket(optional) Quantity 1 1 1 1 1
Product Description 4.3 Inch color TFT High Brightness Display Screen at 320 x 240 resolution 1.
Product Specifications Size Working Temperature Storage Temperature Working Humidity Storage Humidity Main Frequency Main Chip Type Memory Expansion Card Navigation Software Storage Medium Operating System Software Compilation Method Navigation Software Environment Parameters 30*8.5*3cm 10°C ~ +55°C 20°C ~+85°C 45%~80%RH 30%~90%RH System Parameters 400MHZ/533MHZ(optional) SAMSUNG S3C2443 64MB 4G(option) 128MB~8GB SD card or Flash(optional) WINCE 5.
Frequency C/A Code Channel Number Tracking Sensitivity Positioning Sensitivity Speed Rate Data Update Rate Recapture Time Hot Startup Time Warm Startup Time Cold Startup Time Maximum Positioning Height Maximum Speed Rate Acceleration Build in Antenna Type Build in Antenna Gain Build in Antenna Voltage Build in Antenna Current GPS Hardware Parameters 1.575GHZ 1.023 MHZ Chip Rate 20 Channels 150dBm 10m, 2D RMS 5m, 3D RMS, WAAS enabled 0.1m/s 1HZ 0.
Rearview Mirror GPS Appearance and Function Description 1 8 3 44 2 5 6 7 12 9 13 1 11 14 18 15 17 16
NO. 1 2 3 4 5 6 7 8 9 10 11 12 13 14 15 16 17 18 Name Mirror V2 M S V1 MIC Touch Screen SD Card Slot Video Input (1) Video Input (2) Bracket Chassis Car Camera Input Battery (yellow) ACC (Red) Gnd(black) Camera Trigger Line(Green) Fuse Description Standard Mirror or Auto Dimming Mirror Video Input#2 Switch from Video mode to GPS mode Press and hold to turn on/off the device Mute or Turns On/Off Auto dimming Functions Video Input #1 Bluetooth Microphone 4.
Quick Guide 4.1 Power On/Off There are two ways to turn on/off the device 1) The device will turn on automatically as soon as you start your engine. It will also turn off automatically as soon as you turn off the vehicle. 2) Press and hold the Power Button for more than 1 second, to turn the device on. When you want to turn off the device, press and hold the same button for more than 1 second. ! Caution When there is no power, the device will turn off automatically. 4.
Using SD/MMC Card The device has a SD/MMC card slot which can be used for multimedia photos and music. To use the SD/MMC card, insert a SD/MMC card into the slot of the device. With the connector pointing to the slot and it's label facing the front of the device. To remove the card, first make sure that applications are not accessing the card, then slightly push the top edge of the card to release. Then remove the card. 1) Put the card into the right side slot correctly.
Detailed Instructions 1. Bluetooth: Bluetooth is a wireless technology for creating personal networks operating in the 2.4 GHz band, with a range of 10 meters that enables portable electronic devices, including mobile phones, PDA, wireless headphones, and notebook PC etc, to connect and communicate wirelessly. It's available bandwidth is 1Mhz , analogous to the IEEE 802.11 standard.
Bluetooth ON: Choose or to choose if you want the Bluetooth to remain connected. Auto Answer: Choose or to choose if you want the Bluetooth device to answer all incoming calls automatically. Pairing code: Enter a 1 8 digit code for pairing your phone, after you enter the code you should get a prompt on your mobile phone display to enter the pairing code. After you receive this message pair your phone with the same code you entered into the mirror.
4) Follow the instructions on your cell phone for pairing to the device. When searching for a Bluetooth device, the name will appear as GPS. The default PIN code is 1234. Once the pair match is successful the Bluetooth functions on both GPS and cell phone will be turned on as shown below. 5) After a successful pair, the (Dial Pad) will become colored, and (pairing) will become grey: ( ) Pairing then using After entering the GPS Bluetooth system, the system will send the connecting signal.
6) Checking the pairing records: click (Pairing Devices) on the Bluetooth menu to check the pairing devices look on the display to see what devices have been paired. When the cell phone has connected to the device, the" up grey 5. Phone connection: 1) Dialing through the Bluetooth: " will light up red and is lit a. After successfully pairing the device, click (Dial Pad) to dial phone numbers using the touch panel. b.
The call log is from the cell phone, so some data can not be displayed because of incompatibility of some mobile phones. 2) Answering the call through the Bluetooth: After successfully pairing your mobile phone, when there is a incoming call, the system will display the phones number automatically and play the ring tone of the mobile phone.
Calculator 6. Assistant: Introduction: The Assistant tab is for the Calculator application. 1) After you press the Assistant tab you will get the Calculator Tab as shown in the picture below. 2) Press the Calculator tab and you will get the built in calculator as shown below. 3) To exit the Calculator press the tab on the interface until you get back to the main display.
7. Amusement: On the primary menu, touch the Amusement Icon to access your multimedia. Amusement tab 1) Touch the Music Icon to access your music on your SD card.
Music Interface Icon Button Name Description Play Icon Button Name Description Play the Music Stop Stop Playing Last song Choose last song Random Play the songs at random Next song Choose next song Play Repeat Repeat the Songs Mute Mutes the sound Play list Music play list Volume Adjusts the volume Return Return to the last menu Help Touch and enter into Amusement help
Adding Music 1) When there is no audio file in the play list, the system will go to the content on the NAND Flash or SD Card, and then you can add the music Find the music file to add music: Click the names of the music files, then you can add the music successfully, and then enter the play list: Move the music file list up and down Icon Button name Add songs Delete Files Delete all Select all Clear all Description Add songs to the play list Remove files from the play list Delete all files in the pl
Video Interface Icon Button Name Description Play Icon Button Name Description Play the Music Stop Stop playing video Pause Pause playing Full Screen Rewind Choose the last video Decrease video Fast forward Choose the next video Delete all Volume Adjusts the volume Random Mute Mutes the audio Play circularly Return Return to last menu Help View video in full screen Decrease videos in the playlist Delete all videos in the playlist Play the video's at random Play the video
3) After adding the video documentaries, then Click the " " to play the video. 4) Click the " ", slide the volume strip" " to adjust the volume.
Photo Interface 1) On the entertainment menu, tap " " then you enter the photo viewing: 2) Adding pictures: Click " " to enter the picture list and click " " to add pictures ( the detailed operation can refer to that of adding songs): Move the photo file list up and down Icon Description Button Description Play Next photo Viewing next photo Zoom in Last photo Viewing last photo Zoom out Full screen Viewing a photo in ful
Flash Interface 1) On the entertainment menu, tap " " then you enter Flash player.
Device Settings Click " " on the main menu, then you enter the settings interface, Return to main menu Next page FM Setup 1) On the settings interface, tap " " ,then you enter the FM interface: 2) Click " " to turn on the FM or Click " " to turn the FM off. After turning on the FM, you can continue to choose whether to open the loudspeaker of the device, or you can not.
Time Setup 1) Click " " to enter on the settings menu, then you enter the time settings 2) Date form: year month day, Click " " or " " to adjust the right date 3) Default time form is 24 hours, Click " " or " " of the H(hour) or M(minute) to adjust the right time, Click " " to change the time form between 12 hours or 24 hours. After setting Click " " to return to the last page.
Volume Adjustment 1) Click " " on the settings sub menu, then you enter the volume page. You can set the system volume and choose to enable key tones or not. 2) Slide the volume strip " " to set the system volume. 3) Choose " " or " " to turn on or off the key tones. Then, Click " " to save the settings and go back to the last page.
System Information Click" " on the settings menu to display the content of the next page, then Click " " to enter the system menu System Information: Id: Id: GPS body number Ver.: Software version number Ram: It refers to internal caches. And the available capacity/ Total capacity =28.52MB/64.
11. FAQ What role does the electrical map play in the navigation system? The electrical map is an application that integrates map data and navigation software, and the navigation action is implemented with the help of the software and the navigation system. How long will it take for the positioning to be completed after turning on? The navigation system should meet the requirements of getting position parameters with 60 seconds.