XRU9M OM 2-6-10.
Table of Contents Regulatory Cautions Regulatory Cautions .................................3 Button Descriptions ..................................4 Initial Setup ...............................................6 Battery Insertion ...................................6 Precautionary tips for batteries ............6 Battery Saver .......................................6 Code Saver ..........................................6 Code Setup...............................................7 Setup for DVD .............
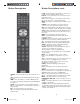
Button Descriptions POWER – Press this button to turn the component on or off. SET – This button starts all programming of the Remote Control. HDMI – Press this button to select the HDMI input. By pressing it repeatedly you will go through all HDMI inputs in sequence. COMP – Press this button to select Component input. AV – Press this button to select AV (either Composite or S-Video) input. DTV – Press this button to select TV input. PIP – Pressing this button will activate the picture-inpicture feature.
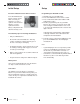
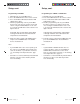
Initial Setup Setup Insertion of Batteries in the Remote Control Programming for BLU-RAY or DVD Insert two AAA batteries into the remote control. Make sure that you match the (+) and (-) symbols on the batteries with the (+) and (-) symbols inside the battery compartment. Reattach the battery cover. 1. Manually turn on your DVD player. 2. Press the DVD button on the remote control. 3. Press and hold the SET button until the LED LIGHT flashes twice. 4.
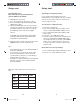
Setup, cont. Setup, cont. Programming for AUDIO Programming for CABLE or SATELLITE 1. Manually turn on your AUDIO device. 2. Press the AUDIO button on the remote control. 3. Press and hold the SET button until the LED LIGHT flashes twice. 4. Find the programming code for your AUDIO device in the code list (on separate sheet) and enter it using the Number Buttons. If the code is accepted, the LED flashes twice after the last digit is entered. 1. Manually turn on your CABLE box. 2.
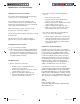
Setup, cont. Setup, cont. Programming for TV Note: The remote is pre-programmed to operate VIZIO TVs by default. Searching for Component Codes 1. Manually turn on your TV. 2. Press the TV button on the remote control. 3. Press and hold the SET button until the LED LIGHT flashes twice. 4. Find the programming code for your TV in the code list (on separate sheet) and enter it using the Number Buttons. If the code is accepted, the LED flashes twice after the last digit is entered.
Maintenance & Troubleshooting VIZIO Remote Control Precautions The remote control should be kept dry and away from heat sources. Avoid humidity. If the Component responds erratically to the remote control or does not respond at all, check the batteries. If the batteries are low or exhausted, replace them with fresh batteries. When not using the remote control for a long period of time, remove the batteries. Do not take the batteries apart, heat them, or throw them into a fire.
ONE YEAR LIMITED WARRANTY Covers units purchased as “new” in United States and Puerto Rico Only. VIZIO provides a warranty to the original purchaser of a new Product against defects in materials and workmanship for a period of one year of non-commercial usage and ninety (90) days of commercial use. If a Product covered by this warranty is determined to be defective within the warranty period, VIZIO will either repair or replace the unit at its sole option and discretion.
Use BLACK back cover supplied separately XRU9M OM 2-6-10.