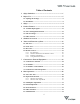
VIZIO P4 User Guide Table of Contents 1. Safety Guidelines.......................................................................1 2. Before Use .................................................................................5 2.1 Opening the Package..................................................................5 2.2 Installation ..................................................................................5 3. Safety .................................................................................
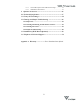
VIZIO P4 User Guide 8.7.1 8.7.2 9 General Description of the OSD Function Pages .................. 34 OSD Menus and Functions.................................................... 35 Optional Accessories ...............................................................46 10 Technical Specification...........................................................47 11 Factory Preset Timings...........................................................48 12 Cleaning and Simple Troubleshooting ..........................
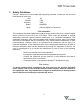
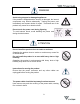
VIZIO P4 User Guide 1. Safety Guidelines Caution: Always use a power cable that is properly grounded. Please use the AC cords listed below for each area. USA UL Canada CSA Germany VDE Britain BASE/BS Japan Electric Appliance Control Act FCC Information This equipment has been tested and found to comply with the limits for a Class B digital device, pursuant to part 15 of the FCC Rules. These limits are designed to provide reasonable protection against harmful interference in a residential installation.
VIZIO P4 User Guide Important Safeguards • Read all the Safety Instructions and the User Manual before using the Display. Keep these instructions in a safe place for future reference. • To avoid the risk of electric shock or component damage, switch off the power before connecting other devices to the Display. • Unplug the power cord before cleaning the Display. A damp cloth is sufficient for cleaning the Display. Do not use a liquid or a spray cleaner for cleaning the product.
VIZIO P4 User Guide 2. Before Use The Vizio P4 is a 46" WVGA (wide-screen with VGA resolution) Plasma Display. It has passed the Class-B EMC test and the UL and CSA safety certifications, and is an ideal product for individual users and commercial exhibitioners. The product is a precise electronic product; Users should read the following instructions carefully to maximize the performance of the product. 2.
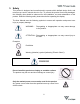
VIZIO P4 User Guide 3. Safety This product is designed and manufactured to operate within defined design limits, and misuse may result in electric shock or fire. To prevent the product from being damaged, the following rules should be observed for the installation, use and maintenance of the product. Read the following safety instructions before operating the display.
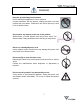
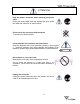
VIZIO P4 User Guide WARNING Keep the product away from moisture Do not expose this appliance to rain or moisture. If water penetrates into the product, unplug the power cord and contact with your dealer. Continuous use in this case may result in fire or electric shock. Do not place any objects on the top of the product Spilled water or metal objects may cause short circuit, fire or electric shock if they penetrate into the housing of the product.
VIZIO P4 User Guide WARNING Avoid using dropped or damaged appliances If the product is dropped and the housing is damaged, the internal components may function abnormally. Unplug the power cord immediately and contact dealer for repair. Continued use of the product may cause fire or electric shock Do not touch the power cord during lightning To avoid electric shock, avoid handling the power cord during electrical storms.
VIZIO P4 User Guide ATTENTION Hold the power connector when removing the power cable Pulling the power cable itself may damage the wires inside the cable and cause fire or electric shock. Do not touch the connector with wet hands To avoid risk of electric shock. Insert batteries in accordance with instructions Insert the batteries with correct polarities (positive + and negative -).
VIZIO P4 User Guide ATTENTION Image Sticking The plasma monitor illuminates phosphors to display images. The phosphor has a finite illumination life. After extended periods of illumination, the brightness of the phosphor will be degraded to such an extent that stationary images would burn-in that part of the screen as grayed-out images.
VIZIO P4 User Guide 11 VINC.
VIZIO P4 User Guide 4. Product Features The 46" PDP provides quality image displays and is suitable for a variety of multimedia applications. 4.1 Available input signals • • • The standard PC module provides RGB (D-SUB15 PIN) and digital DVI input connectors, and a RS-232 communication connector (D-SUB 9 PIN MALE). The Video + Tuner module provides composite video (RCA), S-video (DIN4P) and component video (RCA) input connectors, and a composite video (BNC) output connector.
VIZIO P4 User Guide 5. Standard Accessories This User Manual x1 Power Cord x1 S-Video Cable x1 15-Pin D-Sub Cable x1 AV Cable x1 AA Battery x2 Remote Control x1 NOTE: The style of the Remote Control included with the Display may not be identical to the one pictured. 13 VINC.
VIZIO P4 User Guide 6. Names and Functions of Parts 6.1 Side View Power Switch Power Cable AC Connector Power Outlet • • Connect the power cable female end to the display, then connect the male plug to the wall outlet. Note: Male plug types vary among countries. The power plug shown above may vary from the type supplied with your product. Push the power switch (0: Off, I: On) to the I (On) position. The power indicator on the front panel will glow red, indicating that the plasma is in standby mode.
VIZIO P4 User Guide 6.2 Front View (1) (1) (2) (2) Remote Control Window The window includes the power indicator and the IR remote control sensor. LED's are used to indicate the power status and the receiving of remote control signals. Indicator ON (red) Standby mode. Indicator ON (green) Power ON mode. Indicator flashing (red/green) alternately Power Saving mode.
VIZIO P4 User Guide B – Used for quick adjustment when the OSD Menu is not displayed on the screen. The selections appear in the following sequence, BalanceDBassDTrebleDVolumeDPIP Source*DContrast*DBrightness* (sequential display). The adjustments are made in conjunction with the e/f buttons. *Note: The PIP source is only for the PC Input and the Contrast and Brightness are only for the Video Input. • e/f: A – Used as Left/Right buttons in the OSD Menu screen. The f button also functions as Enter.
VIZIO P4 User Guide (3) (4) Speaker Mounting Holes: Use the brackets and screws supplied with the optional speakers to attach them to the product. Signal Input Connectors: • PC Module i. D-Sub: For PC display purposes. Connects to the 15-Pin D-Sub analog output connector of the PC. ii. DVI: For high quality PC display purposes. Connects to the DVI-I digital output connector of the PC. iii.
VIZIO P4 User Guide • • • • Tuner Module The VHF/UHF Input can be connected to receive a TV/CATV signal from an antenna or CATV 75Ω coaxial cable. The TV Audio Output can be connected to an Audio Amplifier or other TV Audio Line Input. The Video Output can be connected to a Monitor or other TV with a Composite Video Input. 18 VINC.
VIZIO P4 User Guide 6.4 Remote Control 19 VINC.
VIZIO P4 User Guide 6.4.1 Key Functions (1) POWER Press this key to turn the Plasma Display On from Standby mode. Press it again to return to the Standby mode. (2) VIDEO Press this key to switch the Video input. The signal sources are selected in the following sequence: AV1DS-VideoDYCbCr/PbPr. (3) AUTO Vertical and Horizontal position are adjusted automatically when pressing this key in the PC mode. B: The appropriate video format is chosen automatically when pressing this key in the Video mode.
VIZIO P4 User Guide Use this key to activate and adjust the size of the picture-in-picture in the following sequence, Picture-in-Picture On-SmallDMediumDLargeDPicture-in-Picture Off (sequential display). (14) FREEZE Press this key to "Freeze-Frame" the current screen. You may press this key again to continue playing or play will resume automatically after one minute. (15) MUTE Press this key to mute the sound. Press it again to reactivate the sound.
VIZIO P4 User Guide 6.4.2 Insertion of Batteries in the Remote Control (1) (2) (3) As shown in the figure above, turn the Remote Control upside down, press and slide off the battery cover. Insert two AA batteries in the remote control as shown in the figure above. (Polarity + or - must match the markings in the compartment). Replace the cover and slide in reverse until the lock snaps. 22 VINC.
VIZIO P4 User Guide 6.4.3 Remote Control Range • • • Point the Remote Control at the receiver window (the window through which the power LED is illuminating) to transmit the commands. Do not place any obstacles between the Remote Control and the receiver window. The effective range of the Remote Control is approximately 32 feet (10 meters) from the front of the receiver window, 30º to the left and right, 20º up and down. 6.4.4 Using the Remote Control i.
VIZIO P4 User Guide 7. Connection to External Equipment 7.1 Connection to Antenna • When using a 75Ω Coaxial Cable it can be connected directly to the VHF/UHF terminal of the tuner. VHF/ UHF • When using a 300Ω parallel feed line it must be connected to a 300Ω to 75Ω converter and then connected to the VHF/UHF terminal of the tuner. 24 VINC.
VIZIO P4 User Guide 7.2 PC Module • For operating the Display as a PC monitor. 15-Pin D-Sub connects to analog RGB output interface (Input option RGB1). DVI connects to digital RGB output interface (Input option RGB2). Note 1: The DVI connector of the Display is DVI-D, which does not support analog inputs. Note 2: The RS-232 connector of the Display provides a transmission interface for professional technicians to update firmware and does not provide additional communication functions. 25 VINC.
VIZIO P4 User Guide 7.3 PC Module + Video Module • • • • • The functions of D-Sub, DVI and RS-232 terminals are the same as for the PC module. The Component connectors (Y/PbCb/PrCr) accept the component output of a video device (such as a DVD or HDTV Receiver). The audio input is via Audio 1 (INPUT Option YCbCr/PbPr). The S-Video connector accepts the Y/C S-Video output of a video device (such as an S-VHS or DVD). The audio input is via Audio 2 (INPUT Option S-Video).
VIZIO P4 User Guide • The CVBS Out (BNC) connector can be used to connect the Display to another TV or display, transmitting the signal input via CVBS to the other display. 7.
VIZIO P4 User Guide 8. Basic Operation 8.1 Power On / Off • Press the POWER key to turn on the Display. The power indicator will change from red to green. • Press the POWER key again to return the Display to Standby mode. The power indicator will change from green to red. Note: The power indicator will flash for a few seconds before changing color. 8.2 Input Mode Selection • Press the INPUT key. A menu of input signal sources will appear on-screen.
VIZIO P4 User Guide 8.2.1 Selection of TV Mode Select the TV Input by one of three methods: • • • Press the INPUT key. A menu of input signal sources will appear on-screen as shown in the picture opposite. Use the c/d keys to select the signal source desired and press the f key to confirm the selection. Press the VIDEO key repeatedly to select a signal source from the Video module.
VIZIO P4 User Guide 8.2.3 Selection of PC Input Mode • Press the PC key repeatedly to select a signal source from the PC module. The signal sources are displayed in the following sequence, RGB1DRGB2 RGB1 = Analog D-Sub input on PC Module. RGB2 = Digital DVI-D input on PC Module. 30 VINC.
VIZIO P4 User Guide 8.3 OSD Option Adjustment • • The keys for OSD option adjustment include: MENUe, MENUf, c, d, e, f and EXIT. Press MENUe, MENUf to display the OSD Menu then press again to highlight a submenu, scrolling left or right.
VIZIO P4 User Guide 8.4 Sound Adjustment • • • Press and hold VOL + to increase the sound volume level and press and hold VOL - to decrease the sound volume level. Press the MUTE button to mute the internal or external speakers. Press the MUTE button again to restore the sound at the previous volume levels. Other audio adjustments (such as treble, bass and balance) can be adjusted on the OSD Menu or Quick Menu. 8.5 Zoom Functions • • The Zoom buttons include WIDE, ZOOM+ and ZOOM-.
VIZIO P4 User Guide 8.6 Other Functions • If an image cannot be displayed after changing the timing in PC mode, press the AUTO button. The unit will automatically adjust the Phase, Horizontal and Vertical position to optimize the display. • If the image cannot be displayed after changing the playback system in Video Input mode, press the AUTO button. The unit will select the appropriate format for the image system. Note: For the information about the timing capabilities of the unit, refer to Chapter 11.
VIZIO P4 User Guide 8.7 OSD Functions 8.7.1 General Description of the OSD Function Pages • PC Display (DVI input) Display (Analog input) Brightness Contrast Red1 Green1 Blue1 Reset • Reset PIP Setting Display Brightness Contrast Saturation Image Audio H. Position V. Position Phase Adj. Sync Adj.
VIZIO P4 User Guide 8.7.2 OSD Menus and Functions 8.7.2.1 Display Menu PC • • • VIDEO Only the Brightness, Contrast and Reset functions can be adjusted when using an analog PC input signal. The brightness of the Red, Green and Blue can be adjusted when User Color Temp is selected from the Miscellaneous Menu. The Brightness, Contrast, Saturation, Hue, Sharpness and Reset can all be adjusted when using Video input signals. When YCbCr/PbPr video is the primary source, Hue and Sharpness are not available.
VIZIO P4 User Guide 8.7.2.3 • Channel Scan and Memory Highlight the TV Function and then press and f key to select thus option. • Press the c or d key to highlight Source and then repeatedly press the f key to cycle through Antenna, CATV (STD, IRC, or HRC) and select the one that matches the broadcasting system you are receiving. • • Now press the c key to highlight Channel Program and then press the f key to commence Channel Scan to automatically find and memorize the channels available.
VIZIO P4 User Guide 8.7.2.4 • Audio Menu The adjustable items on the Audio Menu are Volume, Treble, Bass, Balance and Mute. These items are the same for both PC and Video signals. Internal or External speakers can also be selected from this menu. 8.7.2.5 PC Language and Screen Saver Menu Options in Advanced Mode VIDEO Options in Advanced Mode • You can select the languages provided by OSD from the Language option.
VIZIO P4 User Guide 8.7.2.6 Miscellaneous Menu PC • • • VIDEO The OSD Position and OSD Timeout options allow you to select the location of the OSD on the screen and the length of time that OSD will remain on screen. The OSD Rotation option allows you to rotate the OSD 90° CCW. The PIP Settings option can be accessed when the input signal is from a PC (Note: The Video, S-Video or Component input must have an input signal in order to use this option).
VIZIO P4 User Guide 8.7.2.6.2 PIP Setting with Tuner (for PC Mode only) • The TV Function selection has the same effect as this selection in the Image and AV System Menu in section 8.7.2.3 • Press the c/d keys to enter the Quick Menu to select TV for the PIP Source. (when OSD is not being displayed) 39 VINC.
VIZIO P4 User Guide 8.7.2.6.3 • User Color Temp. Menu (for AV Mode only) To access these options, select the User Color Temp. option on the Miscellaneous menu. You can adjust the brightness of Red, Green and Blue to suit your personal preference for white point. Note: Only User Color Temperature is adjustable. The Warm, Standard and Cool settings are preset at the factory. 8.7.2.
VIZIO P4 User Guide 8.7.2.8 CC and Parental Control Menus • Select the TV Function on the Image and AV System Menu. Press the f key to select the TV Function Menu. Pressing the MENUf key will recall the CC and Parental Control Menu. (See section 8.7.2.9) • Select the Channel Program function and press the f key to perform Channel Scan and Addressing. Select the Source function and press the e/f keys to select the TV/CATV system.
VIZIO P4 User Guide 8.7.2.9 CC and Parental Control Menu • Select the TV Function on Image and AV System Menu. Press the f key to display the CC and Parental Control Menu. • Highlight the Close Caption function and use the e/f keys to select the options CC1, CC2, T1, T2, T3 and T4. The options are described below.
VIZIO P4 User Guide 8.7.2.9.1 MPAA Rating • Highlight the MPAA Rating item and press the f key to select the function. • Press the c/d keys to highlight the rating items you want to set and then press the e or f key to • • Show or Block the selection. When an item is Blocked, all of the higher ratings will also be blocked. For example, if PG-13 is set to Block, then ratings R, NC-17 and X will be set to Block automatically. The MPAA Ratings are described below.
VIZIO P4 User Guide 8.7.2.9.2 US TV Rating • Highlight the US TV Rating item and press the f key to select the function. • Press the c/d keys to highlight the rating items you want to set and then press the e or f key to Show • • or Block the selection. When an item is Blocked, all of the higher ratings will also be blocked. For example, if TV-G is set to Block, then ratings TV-PG, TV-14 and TVMA will be set to Block automatically. The US TV Ratings are described below.
VIZIO P4 User Guide Rating Description E Exempt C Children C8+ Children 8 years old and older G General programming, suitable for all audiences PG Parental guidance 14+ Viewers 14 years old and older 18+ Adult programming 8.7.2.9.4 French Canadian Rating • Highlight the Canadian France Rating item and press the f key to select the function. • Press the c/d keys to highlight the rating items you want to set and then press the e or f key to Show or • Block the selection.
VIZIO P4 User Guide 9 Optional Accessories Fix the PDP Set to the Stand Stand I Stand II (refer to the stand assembly instruction) Speakers II Speakers I 1 1 Wall Mount Tilt Angle adjustable 0 - 20° Ceiling Mount 46 VINC.
VIZIO P4 User Guide 10 Technical Specification Screen Size 46-in, Wide Screen Screen Area 39.7-in (1007mm) Wide x 22.3-in (567.4mm) High Aspect Ratio 16:9 Overall Size 44.8-in (1138mm) Wide x 27.2-in (691mm) High x 3.8-in (98mm) Deep, without Stand Weight 82lbs (37kg), without Stand Resolution 852 (H) x 480 (V) Pixels (Each pixel has R/G/B 3-color cells.) Pixel (Dot) Pitch 1.182mm (H) x 1.182mm (V) Color 16.
VIZIO P4 User Guide 11 Factory Preset Timings There are 17 different timing formats that are preset at the factory for the RGB Mode. # Resolution Horizontal Frequency (kHz) Vertical Frequency (Hz) Dot Clock Frequency (MHz) 1 720x400 31.47 70.08 25.17 DOS 2 640x400 37.90 85.00 31.50 VESA 3 640x480 31.50 60.00 25.18 DOS 4 640x480 35.00 67.00 30.24 Mac (SOG) 5 640x480 37.50 75.00 31.50 VESA 6 640x480 37.86 72.81 31.50 VESA 7 640x480 43.30 85.00 36.
VIZIO P4 User Guide 12 Cleaning and Simple Troubleshooting 12.1 Important 1. Make sure that the power cable is removed from the socket before cleaning the Display. 2. Do not use volatile solvent (such as toluene, rosin and alcohol) to clean the Display. Such chemicals may damage the housing, screen glass and remote control, and cause the paint to peel. 12.2 Cleaning the Housing and the Remote Control 1. Use a soft cotton cloth for cleaning. 2.
VIZIO P4 User Guide 12.4 Simple Troubleshooting If the display fails or the performance changes dramatically, check the Display in accordance with the following instructions. Remember to check the peripherals to pinpoint the source of the failure. If the Display still fails to perform as expected, contact the dealer for assistance. Problem Solution Power cannot be turned on. (Power indicator does not light) Check that both ends of the power cable are plugged into the socket appropriately.
VIZIO P4 User Guide 13. Optional Wall Mount Installation Instructions Read these instructions before attempting installation SAFETY ADVISORY 13 The wall should be capable of supporting a weight of at least twice (2x) the weight of the Plasma TV, and the site should be studied carefully for correct Stud (Wood), Stud (Metal), Drywall and Concrete mounting procedures. For calculated weights of more than 160lbs, the wall or ceiling must be reinforced.
VIZIO P4 User Guide Ventilation Requirements for Wall Mounting To allow adequate ventilation for the Plasma TV use at least the minimum the space around the TV, as shown on the diagram below, when installing the TV in the desired location. 52 VINC.
VIZIO P4 User Guide • Attach the Plasma Brackets to the Plasma TV Carefully lay the display, screen down, on a soft and flat surface ensuring there are no hard objects on that surface that could damage the face of the Plasma TV. Refer to the User Manual instructions that were supplied with the display to locate the mounting points on the back of the Plasma TV.
VIZIO P4 User Guide • Mount the Wall Plate on the wall. Choose the desired wall location making sure it can support the weight of the Plasma TV as per the ‘Safety Advisory’ on page 2 of these instructions. Remember that the lower edge of the Plasma TV will be lower on the wall, (about 5 inches for the P4, 46 inch TV), than the bottom of the Wall Plate. Locate and mark the centers of two adjacent wood studs, usually 16 inches apart, closest to the middle of the desired location of the Plasma TV.
VIZIO P4 User Guide • Mount the Plasma + Plasma Bracket onto the Wall Plate Make sure the moveable hooks on the Plasma Brackets are as shown in Fig 4, raise the Plasma TV (2 people minimum recommended) and place the Plasma TV flat against the Wall Plate with all of the hooks slightly higher than the rods on the Wall Plate. Holding it level, lower the Plasma TV to seat all four Plasma Bracket hooks, as indicated in Fig 4.
VIZIO P4 User Guide • Adjust the Holding Tension of the Moveable Hooks To adjust the Moveable Hooks so that they can hold the weight of the Plasma TV at any position between 0° and 12° first adjust the nut so that it is just too tight to move the Plasma TV, then adjust the screw so that Plasma TV can be moved but will remain in any desired position within the tilt range. Fig 5.
VIZIO P4 User Guide Final Positioning of the Plasma TV. Å Left or Right Æ Fig 6. Final Position of the Plasma TV. While the Plasma TV is on the Wall Mount you still can move the display from left to right or right to left to optimize the final position of the Plasma TV on the wall by gently sliding the unit on the steel rods of the Wall Plate. • Removal of the Plasma TV from the Wall Mount.
VIZIO P4 User Guide 15. Telephone & Technical Support Products are often returned due to a technical problem rather than a defective product which may result in unnecessary shipping charges billed to you. Our trained support personnel can often resolve the problem over the phone. For more information on warranty service or repair, after the warranty period, please contact our Support Department at the number below.
V INCORPORATED LIMITED WARRANTY For VIZIO PLASMA Displays Welcome to the V, Inc. Digital Family! Please read this warranty carefully, it is a “ONE-YEAR LIMITED WARRANTY” on parts and labor. V, Inc.’s Responsibility V, Inc. PLASMA Displays purchased in the United States are warranted to be free from defects in materials or workmanship for a period of one (1) year from the date of their original retail purchase.