
Operating instructions
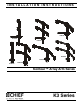

K3 Series Installation Instructions
10
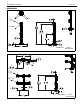
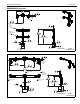
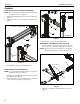
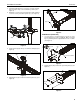
3. Locate a flat surface (thickness minimum of 1" to maximum
of 5") on which to mount the array assembly.
4. If a hole doesn’t already exist, drill a hole in desk with a
diameter between 1/2" and 3 1/2" at desired mounting
location. (See Figure 9)
5. Position mount on desk so that center hole of grommet plate
(P) is centered over grommet hole. (See Figure 9)
6. Insert grommet screw (N) through grommet hole and thread
into center hole of grommet plate (P). (See Figure 9)
7. Tighten grommet screw (N) until grommet base is tightened
against underside of desk and mount is securely mounted
to desk. (See Figure 9)
Figure 9
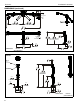
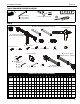
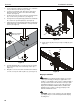
8. Carefully manipulate base cover (E) to create an opening
large enough to wrap cover around array column. (See
Figure 10)
9. Wrap base cover around column and slide it down until base
cover fits securely onto table top base (C). (See Figure 10)
Figure 10
10. Snap column cap (D) onto top of array assembly (A). (See
Figure 11)
Figure 11
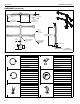
Display Installation
WARNING: Exceeding the weight capacity can result in
serious personal injury or damage to equipment! It is the
installer’s responsibility to make sure the combined weight of
all components located on the K3 Series mount up to (and
including) the display does not exceed 15 lbs (6.8 kg) per
display for the K3F220, K3G220, K3F310, K3G310 and
K3G320 mounts or 25 lbs (11.34 kg) per display for the
K3F120 and K3G120 mounts.
CAUTION: Using screws of improper size may damage
your display! Proper screws will easily thread into display
mounting holes.
5
6
7
diameter between
4
(N)
1/2” and 3 1/2”
8
8
9
(E)
(D)
(A)
10