
User Manual
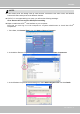
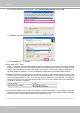
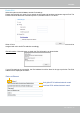
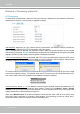
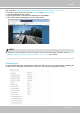
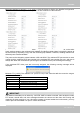
Table Of Contents
- Read Before Use
- Overview
- Hardware Installation
- Accessing the Network Camera
- Using VIVOTEK Recording Software
- Main Page
- Client Settings
- Configuration
- System > General settings
- System > Homepage layout
- System > Logs
- System > Parameters
- System > Maintenance
- Media > Image
- Media > Video
- ■ Smart stream III
- Media > Audio
- Network > General settings
- Network > Streaming protocols
- Network > DDNS
- Network > SNMP (Simple Network Management Protocol)
- Network > FTP
- Security > User accounts
- Security > HTTPS (Hypertext Transfer Protocol over SSL/TLS)
- Security > Access List
- PTZ > PTZ settings
- Event > Event settings
- Applications > Motion detection
- Applications > DI and DO
- Applications > Tampering detection
- Applications > Audio detection
- Applications > VADP (VIVOTEK Application Development Platform)
- Recording > Recording settings
- Local storage > SD card management
- Local storage > Content management
- Appendix

VIVOTEK
User's Manual - 83
Enable IPv6
Select this option and click Save to enable IPv6 settings.
Please note that this only works if your network environment and hardware equipment support IPv6. The
browser should be Microsoft
®
Internet Explorer 6.5, Mozilla Firefox 3.0 or above.
When IPv6 is enabled, by default, the network camera will listen to router advertisements and be
assigned with a link-local IPv6 address accordingly.
IPv6 Information: Click this button to obtain the IPv6 information as shown below.
If your IPv6 settings are successful, the IPv6 address list will be listed in the pop-up window. The IPv6
address will be displayed as follows:
Link-global IPv6 address/network mask
Link-local IPv6 address/network mask
Refers to Ethernet