
User Manual

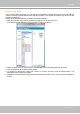
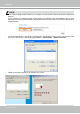
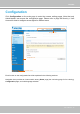
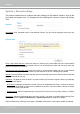
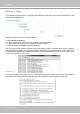
Table Of Contents
- Read Before Use
- Overview
- Hardware Installation
- Accessing the Network Camera
- Using VIVOTEK Recording Software
- Main Page
- Client Settings
- Configuration
- System > General settings
- System > Homepage layout
- System > Logs
- System > Parameters
- System > Maintenance
- Media > Image
- Media > Video
- ■ Smart stream III
- Media > Audio
- Network > General settings
- Network > Streaming protocols
- Network > DDNS
- Network > SNMP (Simple Network Management Protocol)
- Network > FTP
- Security > User accounts
- Security > HTTPS (Hypertext Transfer Protocol over SSL/TLS)
- Security > Access List
- PTZ > PTZ settings
- Event > Event settings
- Applications > Motion detection
- Applications > DI and DO
- Applications > Tampering detection
- Applications > Audio detection
- Applications > VADP (VIVOTEK Application Development Platform)
- Recording > Recording settings
- Local storage > SD card management
- Local storage > Content management
- Appendix

VIVOTEK
42 - User's Manual
Joystick Settings
Enable Joystick
Connect to the USB plug of the joystick to a USB port on your management computer. Once a USB
joystick is connected, the related joystick conguration will be available on the Client settings window.
The joystick should work properly without installing any other driver or software.
Then you can begin to congure the joystick settings of connected devices. Please follow the instructions
below to enable joystick settings.
1. Click on the Congure buttons button. If your joystick is working properly, it will be displayed on the
drop-down list.