
User Manual
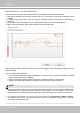
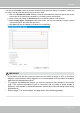
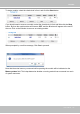
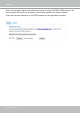
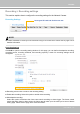
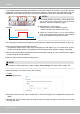
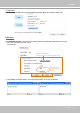

Table Of Contents
- Read Before Use
- Overview
- Hardware Installation
- Accessing the Network Camera
- Using VIVOTEK Recording Software
- Main Page
- Client Settings
- Configuration
- System > General settings
- System > Homepage layout
- System > Logs
- System > Parameters
- System > Maintenance
- Media > Image
- Media > Video
- ■ Smart stream III
- Media > Audio
- Network > General settings
- Network > Streaming protocols
- Network > DDNS
- Network > SNMP (Simple Network Management Protocol)
- Network > FTP
- Security > User accounts
- Security > HTTPS (Hypertext Transfer Protocol over SSL/TLS)
- Security > Access List
- PTZ > PTZ settings
- Event > Event settings
- Applications > Motion detection
- Applications > DI and DO
- Applications > Tampering detection
- Applications > Audio detection
- Applications > VADP (VIVOTEK Application Development Platform)
- Recording > Recording settings
- Local storage > SD card management
- Local storage > Content management
- Appendix

VIVOTEK
User's Manual - 147
Recording > Recording settings
This section explains how to congure the recording settings for the Network Camera.
Recording Settings
► Please remember to format your SD card when using it for the rst time. Please refer to page 152 for
detailed information.
Recording Settings
Click Add to open the recording setting window. On this page, you can dene the adaptive recording,
recording source, recording schedule, and recording capacity. A total of 2 recording settings can be
congured.
■ Recording name: Enter a name for the recording setting.
■ Enable this recording: Select this option to enable video recording.
■ With adaptive recording:
Select this option will activate the frame rate control according to alarm trigger. The frame control
means that when there is alarm trigger, the frame rate will raise up to the value you’ve set on Stream
setting page. Please refer to page 70 for more information.
Insert your SD card and click here to test
NOTE: