
User Manual

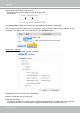
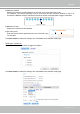
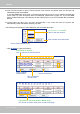
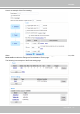
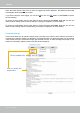
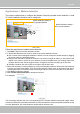
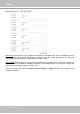
Table Of Contents
- Read Before Use
- Overview
- Hardware Installation
- Accessing the Network Camera
- Using VIVOTEK Recording Software
- Main Page
- Client Settings
- Configuration
- System > General settings
- System > Homepage layout
- System > Logs
- System > Parameters
- System > Maintenance
- Media > Image
- Media > Video
- ■ Smart stream III
- Media > Audio
- Network > General settings
- Network > Streaming protocols
- Network > DDNS
- Network > SNMP (Simple Network Management Protocol)
- Network > FTP
- Security > User accounts
- Security > HTTPS (Hypertext Transfer Protocol over SSL/TLS)
- Security > Access List
- PTZ > PTZ settings
- Event > Event settings
- Applications > Motion detection
- Applications > DI and DO
- Applications > Tampering detection
- Applications > Audio detection
- Applications > VADP (VIVOTEK Application Development Platform)
- Recording > Recording settings
- Local storage > SD card management
- Local storage > Content management
- Appendix

VIVOTEK
138 - User's Manual
A green bar indicates that even though motions have been detected, the event has not been triggered
because the image variations still fall under the preset threshold.
If you want to congure other motion detection settings for day/night/schedule mode (e.g., for a different
lighting condition), please click Profile to open the Motion Detection Profile Settings page as shown
below. Another three motion detection windows can be congured on this page.
Larger than the
min. item size
Photos or videos can be captured instantly and congured to be sent to a remote server (via an Email or
FTP server). For more information on how to congure an event setting, please refer to Event settings on
page 122.
Please follow the steps beolw to set up a prole:
1. Create a new motion detection window.
2. Click the Prole mode tab.
3. Select the applicable Schedule mode. Please manually enter a time range.
4. Click Save to enable the settings and click Close to exit the page.