Premier TREADMILLS GUIDE OWNER’S
C ongratulations on choosing a VISION FITNESS Treadmill. You’ve taken an important step in developing and sustaining an exercise program! Your Treadmill is a tremendously effective tool for achieving your personal fitness goals.
Table of Contents PREMIER TREADMILLS FOLDING TREADMILLS GENERAL USER ENGINEERING MODE . . . . . . . . . . . . 34 COMMON QUESTIONS . . . . . . . . . . . . . . . 36 TROUBLESHOOTING: TREADMILL . . . . . . . . . . . . . . . . . . . . . . . 37 HEART RATE MONITOR . . . . . . . . . . . . . . . . 38 TENSIONING THE BELT . . . . . . . . . . . . . . . 39 PREVENTIVE MAINTENANCE . . . . . . . . . . . . 40 HOME WARRANTY . . . . . . . . . . . . . . . . . . 42 DEVELOPING A FITNESS PROGRAM . . . . . . .
ALL MODELS IMPORTANT SAFETY INSTRUCTIONS This Treadmill is intended for household use only. When using this Treadmill, basic precautions should always be followed, including the following: Read all instructions before using this Treadmill: DANGER – To reduce the risk of electric shock: • Always unplug the Treadmill from the electrical outlet immediately after using and before cleaning.
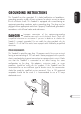
ALL MODELS GROUNDING INSTRUCTIONS This Treadmill must be grounded. If it should malfunction or breakdown, grounding provides a path of least resistance for electric current to reduce the risk of electric shock. This Treadmill is equipped with a cord having an equipment-grounding conductor and a grounding plug. The plug must be plugged into an appropriate outlet that is properly installed and grounded in accordance with all local codes and ordinances.
ALL MODELS OTHER SAFETY TIPS FOR YOUR VISION FITNESS TREADMILL CAUTION – RISK OF INJURY TO PERSONS – To avoid injury, stand on the siderails before starting Treadmill. Read Instruction Manual before using. CAUTION!: If you experience chest pains, nausea, dizziness or shortness of breath, stop exercising immediately and consult your physician before continuing. • Do not wear clothing that might catch on any part of the Treadmill. • Read this Owner’s Guide before operating this Treadmill.
ALL MODELS ASSEMBLY VISION FITNESS recommends this Treadmill be assembled and delivered by qualified personnel. If you have elected to assemble this Treadmill yourself, for your safety please read and follow each of the steps in the enclosed Assembly Guide. It is recommended, when possible, that assembly be performed by an authorized VISION FITNESS retailer. If you have any questions regarding any part or function of your Treadmill, contact your VISION FITNESS retailer.
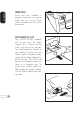
ALL MODELS POWER SWITCH Ensure that your Treadmill is properly connected to a power outlet, then turn on the Power switch, located at the front of the main frame. SAFETY MAGNET KEY & CLIP Your VISION FITNESS Treadmill will not start unless the Safety Magnet Key is inserted into the circle in the front of the console. You should attach the clip end to your clothing. If at any time you need to stop the Treadmill quickly, simply pull the Safety Magnet Key off the console.
ALL MODELS QUICK SPEED AND QUICK ELEVATION KEYS Use the QUICK SPEED and QUICK ELEVATION keys as an option to increase and decrease the speed and elevation to your desired setting. First press the QUICK SPEED or QUICK ELEVATION key, then press the numbered keys (0-9). QUICK SPEED* Examples of the QUICK SPEED key operation: to change the speed to 4.0 mph/kph, press QUICK SPEED, then 4. To change the speed to 4.5 mph/kph, press QUICK SPEED, then 4, then 5. The Quick Speed keys adjust the speed in 0.
ALL MODELS CONTACT HEART RATE HAND PULSE HEART RATE SENSORS The Contact Hand Pulse Sensors are included on this Treadmill to monitor your heart rate. To use, grasp both of the sensors with a comfortable grip during your workout. The console will display your heart rate. Although your signal will be displayed immediately, it may take the system a few seconds to zero in on your actual heart rate. NOTE: For Heart Rate Training programs, you must use the chest transmitter. See Page 29.
P L AT F O R M CONSOLE HANDLEBARS SIDE RAILS MOTOR COVER RUNNING BELT LEVELERS TRANSPORT WHEELS 9 PREMIER P L AT F O R M T R E A D M I L L
PLATFORM TREADMILLS ONLY MOVING YOUR VISION FITNESS PLATFORM TREADMILL P L AT F O R M Your VISION FITNESS Treadmill has a pair of transport wheels built into the front legs. To move, firmly grasp the back end of the frame, carefully lift and roll. CAUTION: Our Treadmills are well-built and heavy, weighing up to 300 pounds! Use care and additional help if necessary. LEVELING Your Treadmill should be level for optimum use.
CONSOLE FOLDING HANDLEBARS SIDE RAILS RUNNING BELT MOTOR COVER TRANSPORT WHEELS 11 PREMIER FOLDING TREADMILL
FOLDING TREADMILLS ONLY TRANSPORT WHEEL LOCK FOLDING Your folding Treadmill comes with transport wheels on the front and back of the bottom frame that should be locked when the Treadmill is in use. Simply press down on the bottom latch with your foot on all four transport wheels. TRANSPORT WHEEL UNLOCK To move your Treadmill, you will need to unlock the transport wheels. With the Treadmill folded, simply press down the top latch with your foot on all four transport wheels.
FOLDING FOLDING To fold your Treadmill in the upright position, first make sure the Elevation is set to 0; if it is not, lower the Elevation to 0 (if you do not set the Elevation to 0 the Treadmill will not fold and lock). Next, make sure the four transport wheels are locked. Then, simply lift the back end of the Treadmill with both hands and push it up. The Treadmill has a built-in locking mechanism that will automatically engage and click into place when you reach a vertical point.
MOVING YOUR VISION FITNESS FOLDING TREADMILL FOLDING Your VISION FITNESS Treadmill has four transport wheels built into the rear frame. Make sure the transport wheels are unlocked before moving the treadmill. To move, fold the Treadmill into the upright position, firmly grasp the frame by the handlebars, then carefully roll. LEVELING The Treadmill should be level for optimum use. If the Treadmill is on an un-level surface, raise or lower one or both of the adjustable levelers located on the front frame.
PREMIER CONSOLE OVERVIEW D C B START PRESS FOR EASY START ELEVATION PREMIER A SPEED STOP HOLD TO RESET E F G A. Quick Elevation Key C. Number Keys E. Speed Arrows G. Start Key H B. Quick Speed Key D. Screen Keys F. Elevation Arrows H.
WELCOME SCREEN The welcome screen will take you through the log in process as a first time user or return user. The QUICK START function is also accessible from this screen. LOG IN AS A GUEST To log in as a GUEST select GUEST and enter your age and weight. SET USER AGE OR WEIGHT PREMIER To set user age use the number keys and select CONTINUE when finished.
LOG IN OPERATION Once you have selected LOG IN on the Welcome Screen press any key next to a User Profile Icon that is not filled in. From there enter a user name, set age and weight and you are set to go. To edit a User Profile select EDIT USER. ADDING USERS: ENTER NAME PREMIER To enter a user name select the blue scrolling arrows to highlight a letter. To choose that letter select ADD LETTER. Select DELETE LETTER to delete. When finished select CONTINUE to progress to the next screen.
BASIC NAVIGATION ATM STYLE KEYS The Premier console is set up like a ATM machine with function keys next to icons on the screen for modifying screen data. To select a function or modify screen data simply press the key next to the icon you wish to choose. RUN SCENES PREMIER There are 4 scenes available as backgrounds during any of the console programs. To scroll through the available screens select the ‘Camera’ icons to scroll forward or back.
TRACK Follow the colored dot around the quarter mile track and watch the laps count up during your workout. HEART RATE SCREEN Only available for HRT programs. The colored graph shows target and current heart rate as well as the percent of your maximum heart rate. PROFILE PREMIER View your workout as a bar graph where the purple bars indicate speed and the yellow flags elevation. At the bottom of the profile screen is the segment progress bar indicating time left for the current segment.
TRAINING CALENDAR To view your Training Calendar log in as yourself and press the key next to the Training Calendar. From there you can select daily, weekly or monthly stats. Any day, week or month with an activity will be a lighter shade of green on the calendar. DAILY STATS PREMIER To view daily stats select DAILY STATS then choose the day you would like to view by selecting NEXT DAY or PREVIOUS DAY and then selecting CONTINUE. Your stats for that day will be displayed on the screen.
MONTHLY STATS To view your stats for a given month select MONTHLY STATS then choose a month you would like to view by selecting NEXT MONTH or PREVIOUS MONTH and then selecting CONTINUE. Your stats for that month will be displayed on the screen. From this screen you may go to the next or previous month by selecting NEXT MONTH or PREVIOUS MONTH To get back to the calendar select BACK.
PROGRAM OVERVIEWS For all programs follow the instructions given on the display. For additional information select INFORMATION/HELP. SPRINT 8 Exclusive to Vision Fitness. This is an anaerobic workout that includes 8, 30 second sprint intervals followed by 90 second recovery intervals. The speed and elevation will change during the sprint intervals. Designed to burn fat, tone muscle, increase energy, and more! Choose from 17 different levels. See Page 31 for SPRINT 8 program details.
PLACES TO GO 5K/10K/15K PROGRAMS These consistent effort programs improve your cardiovascular fitness by simulating a 5K, 10K or 15K run with hills; no preset time with speed and elevation changes to keep intensity the same (i.e. elevation increases and speed decreases.
FITNESS TEST This program requires you to wear a heart rate transmitter. The program is a 5 minute test that will give you an evaluation based on age, gender, and heart rate.
GOAL PROGRAMS CALORIE GOAL Select the number of calories you would like to burn. The treadmill will keep going until you reach your goal. A cool down starts once the goal is achieved. DISTANCE GOAL PREMIER Select the Distance you would like to go. The treadmill will keep going until you reach your goal. A cool down starts once the goal is achieved. TIME GOAL Select the time you would like to workout. The treadmill will keep going until you reach your goal. A cool down starts once the goal is achieved.
HRT PROGRAMS HRT WEIGHT LOSS After a 3 minute warm up the treadmill will adjust the elevation to keep you at 65% of your maximum heart rate (+/– 3BPM). After the program time runs out there is a cool down. HRT CARDIO PREMIER After a 5 minute warm up the treadmill will adjust the elevation to maintain you at 80% of your maximum heart rate (+/– 3BPM). After the program time runs out there is a cool down.
HRT INTERVAL After a 5 minute warm up the treadmill will increase speed to your preset work interval rate for 1 minute. After the 1 minute interval the speed is reduced to 60% of your work interval rate. When your heart rate comes back down to your recovery target the next 1 minute interval will begin. This repeats for the duration of the program. After the time runs out there is a cool down. Default recovery heart rate is 70% of your maximum heart rate.
NOTES FOR YOUR HEART RATE TRAINING PROGRAM • If there is no heart rate detected, the Treadmill will not adjust speed or elevation. • If the heart rate detected is higher than the target zone by 10 BPM, the console will “beep” and the screen will display a warning message. • If the heart rate detected is higher than the target zone by 15 BPM, the console will “beep” and display a warning message. This process will repeat until heart rate has been reduced.
WIRELESS CHEST TRANSMITTER Prior to wearing the strap on your chest, moisten the two rubber contact pads with several drops of water and spread with your fingers. PREMIER TRANSMITTER STRAP PLACEMENT Center the Transmitter Strap just below the breast or pectoral muscles, directly over your sternum with the logo facing out. Adjust the elastic strap length to avoid bouncing or sliding.
TARGET HEART RATE PREMIER Target Heart Rate is a percentage of your maximum heart rate. Target Heart Rate will vary for each individual, depending on age, current level of conditioning, and personal fitness goals. Exercise heart rate should range from 55% to 85% of your maximum heart rate. As a point of reference, we use the predicted maximum heart rate formula of (220 minus age) to determine your heart rate training zone. Please use the following chart to determine your predicted Target Heart Rate.
USING THE SPRINT 8 PROGRAM The SPRINT 8 program is an anaerobic interval program designed to build muscle, improve speed, and naturally increase the release of Human Growth Hormone (HGH) in your body. Producing HGH through exercise and a proper diet has been shown as an effective way to burn fat and build lean muscle mass according to Phil Campbell, author of Ready, Set, Go! Synergy Fitness. Please go to Mr. Campbell’s website, www.readysetgofitness.
CUSTOM PROGRAM OPERATIONS PREMIER Set up your own course by programming time, speed, and elevation for each segment in a program. Once you are satisfied with your program select PROGRAM COMPLETE and then SAVE to save the program. An asterisk should appear next to the program icon to show the custom program is filled. To use your custom program select that program and go. Program up to 25 segments.
PREMIER CONSOLE AUDIO/VIDEO CAPABILITIES The Premier console has a port on its underside that contains RCA connectors for use with A/V equipment (DVD, CD, VCR, etc.). Simply remove the port cover by unscrewing the screw under the console to reveal the RCA connectors and plug in your A/V device and select the DVD function (3rd key down on the right side) while the treadmill is in use. Headphones can be plugged directly into the console face for sound. A B E C F D PREMIER KEY FUNCTIONS IN DVD MODE A.
USER ENGINEERING ENGINEERING MODE SCREEN To enter user engineering mode, press and hold the SPEED UP and SPEED DOWN arrows simultaneously. CONFIGURATION SCREEN From this screen you can adjust program defaults, check accumulated time, change the language or change the unit of measure. UNIT SELECTION GENERAL To change the unit of measure select MI or KM and check to see your desired unit of measure is displayed under UNITS and select BACK to return to the previous screen.
USER ENGINEERING (continued) SETTING PROGRAM DEFAULTS To set program defaults select the setting you would like to change, make the necessary change and select BACK to return to the previous screen. Continue selecting BACK to return to main user engineering screen. SETTING DATE/TIME GENERAL Select DATE/TIME when in the CONFIGURATION screen. Select the information that needs to be changed (YEAR, MONTH, DAY, HOUR, MIN, SECOND) and use the arrow keys to modify.
COMMON TREADMILL QUESTIONS Q: Are the sounds my Treadmill makes normal? A: All Treadmills make a certain type of thumping noise due to the belt riding over the rollers. This noise will diminish over time, although it might not totally go away. With use, the belt will stretch, causing the belt to ride more smoothly over the rollers. It might appear that one Treadmill is louder than another. There are many reasons for this and may not be due to a defect.
TROUBLESHOOTING YOUR TREADMILL Our Treadmills are designed to be reliable and easy to use. If, however, you have a problem, these troubleshooting steps may indicate the cause. PROBLEM: The console does not light up. SOLUTION: Check to make sure the Treadmill is connected to a functioning outlet and that the Treadmill is turned on. PROBLEM: The Treadmill’s built-in circuit breaker trips repeatedly, shutting off for no apparent reason.
TROUBLESHOOTING YOUR HEART RATE MONITOR CHEST STRAP PROBLEM: No pulse reading appears. SOLUTION: There may be a poor connection between the contact pads and skin; remoisten the electrode pads. SOLUTION: Transmitter is not properly positioned. Reposition the chest strap. SOLUTION: Verify that the distance between transmitter and receiver is not beyond the recommended range of 36 inches. PROBLEM: There is an erratic pulse rate. SOLUTION: Chest strap is too loose; readjust according to directions.
TENSIONING THE BELT If the running belt slips when used, use the supplied 8mm Allen wrench to turn the left and right tension bolts clockwise 1/4-turn at a time until the belt no longer slips. CENTERING THE BELT GENERAL Run the treadmill at 2.0 mph. If the running belt is too far to the right side, use the supplied 8mm Allen wrench to turn the right tension bolt clockwise 1/4-turn at a time until the belt remains centered during use.
PREVENTIVE MAINTENANCE Following are several tips on taking care of your VISION FITNESS Treadmill. The location of your Treadmill is important in maintaining it properly. Find a location that does not accumulate dust and dirt easily. A clean environment can help to prolong the life and improve the performance of your Treadmill. CLEANING TREADMILL IMPORTANT: Before cleaning, be sure to turn off and unplug the Treadmill. • After each use, wipe the perspiration off the console and Treadmill surfaces.
GENERAL 41
LIMITED HOME USE WARRANTY* VISION FITNESS extends the following exclusive, limited warranty, which shall apply only to the use of the device in the home, for residential, non-commercial purposes only. Any other use of the device shall void this warranty.
LIMITED HOME USE WARRANTY (continued) EXCLUSIVE REMEDY The exclusive remedy for any of the above warranties shall be repair or replacement of defective Parts, or the supply of Labor to cure any defect, provided that Labor shall be limited to one year. All Labor shall be supplied by the local Retailer who sold the Product and the Product must be located within that Retailer’s service area. Products located outside the Retailer’s service area will not be covered by the Labor warranty.
DEVELOPING A FITNESS PROGRAM By purchasing this piece of VISION FITNESS exercise equipment, you have made a commitment to exercise and now have the convenience of exercising in your own home. Your new equipment offers the flexibility to exercise at whatever time suits you best. It will be easier to maintain a consistent exercise program that will help you achieve your fitness goals.
EXERCISE GUIDELINES WARM-UP A warm-up activity should be a progressive aerobic activity that utilizes the muscles you will be using during the workout. There is no set warm-up intensity. A typical warm-up will produce a small amount of perspiration, but not leave you feeling fatigued. Intensity and fitness level will affect the duration of your warm-up, but 5-10 minutes is usually recommended.
BALANCED FITNESS While cardiovascular exercise has been the primary method of fitness for many programs over the years, it should not be the only method. Strength Training and Flexibility Training have become more popular as exercise has developed.
STRETCHING Flexibility Training is not associated with fitness as often as cardiovascular exercise or Strength Training, even though it is just as important. A good stretching program will help to maintain flexibility of the hips and lower back. A flexible person will be less likely to injure themselves in common activities, such as reaching, twisting and turning, or in uncommon activities such as the annual softball tournament.
STANDING QUADRICEPS STRETCH Using a wall to provide balance, grasp your left ankle with your left hand and hold to stretch. Your knee should be pointing toward the floor. Hold the stretch for 15 to 30 seconds. Repeat with your right leg, and continue to alternate as necessary. STANDING CALF STRETCH GENERAL Standing about three to four feet from the wall, take one step forward with your right foot. Place your hands on the wall in front of you.
GENERAL 49
50 GENERAL
GENERAL 51
52 GENERAL
GENERAL 53
54 GENERAL
customizable reliable simple it all starts with a vision 500 South CP Avenue • P.O. Box 280 • Lake Mills, WI 53551 toll free 800.335.4348 • phone 920.648.4090 • fax 920.648.3373 www.visionfitness.com ©2008 Vision Fitness. All Rights Reserved. Advanced Smart-Matrix, Cambridge Motor Works, Cool-Weave, HRT, Smart-Matrix, and SPRINT 8 are Trademarks of Vision Fitness. May be covered by one or more patents or patents pending: US 6273843, US 7104930, TW 586429, CN 03206094.7 9.08 OM18.