
User manual


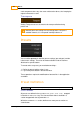


Brightness Regions
211
© 2014 Digital Vision
UM-2014.1-07
Printer Lights
Printer Lights are named after the laboratory process of filtering light during
the film printing process, to control the colour of the film.
The numeric values displayed in the GUI and on the panels can be calibrated
in the Preferences pages, so that they match a local film lab. The number of
points per f-stop can also be calibrated.
On the panel, the top menu knobs adjust red green and blue Printer Lights
when the Color panel is set to Balance, Color Curves or Brightness Regions
and the right hand menu selection is button 1, labeled All.
Printer Lights affect all pixels and produce a very clean correction.
They are ideal for balancing raw images, log files or flat transfers.
They are also a good way to remove color casts and adjust color
temperature offsets.
Density
Density is Printer Lights ganged together and a density reset makes each of
the RGB Printer Light values neutral. Density works the same as the
Brightness tool in Brightness/ Contrast and is also known as offset in some
other systems.
Although Density and Brightness behave the same, they are in fact
different controls and occur at different stages of the processing path
within a layer. They can be used independently of each other,
although Brightness is used less frequently because it does not
appear on the control panels. See S Gamma to learn more about
Contrast.
This control affects all pixels equally, regardless of luminance, color or
position. Its affect is similar to camera exposure and it is useful for adjusting
the source image dynamic range to a pleasing level. Since it does not
squeeze or stretch the dynamic range it causes no artifacts and is a great
control to start grading raw or flat scanned images.
Some use Density to set black levels and others to use it to assign the mid
range. Both methods are correct.