
User manual


Phantom Help File276
© 2010 Vision Research - An AMETEK Company
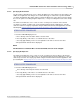
6.2.2.1 Specifying the Trigger (Post Trigger Value) Point
The Trigger Point, or Post Trigger Value), sets the number of images to be saved after a trigger has
been detected. Setting the number of post trigger images also determines the reciprocal number of
pre-trigger images saved.
STEP-BY-STEP PROCEDURE
1.
From the LIVE PRE Display Screen:
a.
Press approximately 1/4 the screen height below the right edge of the Memory Buffer Graphical
Representation Bar to move the Trigger Point to the right.
b.
Continue until the desired trigger position is achieved.
c.
Press approximately 1/4 the screen height below the left edge of the Memory Buffer Graphical
Representation Bar to move the Trigger Point to the left.
d.
Continue until the desired trigger position is achieved.
NOTE
Placing the Trigger Point to the right edge of the Memory Buffer Graphical Representation Bar
the camera will stop recording process the moment the camera is triggered, thereby only pre-
triggered frames will be recorded.
Placing the Trigger Point to the left edge of the Memory Buffer Graphical Representation Bar
the camera fills the memory buffer with Post Trigger frames, images the camera capture after
the camera is triggered, only. In other words, the trigger starts the recording. The camera will
stop recording images once the memory buffer is completely filled.
Placing the Trigger Point anywhere on the Memory Buffer Graphical Representation Bar,
except for the right or left edges, records both pre-trigger and post trigger fames.
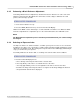
6.2.2.2 Specifying the Sample Rate
The Sample Rate specifies the rate at which images are to be recorded. The Sample rate is
depended upon the defined Resolution (width x height) of the images being captured.
The LCD screen allows the user to select one of the several preset sample rates. If the desired frame
rate is not listed, you will need to use the Phantom Camera Control application to enter the desired
sample rate. For step-by-step details using the Phantom Camera Control application, click the
following link: Step-by-Step Processes>Live Control Panel Procedures>Define the Sample Rate.
To set high sample rates reduce the selected Resolution (width x height).
STEP-BY-STEP PROCEDURE
1.
From the LIVE PRE Display Screen:
a.
Press directly on the Sample Rate field to select the field.
b.
Pressing directly on the value a second time increases the value.
c.
Pressing approximately 1/3 the screen height above the value to decrease the value.
d.
Repeat until the desired value is displayed.