
User manual


Phantom Help File212
© 2010 Vision Research - An AMETEK Company
4.2.6.2 Select the Playback Mode
The Mode button, under the Play Control Panel Tab is used to specify how the cine file is to be
reviewed. Below are the steps to define the playback mode:
STEP-BY-STEP PROCEDURE
1.
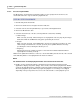
Click the Play Control Panel Tab.
2.
Click on the down-arrow to the right of the Cine: field, then
3.
Select the cine file, from the pull-down list, to open it in its own Playback Panel.
4.
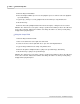
Click on the Mode button, then
5.
Select the desired mode, or modes, from the pull-down selection list, including:
a.
Limit to Range
When selected, (checked), Limit to Range forces the playback controls to play only the images
between the Mark-In and Mark-Out entry points specified by the end-user.
b.
Repeat
When selected, (checked), repeat will allow the cine file to be played in an endless loop. If the
Limit to Range command is also selected, (checked), the loop will be limited to the range
specified by the end-user during the edit cine process.
c.
Ping Pong
Ping Pong instructs the software to play the selected cine file forward and then backward
repeatedly when enabled, (checked).
RESULT: The pull-down list will close. However, a check mark will be placed to the left of the selected
mode indicating that the selected playback mode has been enabled.
NOTE
The software allows for multiple playback modes to be selected at the same time.
6.
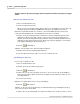
Enable, (check), the Play Each Image command to instruct the Phantom Camera Control
application to display every frame, (image), in the cine file, and restrict the playback rate. Disable,
(uncheck) the Play Each Image command to instruct the Phantom Camera Control application to
allow faster playback speeds, which may require the playback of some images to be skipped
depending on the speed specified. You can use the vertical slider to set the playback speed.