
User manual


Phantom Camera Control Application - Help 205
© 2010 Vision Research - An AMETEK Company
4.2.5.7 Define the Continuous Recording Parameters
This topic describes the Step-by-Step procedure to define the use of Continuous Recording via the
Continuous Recording selector.
STEP-BY-STEP PROCEDURES
Auto Trigger
When the Auto Trigger option is enabled the system will automatically save the capture cine to the
specified destination, (Cine file path and save parameters). Once the cine is saved the camera will
automatically return to the capture mode, refill the camera's memory buffer then automatically
triggers itself, edit and save the new cine to the user specified destination. This process will continue
until you disable, (uncheck), the Active enable box.
CAUTION
Before using Continuous Recording you must first set all desired operating parameters in
the Live Control Panel.
1.
Click the Live Control Panel Tab.
2.
Click on the Continuous Recording Selector and define the Continuous Recording
parameters:
a.
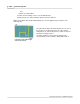
Click on the Browse... button.
RESULT: The Save Cine dialogue window opens.
b.
In the Save Cine dialogue window:
1)
Navigate to the Window folder the recorded cines are to be saved into.
2)
In the File Name field type in the
<root_file_name><special_character><single_digit_range>, where <root_file_name> is
the root filename portion of the file or file being created. This root file name portion of
the filename will remain the consistent with all files created during the Continuous
Recording session. The <special character> portion of the filename is determined by
the type of file or files being created. The <single_digit_range> portion of the file name
specifies the number of digits or file counters that will be appended to the end of the
root file name.
For details on the Phantom File Naming Convention see; Functional
Descriptions>Phantom File Naming Convention.
3)
Select the desired file type from Save As Type drop-down list. It is possible to save the
captured images in any of the available formats found in the Save as type pull-down
selection list. This includes saving the captured images in various Cine formats, an
AVI, Multipage TIFF, MXF, or QuickTime format, or even a series of any one of a host
of image formats.
To determine the file format that best meets your requirements see, Functional
Descriptions>Supported File Formats.
4)
Specify which images will constitute the saved file by defining the Range of Images to
Save fields:
a)
If you do not wish to edit the file, check, (enable), the No Range (full cine always)
enable box.
b)
If you wish to edit the number of images, eliminating unwanted captured images