
User manual


Phantom Camera Control Application - Help 169
© 2010 Vision Research - An AMETEK Company
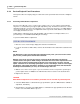
4.2.5 Live Control Panel Procedures
This section describes the Step-by-Step procedures that can be performed via the Live Control Panel.
4.2.5.1 Camera Settings
This topic describes the Step-by-Step procedures that can be performed Camera Settings selector.
4.2.5.1.1 Synchronize or Set the Internal Clock of a Phantom Camera
STEP-BY-STEP PROCEDURE
Synchronize Time Stamp Clock Procedure
1.
Click the Live Control Panel Tab.
2.
Click on Camera Settings.
3.
Click the Set button.
4.
Click the Update and Set button to synchronize the Current Camera Time with the Computer
Time in the Set Camera Time dialogue window.
5.
Click the Close button to close the Set Camera Time dialogue window.
RESULT: The Current Camera Time and the Computer Time are identical, synchronized.
Set Time Stamp Clock Procedure
1.
Click the Live Control Panel Tab.
2.
Click on Camera Settings.
3.
Click the Set button.
4.
In the Set Camera Time dialogue window:
a.
Click the down-arrow to the right of the New Camera Time entry window, then
b.
Navigate to, and select the desired date from the pop-up calendar window.
c.
Use the up/down arrows next to the Time entry window, then
d.
Select the desired time.
e.
Click the Set button to temporarily adjust the time stamp clock to the date and time
specified.
5.
Click the Close button to close the Set Camera Time dialogue window.
RESULT: The Current Camera Time adjusts to the date and time specified.