Smar tDup MODEL VP-8220 Installation Manual
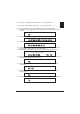
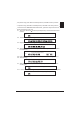
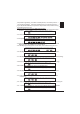
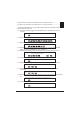
Table of Contents SmartDup VP - 8220 Package ............................................................1 SmartDup VP - 8220 Feature s............................................................1 Install Steps ....................................................................................1 Operation Steps H1 (Upgrade firm-ware) ............. .... ........................................................2 H2 (1xCopy) ......................................................................................
SmartDup VP-8220 Operation Manu SmartDup VP-8220 Package Including: 1. Duplicator Converter. 2. CD-ROM Box (VP-6020) x 2 3. AC/DC Power Adaptor (Universal Type +90 ~ +250VAC) Features: 1. One to one Stand-Alone IDE CD Duplicator. 2. Auto duplication & Easy operation without any push bottom. 3. Fastest CD Duplicator up to 24x speed (ViPowER is the only factory that manufactures it today!) 4. Auto Detects CD-R or CD-RW media's acceptable maximum writing speed and minimum writing time. 5.
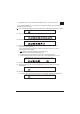
H1 (Upgrade firm-ware): DIP SW 3 4 at ON position, 1 2 at OFF position--If you adjust DIP SW to L1, all operation step same as above, the Recording Speed will drop to 4x only. 1 1. Turn Rock Switch to position (CD Duplicator). LED will show version number. Power-On: display firmware version number. (Buzzer 0.5s X1) ex: 1-2. Than LED display showing: from 00,11, 22, 33, ......88, 99 1-3. Duplicator will chk itself & get ready. Self-Test: Only one segment is running and display "rd" (ready) 1-4.
H2(1xCopy) DIP SW 2 4 at ON position, 1 3 at OFF position --------------- L2(1xCopy) DIP SW 2 at ON position, 1 3 4 at OFF position ---------------- 1xCopy Speed (H2 or L2) or CD-RW writer minimum writing speed. 2-1. Turn Rock Switch to position (CD Duplicator). LED will show version number. Power-On: display firmware version number. (Buzzer 0.5s X1) ex: 2-2. Than LED display showing: from 00,11, 22, 33, ......88, 99 2-3. Duplicator will chk itself & get ready.
H3 (Erase Only): DIP SW 2 3 4 at ON position, DIP SW 1 at OFF position -L3 (Erase Only): DIP SW 2 3 at ON position, DIP SW 1 4 at OFF position --This function for RW Media with Data inside, operation steps same as H3, Erase speed drop to 4x only. 3-1. Turn Rock Switch to position (CD Duplicator). LED will show version number. Power-On: display firmware version number. (Buzzer 0.5s X1) ex: 3-2. Than LED display showing: from 00,11, 22, 33, ......88, 99 3-3. Duplicator will chk itself & get ready.
H4(Test & Copy Mode) DIP SW 1 4 at ON position, 2 3 at OFF position ----- L4(Test & Copy Mode) DIP SW 1 at ON position, 2 3 4 at OFF position----I f you adjust DIP SW to L4, all operation steps same as H4, the Recording Speed will drop to 4x only. Please make sure CD-R or CD-RW media is blank. 4-1.Turn Rock Switch to position (CD Duplicator). LED will show version number. Power-On: display firmware version number. (Buzzer 0.5s X1) ex: 4-2. Than LED display showing: from 00,11, 22, 33, ......88, 99 4-3.
H5 (Test Only): DIP SW 1 3 4 at ON position, 2 at OFF position -------------L5 (Test Only): DIP SW 1 3 at ON position, 2 4 at OFF position--------------If you adjust DIP SW to L5, all operation steps same as H5, the Recording Speed will drop to 4x only. 5-1. Turn Rock Switch to position (CD Duplicator). LED will show version number. Power-On: display firmware version number. (Buzzer 0.5s X1) ex: 5-2. Than LED display showing: from 00,11, 22, 33, ......88, 99 5-3. Duplicator will chk itself & get ready.
H6 (Copy Only): DIP SW 1 2 4 at ON position, 3 at OFF position ------------L6 (Copy Only): DIP SW 1 2 at ON position, 3 4 at OFF position -------------If you adjust DIP SW to L6, all operation steps same as H6, the Recording Speed will drop to 4x only. 6-1. Turn Rock Switch to position (CD Duplicator). LED will show version number. Power-On: display firmware version number. (Buzzer 0.5s X1) ex: 6-2. Than LED display showing: from 00,11, 22, 33, ......88, 99 6-3. Duplicator will chk itself & get ready.
H7(High Speed Auto Mode) : DIP SW always at ON position -----------------L7(Low Speed Auto Mode) : DIP SW 1 2 3 at ON position, 4 at OFF position If you adjust DIP SW to L7, all operation steps same as H7, the Recording Speed will drop to 4x only. 7-1. Turn Rock Switch to position (CD Duplicator). LED will show version number. Power-On: display firmware version number. (Buzzer 0.5s X1) ex: 7-2. Than LED display showing: from 00,11, 22, 33, ......88, 99 7-3. Duplicator will chk itself & get ready.
SmartDup VP-8220 Optional interface: 1. VP-9006 : PCMCIA to IDE cable with 36 pin connector. 2. VP-9007 : CardBus to IDE cable with 36 pin connector. 3. VP-9008 : USB 1.1 to IDE cable with 36 pin connector. 4. VP-9009 : FireWire IEEE 1394 to IDE cable with 36 pin connector. 5. VP-9208 : USB 2.0 to IDE cable with 36 pin connector. Features: 1. External CD-RW writer. 2. Back Up your own Data/ Audio/ Video from HDD/ MO/ LS120/ ZIP...
Install Steps: 1. Install CD-RW Writer & CD-ROM Driver in each CD-ROM box. Must put rubber stand on each CD-ROM box. 2. CD-ROM Driver on top & CDR or CD-RW Writer on the bottom. 3. Plug in Duplicator Converter in both CD-ROM box connectors. 4. Plug in Power Cable in Duplicator Converter. 5. Plug in Power Cord to AC Power source (+90 ~ +250VAC). 6. 36 pin IDE cable connect between SmartDup & your PC or Note Book interface port. 7. Turn your Power switch to (PC interface), LED Display will blinking. 8.
How to Up-Grade CD-ROM F irm-Ware If you wish get best performance on your SmartDup. 1. Please visit ViPowER web-site www.vipower.com to check CD-ROM Brand/ Model number & Firm-Ware Version Number. 2. ViPowER Inc.
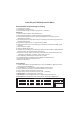
8. You can ask your retail store to purchase any brand of CD-ROM driver, which ViPowER supply or recommend. 9. CD-ROM Compatibility List CD-RW ACER 52x Afreey 52x AOpen 52x ASUS 52x LITEON 52x TEAC 40x 8x x x x x x x 12x x x x x x x 16x x x x x x x x x x x x 20x 24x x Acer CD-ROM Model Number: CD-652P Version: ?? AOpen CD-ROM Model Number: CD-952E/TKU Version: C41 Asus CD-ROM Model Number: CD-S 950/A Version: 1.