
Installation Sheet

4
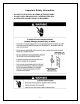
cooling unit must intake adequate fresh ambient-air to work properly. The
ambient-air intake and hot-air exhaust must not be short-circulated. A piece of
wood may be used to separate them.
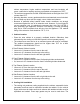
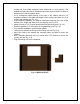
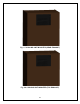
• Cut a rectangular inside opening at the rear of the cabinet with the 1/4”
clearance inwards to the width and height of the cooling unit. Make a 1/2” lip
to place the gaskets (see Fig. 2.1).
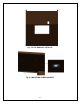
• If top exhaust installation, cut another rectangular opening at the top of the
cabinet to the length and width of the top exhaust (see Fig. 2.2).
• Install 2 pieces of 1/4” ID wood thread inserts at the ceiling (see Fig. 2.3).
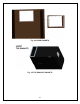
• Place the gaskets (1/2” foam tape) on the gasket lips (see Fig. 2.4).
• If top exhaust installation, place another gasket
• along the top exhaust at the top of the cooling unit (see Fig. 2.5).
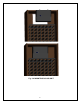
• Move the cooling unit towards the mounting sides and push to press the
gaskets.
• Use 2 mounting brackets and 1/4” screws with 7/16” wrench to secure the
cooling unit (see Fig. 2.6).
• Plug the cooling unit in the receptacle.
.
Fig. 2.1 REAR CUTOUT