
User Guide

Viega... The global leader in plumbing and heating systems.
301 N. Main, 9th Floor • Wichita, KS 67202 • Ph: 877-843-4262 • Fax: 800-976-9817 • E-Mail: service@viega.com • www.viega.com
PI-PR-18050-0309 (Digital Thermostat)
Product Instructions
Digital Thermostat
3 of 4
Program
Codes
Defaults and Options
JO °F or °C temperature display setting
J1 "Hot" or "Cold", Select "Hot" for heating system
Cy* Proportional integral regulation time cycle value in minutes (default: 15 min. for radiant heat)
bp* Value of the proportional band (default: 3.6°F differential from setpoint)
J4
Normally Closed (NC) or Normally Open (NO). Viega Actuators (powerheads) are NC type.
J5
Select "No" or "Pmp". "Pmp" to perform a 1 minute system exercise everyday-if system is inactive in previous 24
hours.
J6
"Air" senses room air temperature, or room temperature & oor limitation if sensor is connected. "FLR" oor
temperature without limitation. "AF" room sensor & oor sensor without limitation.
J7* "rEG" (Proportional band)* or "HYs" (0.3°K Hysteresis) regulation type setting
Cp* Compensation value in ° C or ° F (default: 2.0°C, 3.6°F)
Ao Calibrate thermostat, adjust value to match thermostat to actual room (default: no of
fset)*
Fo Calibrate oor sensor (default: no offset)*
FL Floor temperature LOW limitation (default: 41°F) effective only if oor sensor is connected
FH Floor temperature HIGH limitation (default: 82°F) effective only if oor sensor is connected
CLr Press "OK" button for 5 continuous seconds to restore default settings
End Press "OK" button to exit the programming mode and return to user display
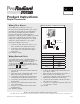
Programming
To program the Viega Digital Thermostat, press the "OK" button for 5 continuous seconds until the END
screen appears. Use the "
+
" or "-" buttons to scroll through the settings. The programming codes are
in the upper right corner of the LCD screen. To adjust any of the default settings press the "OK" button.
The screen will blink. Then use the "
+
" or "-" buttons to make desired changes. If there are only two
options for the programming code, pressing the "OK" button will cycle through them. If there are multiple
programming options like high limit oor temp (FH), press "OK" button to select, then "
+
" or "-" buttons to
adjust. Once changes are made, press the "OK" button then continue using the "
+
" or "-" to scroll through
additional programming options. See chart below.
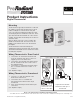
Operating Mode
Use the "OK" button to scroll through the four Operating Modes
OFF Mode - No power for thermostat.
Screen is blank.
Comfort Mode - Standard, adjust using "
+
"
or "-" buttons for desired room temperature
Reduced Temperature Mode - Thermostat
automatically sets back room temperature by 7°
External Clock Mode - Thermostat will follow
external clock signal
* Leave as factory defaults