
Call Recorder Pico - User Manual

Call Recorder Pico Manual UK © 2009 Vidicode
11
After connecting the Pico to the telephone line or microphone, it can be
connected to the PC.
2.4 Connect the Pico to the PC
Once the Pico is connected to the telephone it can be connected to the
computer using the USB cable.
2.4.1 Connecting the first Call Recorder Pico
The Pico can be connected to any free USB port or to a USB hub. If
connected to a hub, this hub should have an external power supply.
For Windows, 2000, XP and Vista the Pico will show up in the device list
after a couple of seconds.
Warning
WarningWarning
Warning: Installing the Pico will make it the preferred sound device of
your computer. If you have a soundcard in your system and you use it for
other applications it is advised to restore your original sound device as
preferred device. To restore your original sound device (your soundcard)
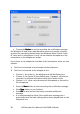
as preferred, please follow these instructions:
• Click "Start" and select the Control Panel.
• Select "Multimedia" or "Sound and Multimedia"
• Select the Audio tab-page.
• Now select your preferred device for playback.
2.5 Software installation
Place the CD-ROM in your computer and the software installation starts
automatically. If the installation is not started automatically, locate the
file ‘CRPicoInstaller.exe’ on the CD and start it by double-clicking. Follow
the instructions on the screen.
• Select your preferred language for the installation.
• You are prompted to accept the software license agreement.
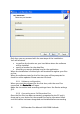
• Now enter the user details and the installation key provided with
your product