
User's Manual
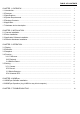
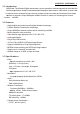
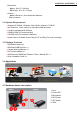

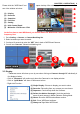
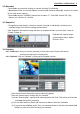
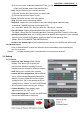
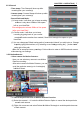
Table Of Contents

CHAPTER 3. OPERATION | 4
Please click the “WiDiGuard” icon on your desktop. After starting application, you can
see video window as below:
(1) Display
(2) Recorder
(3) Snapshot
(4) Function
(5) Setting
(6) Hide Control Panel
(7) Minimaize / Full Screen / Exit
At the first time to start WiDiGuard, you should match the WiDiGuard Camera and USB receiver
frequency first.
1. Go to
Setting -> Camera -> Camera Matching Set
.
2. Select a camera you want to match.
3. You have 10 seconds to poke the “
SET
” hole in back of WiDiGuard Camera.
4. You will see “
Success
” showed on Matching Info.
3.1 Display
- The camera screen will show up one by one when clicking on “Camera I through IV” individually in
four display window.
- Click on “Sequence” will continuously show the Cameras in one display window.
- Click on “Quad Mode” will show 4 Cameras at a time.
- Right-click Function :
(1) Single Display: Choose to display you want to show.
(2) Recorder: Recording from any camera you are choose.
(3) Sequence: Continuously show the Cameras.
(4) Delete One Motion Rectangle: Undo the particular
areas of each camera in Motion Detector Setting Mode.
(5) About: Show the WiDiGuard software version.
(6) Exit: Close WiDiGuard software.
(7) Always on Top: Make WiDiGuard