
Manual


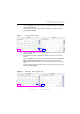


Table Of Contents
- SmartOTDR Mainframe
- Table of Contents
- About This Guide
- Chapter 1 Safety information
- Chapter 2 Introducing the SmartOTDR
- Chapter 3 Starting up
- Chapter 4 Setting-up the SmartOTDR
- Chapter 5 Optical options
- Chapter 6 Microscope application
- Chapter 7 Connectivity
- Establishing connection
- Remote Control
- Smart Access Anywhere
- Connection modes
- Pre-requisite for using the Smart Access Anywhere Application
- Downloading the VIAVI application on PC
- Downloading the VIAVI application on Tablet/ Smartphone
- Launching the SmartAccess Anywhere application
- Using Remote screen and File Transfer applications
- Working with files and directories on SmartOTDR
- Connection information and settings
- Data Transfer
- VNC
- Smart Access Anywhere
- Stratasync
- Chapter 8 File management
- Chapter 9 Technical specifications
- Chapter 10 Options and accessories
- Chapter 11 Maintenance and Troubleshooting
- Maintenance procedure
- Recycling Information
- Troubleshooting
- General information on warranty
- Index

Chapter 6 Microscope application
Using the microscope
User Manual 7SMART102 Rev006 43
2 Touch the Magnify softkey to toggle between low and high magnification image
views.
3 Touch an image to select it.
A yellow outline will appear around the selected image.
4 Touch the Full softkey to return to a single-image, full screen view.
5 Touch Test or Setup softkeys if the Live (top left) image is selected.
6 Touch the Save or Comment softkeys if a non-live image is selected.
Accessing online help
1 Touch the Help softkey located on several setup screens to find a link
and QR code for online help.
Online help includes videos, posters, and product information.
Figure 32 Mo
saic mode