
Manual


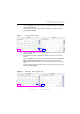


Table Of Contents
- SmartOTDR Mainframe
- Table of Contents
- About This Guide
- Chapter 1 Safety information
- Chapter 2 Introducing the SmartOTDR
- Chapter 3 Starting up
- Chapter 4 Setting-up the SmartOTDR
- Chapter 5 Optical options
- Chapter 6 Microscope application
- Chapter 7 Connectivity
- Establishing connection
- Remote Control
- Smart Access Anywhere
- Connection modes
- Pre-requisite for using the Smart Access Anywhere Application
- Downloading the VIAVI application on PC
- Downloading the VIAVI application on Tablet/ Smartphone
- Launching the SmartAccess Anywhere application
- Using Remote screen and File Transfer applications
- Working with files and directories on SmartOTDR
- Connection information and settings
- Data Transfer
- VNC
- Smart Access Anywhere
- Stratasync
- Chapter 8 File management
- Chapter 9 Technical specifications
- Chapter 10 Options and accessories
- Chapter 11 Maintenance and Troubleshooting
- Maintenance procedure
- Recycling Information
- Troubleshooting
- General information on warranty
- Index

Chapter 6 Microscope application
Configuring the microscope
38 User Manual 7SMART102 Rev006
6 Touch the Logo setup icon to add a custom logo to test reports
a Copy
a logo file in JPG format to a USB flash drive.
b Plug the USB drive into the instrument.
c Navigate to the USB drive.
d Select the logo file.
e Touch Load.
7 T
ouch the Auto Save dropdown box to automatically save a test result:
Yes Always: test result always saved.
Yes on Pass: test result saved only if the test result is a Pass.
No: automatic saving is disabled.
8 Touch Report As file formats to define how test results are saved:
Format options: JPG (default), PDF, JSON.
More than one format may be selected.
Tip and Profile Management
1 Touch the setup icon next to Tip Setting to manage tip settings.
2 Touch the check boxes next to the tip setting name to define what settings will
appear in the Tip Setting dropdown box.
3 Touch Apply.
Figure 26 Man
age tips