
Manual


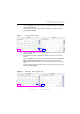


Table Of Contents
- SmartOTDR Mainframe
- Table of Contents
- About This Guide
- Chapter 1 Safety information
- Chapter 2 Introducing the SmartOTDR
- Chapter 3 Starting up
- Chapter 4 Setting-up the SmartOTDR
- Chapter 5 Optical options
- Chapter 6 Microscope application
- Chapter 7 Connectivity
- Establishing connection
- Remote Control
- Smart Access Anywhere
- Connection modes
- Pre-requisite for using the Smart Access Anywhere Application
- Downloading the VIAVI application on PC
- Downloading the VIAVI application on Tablet/ Smartphone
- Launching the SmartAccess Anywhere application
- Using Remote screen and File Transfer applications
- Working with files and directories on SmartOTDR
- Connection information and settings
- Data Transfer
- VNC
- Smart Access Anywhere
- Stratasync
- Chapter 8 File management
- Chapter 9 Technical specifications
- Chapter 10 Options and accessories
- Chapter 11 Maintenance and Troubleshooting
- Maintenance procedure
- Recycling Information
- Troubleshooting
- General information on warranty
- Index

Chapter 6 Microscope application
Configuring the microscope
User Manual 7SMART102 Rev006 35
4 Touch the Fiber Id setup icon to change the name used to identify the fiber under
test.
An alphanumeric keypad is displayed to facilitate creation of a new name
5 Touch the Fiber Number setup icon to change the number used to identify the
fiber under test.
An numeric keypad is displayed to facilitate changing the fiber number.
6 Touch the Change Fiber Nbr to enable automatic fiber number updating:
No: the fiber number is not updated automatically.
Increment: the fiber number is automatically incremented by 1 after saving a test
result.
Decrement: the fiber number is automatically decremented by 1 after saving a
test result.
User Defined: the fiber number is automatically updated as defined by the user.
A setup field appears when User Defined is selected.
Touching the setup icon opens a keypad where the update value is entered.
A minus sign ("-") before the value indicates automated decrementing, whereas
no sign indicates automated incrementing by the value entered.
7 Touch the Cable Id set up icon to change the name used to identify the cable
under test.
A combination of Cable Id, Fiber Id, and Fiber Number is typically sufficient to
uniquely identify the fiber under test.
8 Touch the Direction dropdown box to identify the direction from which the test is
performed:
A -> B: from the origin to the extremity.
B -> A: from the extremity to the origin.
9 Touch the Location A setup icon to change the name of location A (origin).
10 Touch the Location B setup icon to change the name of location B (extremity).
11 Touch the Company setup icon to change the name of the company performing
the test.
12 Touch the Technician ID icon to change the name of the individual performing
the test.
13 Touch the Job ID icon to change the name of the job used to identify a group of
tests.
14 Touch the Contractor ID to change the name of the contractor performing the
test.
These descriptors are listed in the header of a PDF report when a test result is
saved.