
Manual


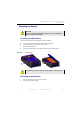


Table Of Contents
- SmartOTDR Mainframe
- Table of Contents
- About This Guide
- Chapter 1 Safety information
- Chapter 2 Introducing the SmartOTDR
- Chapter 3 Starting up
- Chapter 4 Setting-up the SmartOTDR
- Chapter 5 Optical options
- Chapter 6 Microscope application
- Chapter 7 Connectivity
- Establishing connection
- Remote Control
- Smart Access Anywhere
- Connection modes
- Pre-requisite for using the Smart Access Anywhere Application
- Downloading the VIAVI application on PC
- Downloading the VIAVI application on Tablet/ Smartphone
- Launching the SmartAccess Anywhere application
- Using Remote screen and File Transfer applications
- Working with files and directories on SmartOTDR
- Connection information and settings
- Data Transfer
- VNC
- Smart Access Anywhere
- Stratasync
- Chapter 8 File management
- Chapter 9 Technical specifications
- Chapter 10 Options and accessories
- Chapter 11 Maintenance and Troubleshooting
- Maintenance procedure
- Recycling Information
- Troubleshooting
- General information on warranty
- Index

Chapter 11 Maintenance and Troubleshooting
Troubleshooting
128 User Manual 7SMART102 Rev006
Touchscreen calibration («Autotune» process for
capacitive touchscreen)
In case of problem with the capacitive touchscreen of your SmartOTDR, an «Autotune»
can be performed:
From the Home page:
1 Press Settings icon top open the System Settings screen
or
If the use of the touchscreen is not possible, press simultaneously
the up and down arrow keys on the Platform to open the System
Settings screen.
2 Press again the up and down arrow keys simultaneously.
A dialog box displays, asking if you wish to perform an Autotune.
3 Press Confirm to start Autotune process.
A dialog box displays during the process.
Once the dialog box is closed, the Autotune process is completed, and the screen
is calibrated.
Figure 86 Autotune process
NOTE
Do not touch the product during the Autotune process!