
Manual

8 QUICK START GUIDE
Operation CHAPTER 3
1. From the Live Inspection View, press and hold the Autofocus/Inspection
Trigger. This will focus the ber automatically, then perform PASS/FAIL
analysis. (To focus the ber manually instead, adjust the Manual Focus/
Navigation Control until the Focus Quality Meter turns yellow or green. Then,
press the Action Button to perform PASS/FAIL analysis.)
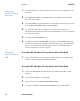
2. FiberChek will briey display the analysis result, then enter the Analysis
Result View. A green screen with a "check" graphic indicates a PASS result. A
red screen wtih an "X" graphic indicates a FAIL result. To perform additional
actions from the Analysis Result View:
• Tap the Touchscreen Display to display or hide additional information.
The modes are No Overlay, Rings, and Rings + Table.
• Press the Magnication/Return Button to toggle between High
Magnication and Low Magnication of the ber.
• Press the Action Button to save the current analysis to FiberChek's
storage or current group. (See "Working with Groups.")
• Press the Autofocus/Inspection Trigger to return to the Live Inspection
View.
Performing PASS/
FAIL Analysis:
Working with Groups
You may nd it useful to collect several analysis results or still images into a group.
Saving completed PASS/FAIL analyses into a group makes it easy to keep track of
analyses from the same job. To begin adding analyses or images to a group:
1. From the Live Inspection View, tap the Touchscreen Display to enter the
Menu.
2. Select CREATE NEW GROUP using the Manual Focus/Navigation Control, then
press the Action Button.
3. Return to the Live Inspection View by pressing the Autofocus/Inspection
Trigger once, or by pressing the Magnication/Return Button twice. You
may begin perfoming PASS/FAIL analysis as usual. (See "Performing PASS/FAIL
Analysis.") Saving an analysis result will add it to the current group.
Creating a New
Group: