
Programming instructions


VEXnet Joystick Conguration in ROBOTC
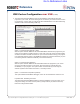
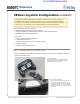
You will need:
• 1 VEXnet Joystick with 6 AAA Batteries
• 1 Small Phillips Screwdriver
• A computer with ROBOTC for Cortex and PIC installed
• 1 USB A-to-A Cable
• 1 USB-to-Serial Programming Cable
The VEXnet Joystick enables more than just the remote control of your robot. It also
provides the wireless communication link between your computer and the VEX Cortex,
enablingyoutowirelesslydownloadrmware,programsandruntheROBOTCdebugger.In
thisdocument,youwilllearnhowtocongureVEXnetJoystickusingROBOTC.
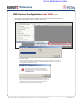
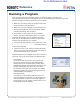
1. Begin by installing 6 AAA batteries in the VEXnet Joystick. You will need a small Phillips screwdriver
to remove the battery cover.
1a. Install 6 AAA Batteries
Remove the battery cover using a small Phillips
screwdriver and install 6 AAA batteries, being
careful to align them as indicated.
This document is broken into 3 sections:
1. Downloading Firmware to the VEXnet Joystick
2. Creating a Wireless Link Between the VEXnet Joystick and VEX Cortex
3. Calibrating the VEXnet Joystick Values
Section 1: Downloading Firmware to the VEXnet Joystick
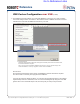
1b. Verify Correct Installation
Turn the VEXnet Joystick ON to verify that
you correctly installed the batteries. If any of
the LED’s on the front turn on, you installed
the batteries correctly. Turn the controller OFF
and secure the battery cover using the Philips
screwdriver.
Reference
Project Lead The Way
©
and Carnegie Mellon Robotics Academy
©
/ For use with VEX
®
Robotics Systems
VEXnetJoystickConguration• 1
Go to Reference Links