
Programming instructions

VEX Cortex Conguration over USB
You will need:
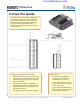
• 1 VEX Cortex Microcontroller with one 7.2V Robot Battery
• A computer with ROBOTC for Cortex and PIC installed
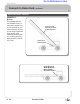
• 1 USB A-to-A Cable
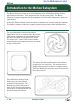
The VEX Cortex is a fully programmable device, and is what enables you to incorporate
motors, sensors, an LCD screen, and remote control signals all in one robot. Inside of the
Cortex, there are two separate processors; a user processor handles all of the ROBOTC
programming instructions, and a master processor controls lower-level operations, like motor
control and VEXnet communication. This document is a guide for downloading the Master CPU
rmwareandROBOTCrmwaretotheVEXCortexusingtheUSBA-to-Acable.
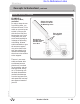
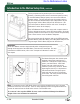
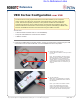
1. Leaving the POWER switch in the OFF position, connect your Cortex to the computer using the USB
A-to-A cable. Once the cable is attached, move the POWER switch to the ON position.
1a. Connect the Cortex to your PC
Use the USB A-to-A cable to connect your Cortex
to your PC.
Note: The order detailed in this step is crucial.
When the Cortex is powered on, it immediately
tries to determine how it is connected (over
VEXnet, USB, or no connection). Some power
is provided to the Cortex over USB, which will
allow it to determine that it is connected to your
computer.
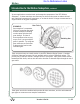
1b. Turn the Cortex ON
Make sure a 7.2V Robot battery is connected
and move the POWER switch on the Cortex to
the ON position.
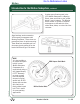
Note: If your Cortex is connected to a mobile
robot, it’s recommended that you prop the
robot up to prevent its wheels from making
contact with a surface. The motors may turn on
andoffduringthermwaredownloadprocess.
Reference
Project Lead The Way
©
and Carnegie Mellon Robotics Academy
©
/ For use with VEX
®
Robotics Systems
Main Title • 1
Go to Reference Links