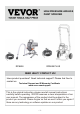
Technical Support and E-Warranty Certificate www.vevor.com/support High Pressure Airless Paint Sprayer We continue to be committed to provide you tools with competitive price. "Save Half", "Half Price" or any other similar expressions used by us only represents an estimate of savings you might benefit from buying certain tools with us compared to the major top brands and does not necessarily mean to cover all categories of tools offered by us.
HIGH PRESSURE AIRLESS PAINT SPRAYER RP8628 RP8628 PLUS NEED HELP? CONTACT US! Have product questions? Need technical support? Please feel free to contact us: Technical Support and E-Warranty Certificate www.vevor.com/support This is the original instruction, please read all manual instructions carefully before operating. VEVOR reserves a clear interpretation of our user manual. The appearance of the product shall be subject to the product you received.
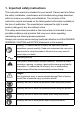
1. Important safety instructions This instruction manual is intended for your benefit. Please read and follow the safety, installation, maintenance and troubleshooting steps described within to ensure your safety and satisfaction. The contents of this instruction manual are based on the latest product information available at the time of publication. The manufacturer reserves the right to make product changes at any time without notice.
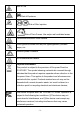
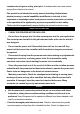
Risk of Fire Risk of Explosion. Risk of Skin lnjection. Risk of Toxic Fumes. Use onlyin well ventilated areas. Pressurized Aluminum Parts Hazard. Avoid ignition sources such as pilot lightscigarettes, portable lamps, etc. Relieve System Pressure. Hot Surfaces/Burn Hazard. Disposal information: This product is subject to the provision of European Directive 2012/19/EC. The symbol showing a wheelie bin crossed through indicates that the product requires separate refuse collection in the European Union.
Maintain labels. These carry important information. The label on your tool may include the following symbols.
tool. WORK AWORK AREA SAFETYREA SAFETY Keep work area clean and well lit. Cluttered or dark areas invite accidents Do not operate power tools in explosive atmospheres, such as in the presence of flammable liquids, gases or dust. Power tools create sparks which may ignite the dust or fumes. Keep children and bystanders away while operating a power tool. Distractions can cause you to lose control.
complacent and ignore safety principles. A careless action can cause severe injury within a fraction of a second. This product is not intended for use by persons (including children) whose physical, sensory, or mental capabilities are different or reduced, or lack experience or knowledge unless such persons receive supervision or training in the operation of the appliance by a person responsible for their safety. Children should be supervised to ensure that they do not use the device as toys.
moving parts, binding of moving parts, breakage of parts, mounting, and any other conditions that may affect its operation. A guard or other part that is damaged should be properly repaired or replaced by an authorized service center. Following this rule will reduce the risk of shock, fire, or serious injury. Inspect power tool cord periodically and, if damaged, it must be replaced only by the manufacturer or by an authorized service center to avoid risk.
vapors. Do not spray flammable or combustible materials near an open flame or sources of ignition such as water heaters, cigarettes, motors, and electrical equipment with pilot lights. Use only water-based or mineral spirit-type materials with a flash point greater than 70°F (21°C). Paint or solvent flowing through the equipment can result in static electricity. Static electricity creates a risk of fire or explosion in the presence of paint or solvent fumes.
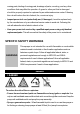
Ensure the power outlet is properly grounded in accordance with all local codes and ordinances. The plug and outlet should look like those in Fig. A. Consult with a qualified electrician or service person if grounding instructions are not understood or if there is doubt as to whether the equipment is properly grounded. Do not modify the power cord plug provided with the tool. Neverremovethe grounding prong from the plug.
hold a metal portion of the spray gun against the pail to ensure continuity to ground then spray. To maintain grounding continuity when flushing or relieving pressure: hold metal part of the spray gun firmly to the side of a grounded metal pail, then trigger the gun. SKIN INSKIN INJECTION SAFETYJECTION SAFETY IN CASE OF ACCIDENTAL SKIN INJECTION SEEK IMMEDIATE MEDICAL TREATMENT! High pressure spray or leaks can penetrate skin resulting in serious injury or death.
Replacement components must have a pressure rating not less than the pump rating of 3000 PSI (205 bar). Always follow the Pressure Relief Procedure to turn off and relieve pressure. Do notleavethe unit energized or under pressure while unattended or not in use. Use caution when cleaning and changing hoses, nozzle tips, tip guards, or when installing extensions. FollowthePressureReliefProcedure for turning off and relieving pressure before attempting to change.
system component. Use fluids and solvents that are compatible with equipment. Always read fluid and solvent manufacturer's warnings. Pressurized equipment can start without warning. Before inspecting, moving, or servicing the equipment, follow the Pressure Relief Procedure in this manual and disconnect the power supply.
residential installation. This product generates, uses and can radiate radio frequency energy, and if not installed and used in accordance with the instructions, may cause harmful interference to radio communications. However, there is no guarantee that interference will not occur in a particular installation.
power supply that does not meet the specified voltage may cause fire or electric shock. 12)Ensure that the machine is grounded so as not to cause harm to the body. 13)Do not touch the rotating rod or bearing part with y ur fingers during use in case of injuries. 14)If the machine is not in use for a long time , please unplug the power cord from the socket. 15) Do not use the machine during thunderstorms or lighting to avoid damage to the machine.
SPE CSPECIFICATIONSIFICATIONS - 15 -
FEA FEATUREI DENTIFICATIONTUREI DENTIFICATION RP8628 SPRAYER: Number Description Function Introduction 1 Pressure Adjust Knob Control output pressure of Paint(Clockwise increase pressure, anticlockwise decrease pressure) 2 Electrical Switch Control the sprayer on or off 3 Pressure Relief Valve Horizontal direction means the paint operating condition, Vertical direction means paint pressure relief condition 4 Fluid Outlet Paint Output Tube 5 Suction Tube Absorb the paint from the containe
RP8628 & RP8628 PLUS AIRLESS SPRAY GUN 8628 PLUS - 17 -
- 18 -
INSTALLATION Returns are not accepted & warranty is void if the sprayer is not properly cleaned immediately after every use. Clean the sprayer immediately to prevent permanent damage. Grounding and Electric Requirements Grounding Instructions This product must be grounded. In the event of an electrical short circuit, grounding reduces the risk of electric shock by providing an escape wire for the electric current.
Do not use the sprayer if the electrical cord has a damaged ground contact. Only use an extension cord with an undamaged ground contact. Smaller gauge or longer extension cords may reduce sprayer performance. Spray gun: ground through connection to a properly grounded fluid hose and pump. Fluid supply container: follow local code. Solvent and Oil-based fluids: follow local code. Use only conductive metal pails placed on a grounded surface such as concrete.
Locking the Spray Gun The gun is secured when the trigger lock is at a 90 angle(perpendicular) to the trigger in either direction. Unlocking the Spray Gun To unlock the gun,turn the trigger lock to be in line with the trigger. Applicable for wall painting paint, clean with water.
pressure rating, or fluid-carrying capacity highly abrasion resistant. Extremely durable. Operating Instructions BEFORE STARTING (1)CHECK all fittings and connections in the pump system, hose, and gun to ensure that they are tight. CHECK to ensure that there is a spray tip in the gun, and that the tip is the correct size for the coating you are to spray. (There are various tips available, for each type of coating or configuration.
Pressure Relief Procedure Follow this Pressure Relief Procedure whenever you are instructed to relieve pressure, stop spraying, check or service equipment or install or clean spray tip. 1.Turn OFF power and turn pressure control to lowest pressure setting. 2.Hold gun against side of grounded metal flushing pail. Trigger gun to relieve pressure. 3.Turn prime valve down. Our pressure relief should operated by hand. 4.
Operation WARNING: Make sure sprayer is turned off and unplugged from power source. Setup: Note: Remove or cover objects that you want to protect from over spray (paint mist) 1. Attach Paint Hose 2. Attach Paint Hose 3. Turn Pressure Control to Paint Hose Outlet Paint Gun and tighten Knob to Low Pressure and tighten with with two wrenches Spray setting. wrench. To Relieve Sprayer Pressure 1. Tum Power Switch 2.Switch Prime/Spray 3.
4.Turn Trigger Lock Note: Always set to Knob to Locking Prime mode between position. uses Pressure release procedure Whenever instructed to relieve pressure, Stop spraying, Check or service equipment or install or clean spray tip. 1.Engage trigger safety lock on gun. Turn Off power and turn sprayer pressure control to lowest pressure setting. 2.Hold gun against side of flushing pail. Trigger gun into pail to relieve pressure. 3.
Water-based (Latex) Paint: Flush with warm clean water. Priming and Startup Steps 1. Separate smaller 2. Place Priming Tube 3. Submerge Suction Priming Tube from in waste bucket Tube in water or Suction Tube. flushing solvent 4.Turn Prime/Spray 5.Adjust Pressure 6. Plug in Sprayer switch to Prime mode Control Knob to and turn on power Prime/Clean setting 7.Sprayer will start pumping and water or 8.
9. Switch Power to On 10. Paint should work itself from Suction Tube to Sprayer to Priming Tube until paint discharges from Return Tube Point gun into waste bucket and pull trigger 11. Turn Spray/Prime 12. Stop spraying 13. Remove the Priming Switch to Spray and activate trigger Tube from the waste mode and continue lock bucket and clip to to spray into waste Suction Tube and bucket submerge in paint pail 14.
1. Once primed, 2.Start spraying at the lowest setting adjust nozzle to on the Pressure Control Knob and Spray setting increase pressure as needed byturning clockwise to create a good Painting Techniques Before painting ensure the Sprayer has been primed(see Priming and Startup steps) and verify that Nozzle Tip is aligned properly keep the gun approximately 1 foot from the surface. 1. Keep gun 2. Do not fan the 3.
Cleaning 1.Relieve pressure 2.Separate tubes; 3. Place Priming and drain paint Tube in empty from Tubes waste bucket 4.Submerge Suction 5.Unthread Spray Tip and remove Tube in water or flushing fluid 6.Turn to Spray mode 7.Switch power to on - 29 - 8.Spray paint into paint pail.
9.Change to waste 10. Turn to Prime 11. Continue to bucket as paint thins mode flush until clear 12. Release trigger, 13. Remove trigger turn power off and guard from housing release pressure. 15. Remove filter 16.Clean all parts in warm, soapy water or flushing fluid with a bristled brush - 30 - 14.
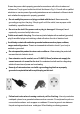
Spray Tips Always clean tips with compatible cleaning fluid and brush after spraying. Tips may require replacement after 15 gallons (57 liters) or they may last through 60 gallons (227liters)depending on abrasiveness of paint. Replacement part list ITEM Part 1 How to fine the parts Pump assembly Use an adjustable wrench to unscrew the lower pump body assembly. 2 pistion assembly Step A.Use a Phillips screwdriver to unscrew Step B.
3 Pressure relief valve assembly Knock out the cylindrical pin, remove the switch knob and switch seat, and then use an adjustable wrench to unscrew the pressure relief valve assembly. 4 Pressure relief valve assembly Use an adjustable wrench to unscrew the lower pump body assembly. Material Compatibility- Material and Paints which Can be used WATER-BASED MATERIAL: All sprayers CAN be used with water-based interior and exterior materials.
Material Compatibility-Material and Paints which Can not be used SOLVENT-BASED FLAMMABLE MATERIAL MATERIALS THAT ARE TOO THICK - requires a larger commercial airless or texture sprayer ∙ Deck and concrete restoration ∙ Elastomeric ∙ Roof coating - sealer, paint or primer ∙ Epoxy for concrete or fast-drying 1 or 2 component material ∙ Two component material such as bonding primer, garage floor paint ∙ Driveway sealer ∙ Texture or sand filled material ∙ Plaster ∙ Materials that include limestone, glass, clay,
Basic 2.Spray tip or fluid filter may be 2.Relieve pressure,then Then clogged clear clog or lean gun filter 1.Pump frozen or hardened pain 1.Thaw sprayer if water or Mechanical water-based pain has frozen in sprayer.Place sprayer in warm area to thaw. Do not start sprayer until thawed completely.If paint hardened (dried)in sprayer replace pump packing 2.Displacement pump connecting 2.
7.Leads from motor to circuit board 7.Be sure male terminal pins for damaged or loose wire are connected and firmly connectors. Inspect wiring connected l female terminals. insulation and terminal for signs of Replace any loose terminals overheating or damaged wring,Securely reconnect terminal 8.Worn motor brushes which must 8.Replace brushes be greater than 1/4 in.(6 mm) 9.Motor brushes binding in brush 9.Clean brush holders.
Flammable materials spilled on hot, bare, motor could cause fire or explosion. To reduce risk of burns,fire or explosion, do not operate sprayer with cover removed Keep all screws. nuts. washers. gaskets, and electrical fittings removed during repair procedures. These parts usually are not provided with replacement kits. Test repairs after problems are corrected.· If sprayer does not operate properly, review repair procedure to verify you did it correctly. See Troubleshooting.
CAUTION ·Do not run sprayer dry for more than 30 seconds. Doing so could damage pump packings ·Protect the internal drive parts of this sprayer from water. Openings in the cover allow for air cooling of the mechanical parts and electronics inside. If water gets in these openings, the sprayer could malfunction or be permanently damaged. ·Prevent pump corrosion and damage from freezing. Never leave water or water-base paint in sprayer when its not in use in cold weather.
PARTS DIAGRAM(RP8628) - 38 -
PARTS LIST No Description 1 Lowe pump body Qty. No Description 1 20 Coupling assembly 2 Inlet valve ball Qty No Description 1 39 Power cord retaining gear 1 21 (DW=12.
13 Lock nut guide 1 32 copper sleeve 14 Pump body lock nut PCB 1 51 Foot pads 4 2 52 Threaded Sheath 1 assembly 1 33 Screw ST3.
Address:Baoshanqu Shuangchenglu 803long 11hao 1602A-1609shi Shanghai Imported to AUS: SIHAO PTY LTD, 1 ROKEVA STREETEASTWOOD NSW 2122 Australia Imported to USA: Sanven Technology Ltd.
Technical Support and E-Warranty Certificate www.vevor.
Technisch Ondersteuning en e-garantiecertificaat www.vevor.com/support Hogedruk airless verfspuit We continue to be committed to provide you tools with competitive price. "Save Half", "Half Price" or any other similar expressions used by us only represents an estimate of savings you might benefit from buying certain tools with us compared to the major top brands and does not necessarily mean to cover all categories of tools offered by us.
HIGH PRESSURE AIRLESS PAINT SPRAYER RP8628 RP8628 PLUS NEED HELP? CONTACT US! Have product questions? Need technical support? Please feel free to contact us: Technical Support and E-Warranty Certificate www.vevor.com/support This is the original instruction, please read all manual instructions carefully before operating. VEVOR reserves a clear interpretation of our user manual. The appearance of the product shall be subject to the product you received.
2. Belangrijke veiligheidsinstructies Deze handleiding is bedoeld voor uw voordeel . Lees en volg de stappen op het gebied van veiligheid, installatie, onderhoud en probleemoplossing die hierin worden beschreven om uw veiligheid en tevredenheid te garanderen. De inhoud van deze gebruiksaanwijzing is gebaseerd op de meest recente productinformatie die beschikbaar was op het moment van publicatie.
Waarschuwing- Zorg ervoor dat u stofmaskers draagt wanneer u dit product gebruikt. Waarschuwing- Zorg ervoor dat u handschoenen draagt wanneer u dit product gebruikt. Risico op brand Risico op explosie. Risico op huidinjectie. Risico op giftige dampen. Alleen in goed geventileerde ruimtes gebruiken. Gevaar voor aluminium onderdelen onder druk. Vermijd ontstekingsbronnen zoals waakvlammen, sigaretten, draagbare lampen, enz. Ontlast de systeemdruk. Hete oppervlakken/gevaar voor brandwonden.
apparaten . Dit apparaat voldoet aan Deel 15 van de FCC-regels. Het gebruik is onderworpen aan de volgende twee voorwaarden: (1) Dit apparaat mag geen schadelijke interferentie veroorzaken, en (2) dit apparaat moet alle ontvangen interferentie accepteren, inclusief interferentie die een ongewenste werking kan veroorzaken. Etiketten onderhouden. Deze bevatten belangrijke informatie. Het label op uw gereedschap kan de volgende symbolen bevatten.
PSI Pond per vierkante inch MPa Megapascal toerental Revoluties per minuut min Minuten S Seconden ALGEMENE VEILIGHEIDSREGELS VOOR ELEKTRISCHE GEREEDSCHAPPEN EEN WAARSCHUWING LEES ALLE VEILIGHEIDSWAARSCHUWINGEN EN ALLE INSTRUCTIES. Het niet opvolgen van de waarschuwingen en instructies kan leiden tot elektrische schokken, brand, explosies en/of ernstig letsel. BEWAAR ALLE WAARSCHUWINGEN EN INSTRUCTIES VOOR TOEKOMSTIG RAADPLEGING.
bedienen van elektrisch gereedschap. Gebruik geen elektrisch gereedschap als u moe bent of onder invloed bent van drugs, alcohol of medicijnen. Een moment van onoplettendheid tijdens het gebruik van elektrisch gereedschap kan leiden tot ernstig persoonlijk letsel. Gebruik persoonlijke beschermingsmiddelen. Draag altijd oogbescherming met zijschermen.
ze het apparaat niet als speelgoed gebruiken. STROOM T GEBRUIK EN ONDERHOUD VAN HET ELEKTRISCHE GEREEDSCHAP GEBRUIK EN ONDERHOUD VAN HET GEREEDSCHAP REINIG HET SPUITAPPARAAT NA ELK GEBRUIK. Forceer het elektrisch gereedschap niet. Gebruik het juiste elektrische gereedschap voor uw toepassing. Het juiste elektrische gereedschap zal het werk beter en veiliger uitvoeren met de snelheid waarvoor het is ontworpen. Gebruik het elektrisch gereedschap niet als de schakelaar het niet aan- en uitzet.
bewakers goed werken en hun beoogde functie vervullen. Controleer op uitlijning van bewegende delen, vastlopen van bewegende delen, breuk van onderdelen, montage en andere omstandigheden die de werking ervan kunnen beïnvloeden. Een beschermkap of ander onderdeel dat beschadigd is, moet op de juiste manier worden gerepareerd of vervangen door een erkend servicecentrum. Als u deze regel volgt, wordt het risico op schokken, brand of ernstig letsel verminderd.
exploderen. Gebruik het apparaat alleen in een goed geventileerde ruimte en laat frisse lucht door de werkplek stromen . Houd de pomp goed geventileerd en spuit niet op de pompconstructie. Het spuitapparaat genereert vonken. Als er brandbare vloeistof wordt gebruikt in of nabij het spuitapparaat of voor het spoelen of reinigen, houd het spuitapparaat dan op een afstand van ten minste 6 meter van explosieve dampen.
ELEC ELEKTRISCHE VEILIGHEID TRISCHE VEILIGHEID Om het risico op een elektrische schok te verminderen: Dit product vereist een goed geaard stopcontact om het risico op een elektrische schok te verminderen. Zorg ervoor dat het stopcontact goed geaard is, in overeenstemming met alle lokale codes en verordeningen. De stekker en het stopcontact moeten er uitzien als die in Afb. A.
Volg de lokale codes bij het kiezen van een emmer met oplosmiddel voor het spoelen. Gebruik alleen geleidende metalen emmers die op een geaard oppervlak zoals beton worden geplaatst. Plaats de emmer niet op een niet-geleidend oppervlak zoals papier of karton. Sluit een aardedraad aan tussen de emmer en een aarde, zoals een metalen buis.
Om het risico op huidinjectie te verminderen: Controleer of alle aansluitingen goed vastzitten VOORDAT u het apparaat inschakelt. Richt het pistool niet en spuit niet op personen of dieren. Houd handen en andere lichaamsdelen uit de buurt van de spuittip en lekkages. Probeer geen lekkages met welk lichaamsdeel dan ook te stoppen. Gebruik altijd een mondstuktipbeschermer. Spuitnooitzonder dat er een spuittipbeschermer is geïnstalleerd.
Oppervlakken van apparatuur en vloeistoffen die onder druk staan, kunnen tijdens het gebruik heet worden. Voorkom brandwonden door hete vloeistoffen of apparatuur niet aan te raken. UITRUSTEN M APPARATUUR VEILIGHEID ENT VEILIGHEID MISBRUIK VAN DEZE APPARATUUR KAN DOOD OF ERNSTIG LETSEL VEROORZAKEN. Bedien het apparaat niet als u vermoeid bent of onder invloed van drugs of alcohol bent.
apparatuurbreuk. Mislukking het opvolgen van deze waarschuwing kan leiden tot de dood, ernstig letsel of materiële schade. Gebruik geen 1,1, 1 - trichloorethaan, methyleen chloride, of andere gehalogeneerde koolwaterstof oplosmiddelen of vloeistoffen die dergelijke oplosmiddelen bevatten. Veel andere vloeistoffen kunnen chemicaliën bevatten die kan reageren met aluminium.
maatregelen. · Heroriënteer of verplaats de ontvangstantenne. · Vergroot de afstand tussen het product en de ontvanger. · Sluit het product aan op een stopcontact op een ander circuit dan dat waarop de ontvanger is aangesloten. · Raadpleeg de dealer of een ervaren radio-/tv-technicus voor hulp. WARNING Voordat u dit product gebruikt, dient u alle instructies en veiligheidswaarschuwingen te lezen en te begrijpen. Onjuist gebruik kan leiden tot ernstig letsel of materiële schade. 1.
leed naar het lichaam . 13)Doen niet aanraken roterend _ hengel of lager neem deel met uw vingers tijdens gebruik in geval van verwondingen . 14) Als de machine is niet in gebruik voor A lang tijd , Alsjeblieft loskoppelen de stroom koord van de stopcontact . 15) Doen gebruik de niet machine tijdens onweer of verlichting naar voorkomen schade aan de machine . 16) Plaats de machine soepel op de vlamvertragende tafel En blijf weg van Ik ben bekwaam en explosief artikelen.
SPE C SPECIFICATIES IFICATIES - 17 -
FEA KENMERKEN DENTIFICATIE TUREI DENTIFICATIE RP8628 SPUITAPPARAAT: Nummer Beschrijving Functie Introductie 1 Drukinstelknop Controle uitgangsdruk van verf (met de klok mee de druk verhogen, tegen de klok in de druk verlagen) 2 Elektrische schakelaar Bedien de veldspuit aan of uit 3 Drukventiel Horizontale richting betekent de bedrijfstoestand van de verf.
6 Afvoerslang Bij drukontlasting vloeit de verf uit deze buis RP8628 & RP8628 PLUS LUCHTLOOS SPUITPISTOOL 8628 PLUS - 19 -
- 20 -
INSTALLATIE Retourzendingen worden niet geaccepteerd en de garantie vervalt als de spuit niet onmiddellijk na elk gebruik goed wordt gereinigd. Maak het spuitapparaat onmiddellijk schoon om blijvende schade te voorkomen. Aarding en elektrische vereisten Aardingsinstructies Dit product moet worden geaard. In het geval van een elektrische kortsluiting vermindert aarding het risico op een elektrische schok door te voorzien in een ontsnappingsdraad voor de elektrische stroom.
Gebruik nooit een stopcontact dat niet geaard is of een adapter. niet als het elektriciteitssnoer een beschadigd aardcontact heeft. Gebruik uitsluitend een verlengsnoer met een onbeschadigd aardcontact. Kleinere of langere verlengsnoeren kunnen de werking van het spuitapparaat verminderen prestatie. Spuitpistool: aarden via aansluiting op een goed geaarde vloeistofslang en pomp. Vloeistoftoevoercontainer: volg de lokale code. Oplosmiddel- en oliegebaseerde vloeistoffen: volg de lokale code.
zoals een waterleiding. Het spuitpistool vergrendelen en ontgrendelen: Vergrendel altijd de trekker wanneer u de spuittip bevestigt of wanneer het spuitpistool niet in gebruik is. Het spuitpistool vergrendelen Het pistool is beveiligd wanneer de trekkervergrendeling op 90 staat hoek (loodrecht) ten opzichte van de trekker in beide richtingen . Het spuitpistool ontgrendelen Om het pistool te ontgrendelen, draait u de trekkervergrendeling in lijn met de trekker . _ Toepasbaar op muurverf, reinigen met water.
bevindt zich een statisch afvoerelement van flexibel, eclectisch geleidend materiaal . FUNCTIES De polyurethaanafdekking maakt grotere flexibiliteit en strakkere bochten mogelijk . Bestand tegen buigvermoeidheid . Verdrijft statische lading . Zal niet opzwellen of afbreken bij contact met de meeste verfchemicaliën, oliën en de meeste andere oplosmiddelen . Lichtgewicht - ongeveer de helft van vergelijkbare rubberen of draadslangen .
water,3. Zet de motor aan en duw het drukventiel rechtop. Binnen een paar seconden begint het water door de buis omhoog te stromen en uit de uitlaatklep te stromen, draai de uitlaatklep deasil vast en draai vervolgens de drukklep deasil vast. 4. Wanneer de druk ongeveer 207 bereikt bar, controleer of er lekkage is in de uitlaatslang . Als het lek is, controleer het dan . Stop of buig lekkages niet af met uw hand, lichaam, handschoen of doek. 5.
3. Draai het vulventiel omlaag. Onze drukontlasting moet met de hand worden bediend. 4. Als u vermoedt dat de spuittip of de slang verstopt is of dat de druk niet volledig is ontlast na het uitvoeren van de bovenstaande stappen, draai dan LANGZAAM de borgmoer van de tipbeschermer of de slanguiteinde los om de druk geleidelijk te ontlasten, en maak vervolgens de slang of de verstopping volledig los. 5.
(verfnevel) 2. Attach Paint Hose 2. Attach Paint Hose 3. Turn Pressure Control to Paint Hose Outlet Paint Gun and tighten Knob to Low Pressure and tighten with with two wrenches Spray setting. wrench. Om de spuitdruk te ontlasten 2. Tum Power Switch 2.Switch Prime/Spray 3. Point gun into paint off and unplug unit switch to Prime mode pail and activate Sprayer Trigger to from outlet. relieve pressure.
4.Turn Trigger Lock Note: Always set to Knob to Locking Prime mode between position. uses Procedure voor drukontlasting Wanneer u wordt gevraagd de druk te ontlasten, stop dan met spuiten, controleer of onderhoud de apparatuur, of installeer of reinig de spuittip. 1. Activeer de veiligheidsvergrendeling op het pistool. Schakel de stroom uit en zet de drukregelaar van het spuitapparaat op de laagste drukinstelling. 2. Houd het pistool tegen de zijkant van de spoelemmer.
2. Separate smaller 2. Place Priming Tube 3. Submerge Suction Priming Tube from in waste bucket Tube in water or Suction Tube. flushing solvent 4.Turn Prime/Spray 5.Adjust Pressure 6. Plug in Sprayer switch to Prime mode Control Knob to and turn on power Prime/Clean setting 7.Sprayer will start pumping and water or 8.
9. Switch Power to On 10. Paint should work itself from Suction Tube to Sprayer to Priming Tube until paint discharges from Return Tube Point gun into waste bucket and pull trigger 11. Turn Spray/Prime 12. Stop spraying 13. Remove the Priming Switch to Spray and activate trigger Tube from the waste mode and continue lock bucket and clip to to spray into waste Suction Tube and bucket submerge in paint pail 14. Als de motor stopt, worden de pomp en de slangen gevuld.
2. Once primed, 2.Start spraying at the lowest setting adjust nozzle to on the Pressure Control Knob and Spray setting increase pressure as needed byturning clockwise to create a good Schildertechnieken Zorg er vóór het verven voor dat het spuitapparaat is geprimed (zie de stappen voor het primen en opstarten) en controleer of de spuitmondtip goed is uitgelijnd. Houd het pistool ongeveer 30 cm van het oppervlak. 1. Keep gun 2. Do not fan the 3.
Schoonmaak 1.Relieve pressure 2.Separate tubes; 3. Place Priming and drain paint Tube in empty from Tubes waste bucket 4.Submerge Suction 5.Unthread Spray Tip and remove Tube in water or flushing fluid 6.Turn to Spray mode 7.Switch power to on - 32 - 8.Spray paint into paint pail.
9.Change to waste 10. Turn to Prime 11. Continue to bucket as paint thins mode flush until clear 12. Release trigger, 13. Remove trigger turn power off and guard from housing release pressure. 15. Remove filter 16.Clean all parts in warm, soapy water or flushing fluid with a bristled brush - 33 - 14.
Spuittips Maak de tips na het spuiten altijd schoon met een compatibele reinigingsvloeistof en een borstel. De tips moeten mogelijk na 57 liter (15 gallon) worden vervangen of kunnen tot 227 liter (60 gallon) meegaan, afhankelijk van de abrasiviteit van de verf. Lijst met vervangende onderdelen ITEM Deel 1 Hoe u de onderdelen kunt verfijnen Pomp montage Gebruik een verstelbare sleutel om het onderste pomphuis los te schroeven. 2 zuiger montage Stap A. Gebruik een kruiskopschroevendraa Stap B.
verbindingspen van de plunjerstang eruit en verwijder de plunjerstangconstructie van onderaf. 3 Overdrukventielsa menstel Sla de cilindrische pen eruit, verwijder de schakelknop en de schakelaarzitting en gebruik vervolgens een verstelbare sleutel om het overdrukventiel los te schroeven.
4 Overdrukventielsa menstel Gebruik een verstelbare sleutel om het onderste pomphuis los te schroeven. Materiaalcompatibiliteit - Materiaal en verf die kunnen worden gebruikt MATERIAAL OP WATERBASIS: Alle spuittoestellen KUNNEN worden gebruikt met materialen op waterbasis voor binnen en buiten. Spoel uw spuitapparaat met water voordat u materialen op waterbasis gaat spuiten. Voorbeeld:Houtlak,Latex,Vlekken...
∙ Textuur of zandgevuld materiaal ∙ Gips ∙ Materialen zoals kalksteen, glas, klei en kwarts, zoals speciaal metselwerk, stucwerk en baksteenverf ∙ Metallic lak ∙ Magneetverf of primer GEVAARLIJKE STOFFEN ∙ Verf- en vlekafbijtmiddel ∙ Bleekmiddel of enig ander materiaal dat bleekmiddel bevat ∙ Herbicide ∙ Insecticide of pesticide ∙ Desinfectiemiddel Probleemoplossen 1.
om te ontdooien. Start het spuitapparaat pas nadat het volledig is ontdooid. Als de verf in het spuitapparaat is uitgehard (gedroogd). pomppakking vervangen 2. Verdringerpomp 2.Plaats de pin op zijn drijfstangpen plaats en zet hem vast met De pen moet volledig een veer houder ingestoken zijn drijfstang en borging de veer moet er stevig in zitten groef of pomppen Lage output 3.Motor.Verwijder het 3. Vervang de motor als de aandrijfhuis ventilator niet draait 1. Versleten spuittip 1.
6. Grootte en lengte van het 6. Vervang door een verlengsnoer correcte, geaarde verlengkaart 7. Leidt van motor naar 7. Zorg ervoor dat de printplaat voor beschadiging of mannelijke aansluitpinnen losse draadconnectoren. zijn aangesloten en stevig Inspecteer de zijn bedradingsisolatie en terminal aangesloten terminals. op tekenen van oververhitting Vervang losse aansluitingen of beschadigde wringen. Sluit de aansluiting weer veilig aan 8. Versleten motorborstels, dat 8.
4. Rol de slang na het reinigen op, in geval van schade. 5. Voeg wat glijmiddel toe als je het langere tijd niet gebruikt Algemene reparatie-informatie Flammable materials spilled on hot, bare, motor could cause fire or explosion. To reduce risk of burns,fire or explosion, do not operate sprayer with cover removed Bewaar alle schroeven. noten. ringen. pakkingen en elektrische aansluitingen verwijderd tijdens reparatieprocedures . Deze onderdelen zijn dat meestal niet voorzien van vervangingssets.
To reduce risk of serious injury, including electric shock: Do not touch moving or electric parts with fingers or tools while testing repair. Unplug sprayer when power is not required for testing Install all covers, gaskets, screws and washers before you operate sprayer. VOORZICHTIGHEID ·Laat het spuitapparaat niet langer dan 30 seconden drooglopen . Als u dit wel doet, kunnen de pomppakkingen beschadigd raken. ·Bescherm de interne aandrijfonderdelen van dit spuitapparaat tegen water.
•De volgende aanbevolen openingen voor de spuittip zijn geschikt voor verschillende soorten coatingmateriaal: Lak en beits: 0,007” — 0,013" Emaille: 0,011” — 0,015” Acryl: 0,015” — 0,021” MONDSTUK SPUITEN TIP SELECTIE GRAFIEK Opening Maat (Inches) 0,007” 0,009” 0,011” 0,013” 0,015” 0,017" 0,019” 0,021” 0,023” 0,025” 0,027” 0,029” 0,031” 0,033” 0,035" 2- 4 107 109 111 113 115 117 119 121 209 211 213 215 217 219 221 309 311 313 315 317 319 321 8- 10 409 411 413 415 417 419 10-12
ONDERDELEN LIJST - 43 -
Ne Beschrijving e 1 - pomplichaam Aant Ne al e 1 20 Beschrijving Koppeling Aant Ne al e 1 39 versnelling 2 Inlaatklepkogel 1 21 (DW=12.
13 Borgmoergeleider 1 32 koper mouw 14 Borgmoer van het Overdrukventiel 1 51 Voetkussentjes 4 2 52 Geschroefde 1 ge 1 33 pomphuis 15 PCB-assembla Schroef ST3.
Adres: Baoshanqu Shuangchenglu 803long 11hao 1602A-1609shi Shanghai Geïmporteerd naar AUS: SIHAO PTY LTD, 1 ROKEVA STREETEASTWOOD NSW 2122 Australië Geïmporteerd naar de VS: Sanven Technology Ltd.
- 47 -
Technisch Ondersteuning en e-garantiecertificaat www.vevor.
Teknisk Support och e-garanticertifikat www.vevor.com/support Högtrycksspruta för högtrycksfärg We continue to be committed to provide you tools with competitive price. "Save Half", "Half Price" or any other similar expressions used by us only represents an estimate of savings you might benefit from buying certain tools with us compared to the major top brands and does not necessarily mean to cover all categories of tools offered by us.
HIGH PRESSURE AIRLESS PAINT SPRAYER RP8628 RP8628 PLUS NEED HELP? CONTACT US! Have product questions? Need technical support? Please feel free to contact us: Technical Support and E-Warranty Certificate www.vevor.com/support This is the original instruction, please read all manual instructions carefully before operating. VEVOR reserves a clear interpretation of our user manual. The appearance of the product shall be subject to the product you received.
3. Viktiga säkerhets instruktioner Denna bruksanvisning är avsedd för din fördel . Vänligen läs och följ stegen för säkerhet, installation, underhåll och felsökning som beskrivs här för att säkerställa din säkerhet och tillfredsställelse. Innehållet i denna bruksanvisning är baserat på den senaste produktinformationen som var tillgänglig vid publiceringstillfället. Tillverkaren förbehåller sig rätten att göra produktändringar när som helst utan föregående meddelande.
Brandrisk Explosionsrisk. Risk för hudinjektion. Risk för giftiga ångor. Använd endast i väl ventilerade utrymmen. Risk för trycksatta aluminiumdelar. Undvik antändningskällor som pilotljuscigaretter, bärbara lampor etc. Avlasta systemets tryck. Heta ytor/brännrisk. Avfallshanteringsinformation: Denna produkt omfattas av bestämmelserna i det europeiska direktivet 2012/19/EC. Symbolen som visar en soptunna korsad anger att produkten kräver separat sophämtning i EU.
Underhåll etiketter. Dessa innehåller viktig information. Etiketten på ditt verktyg kan innehålla följande symboler.
Termen "elverktyg" i varningarna syftar på ditt nätdrivna (sladd) elverktyg. ARBETA ETT ARBETSOMRÅDE SÄKERHET REA SÄKERHET Håll arbetsområdet rent och väl upplyst. Röriga eller mörka områden leder till olyckor Använd inte elverktyg i explosiva miljöer, som i närvaro av brandfarliga vätskor, gaser eller damm. Elverktyg skapar gnistor som kan antända damm eller ångor. Håll barn och åskådare borta när du använder ett elverktyg. Distraktioner kan få dig att tappa kontrollen.
självbelåten och ignorerar säkerhetsprinciper. En vårdslös handling kan orsaka allvarlig skada inom en bråkdel av en sekund. Denna produkt är inte avsedd att användas av personer (inklusive barn) vars fysiska, sensoriska eller mentala förmåga är annorlunda eller nedsatt, eller som saknar erfarenhet eller kunskap, såvida inte sådana personer får övervakning eller utbildning i användningen av apparaten av en person ansvariga för sin säkerhet.
fungerar korrekt och utför sin avsedda funktion. Kontrollera om rörliga delar är inriktade, fastsättning av rörliga delar, brott på delar, montering och andra tillstånd som kan påverka dess funktion. Ett skydd eller annan del som är skadad bör repareras eller bytas ut av ett auktoriserat servicecenter. Om du följer denna regel minskar du risken för stötar, brand eller allvarliga skador.
för spolning eller rengöring, håll sprutan minst 20 fot (6 m) borta från explosiva ångor. Spraya inte lättantändliga eller brännbara material nära en öppen låga eller antändningskällor som vattenvärmare, cigaretter, motorer och elektrisk utrustning med pilotljus . Använd endast vattenbaserade eller mineralsprit-typ material med en flampunkt högre än 70°F (21°C). Färg eller lösningsmedel som flödar genom utrustningen kan resultera i statisk elektricitet.
stötar. Se till att eluttaget är ordentligt jordat i enlighet med alla lokala bestämmelser och förordningar. Kontakten och uttaget ska se ut som i Fig. A. Rådgör med en kvalificerad elektriker eller serviceperson om jordningsinstruktionerna inte förstås eller om det råder tvivel om huruvida utrustningen är ordentligt jordad. Modifiera inte nätsladdens kontakt som medföljer verktyget. Taaldrigbortjordstiftet från kontakten.
säkerställa kontinuitet till marken när du spolar eller avlastar trycket. För att upprätthålla jordningskontinuiteten vid spolning eller avlastning av tryck: håll metalldelen av sprutpistolen stadigt mot sidan av en jordad metallhink och avtryck sedan pistolen. HUD VID OAVSIKTLIG I HUDINJEKTIONSSÄKERHET JEKTIONSSÄKERHET HUDINJEKTION SÖK Omedelbart medicinsk behandling! Högtrycksspray eller läckor kan penetrera huden och leda till allvarliga skador eller dödsfall.
Ersättningskomponenter måste ha ett tryck som inte är lägre än pumpvärdet på 3000 PSI (205 bar). Följ alltid tryckavlastningsproceduren för att stänga av och avlasta trycket. Lämna inteenheten strömsatt eller under tryck när den är obevakad eller inte används. Var försiktig när du rengör och byter slangar, munstycksspetsar, spetsskydd eller när du installerar förlängningar. Följtryckavlastningsprocedurenför att stänga av och avlasta trycket innan du försöker byta.
använder. Överskrid inte det maximala arbetstrycket eller temperaturklassificeringen för den lägsta systemkomponenten. Använd vätskor och lösningsmedel som är kompatibla med utrustning. Läs alltid vätske- och lösningsmedelstillverkarens varningar. Trycksatt utrustning kan starta utan förvarning. Innan du inspekterar, flyttar eller servar utrustningen, följ tryckavlastningsproceduren i denna handbok och koppla bort strömförsörjningen.
gränserna för en digital enhet av klass B i enlighet med del 15 av FCC-reglerna. Dessa gränser är utformade för att ge rimligt skydd mot skadlig störning i en bostadsinstallation. Denna produkt genererar, använder och kan utstråla radiofrekvensenergi, och om den inte installeras och används i enlighet med instruktionerna kan den orsaka skadliga störningar på radiokommunikation. Det finns dock ingen garanti för att störningar inte kommer att inträffa i en viss installation.
10) Gör inte använda i en fuktig miljö eller kontakt med vatten Do inte om jag ltrate flytande i de maskin till förhindra brand eller orsakade elektriska stötar genom kortslutning. 11) Gör inte använda sig av de kraft tillförsel den där gör inte träffa de betygsatt Spänning . De kraft tillförsel det gör inte uppfyller den specificerade spänningen kan orsaka brand eller elektrisk chock. 12) Se till den där de maskin är grundad så som inte till orsak skada till kroppen .
SPE C SPECIFIKATIONER IFIKATIONER - 15 -
FEA FEATUREI DENTIFIKATION TUREI DENTIFIKATION RP8628 SPRUTA: siffra Beskrivning Funktionsintroduktion 1 Tryckjusteringsratt Styr utgående tryck för färg (öka trycket medurs, minska trycket moturs) 2 Elektrisk strömbrytare Styr sprutan på eller av 3 Övertrycksventil Horisontell riktning betyder färgens drifttillstånd, Vertikal riktning betyder färgens tryckavlastande tillstånd 4 Vätskeutlopp Målarutgångsrör - 16 -
5 Sugrör Absorbera färgen från behållaren till sprutan 6 Avloppsslang Vid tryckavlastning flödar färgen från detta rör RP8628 & RP8628 PLUS AIRLESS SPRAYPISTOL 8628 PLUS - 17 -
- 18 -
- 19 -
INSTALLATION Returer accepteras inte och garantin är ogiltig om sprutan inte rengörs ordentligt direkt efter varje användning. Rengör sprutan omedelbart för att förhindra permanent skada. Jordning och elkrav Jordningsinstruktioner Denna produkt måste jordas. I händelse av en elektrisk kortslutning minskar jordning risken för elektriska stötar genom att tillhandahålla en flyktledning för den elektriska strömmen. Denna produkt är utrustad med en sladd som har en jordkabel med en lämplig jordkontakt.
inte sprutan om den elektriska sladden har en skadad jordkontakt. Använd endast en förlängningssladd med oskadad jordkontakt. Smalare eller längre förlängningssladdar kan minska sprutan prestanda. Spraypistol: jordad genom anslutning till en korrekt jordad vätskeslang och pump. Vätskeförrådsbehållare: följ lokala bestämmelser. Lösningsmedel och oljebaserade vätskor: följ lokala regler. Använd endast ledande metall hinkar placerade på en jordad yta som betong.
Låsning av sprutpistolen Pistolen är säkrad när avtryckarlåset är på 90 vinkel (vinkelrätt) mot avtryckaren i endera riktningen . Låsa upp sprutpistolen För att låsa upp pistolen, vrid avtryckarlåset så att det är i linje med utlösaren . _ _ Gäller för väggmålning färg, rengör med vatten.
OD mindre än jämförbar gummislang utan att reducera lD, tryckklass eller vätsketransportkapacitet mycket nötningsbeständig . Extremt tålig . Bruksanvisningar INNAN DU STARTAR (1) KONTROLLERA alla kopplingar och anslutningar i pumpsystemet, slangen och pistolen för att säkerställa att de är täta . KONTROLLERA att det finns en sprutmunstycke i pistolen och att munstycket har rätt storlek för den beläggning du ska spruta.
Tryckavlastningsprocedur Följ denna tryckavlastningsprocedure närhelst du blir instruerad att avlasta trycket, sluta spruta, kontrollera eller serva utrustning eller installera eller rengöra sprutmunstycket. 1.Stäng AV strömmen och vrid tryckkontrollen till lägsta tryckinställning. 2. Håll pistolen mot sidan av den jordade metallspolhinken. Avtryckar pistolen för att avlasta trycket. 3 .Vrid påfyllningsventilen nedåt. Vår tryckavlastning ska drivas för hand. 4.
Drift VARNING: Se till att sprutan är avstängd och urkopplad från strömkällan. Uppstart: Obs: Ta bort eller täck över föremål som du vill skydda mot översprutning (färgdimma) 3. Attach Paint Hose 2. Attach Paint Hose 3. Turn Pressure Control to Paint Hose Outlet Paint Gun and tighten Knob to Low Pressure and tighten with with two wrenches Spray setting. wrench. För att minska trycket i sprutan 3. Tum Power Switch 2.Switch Prime/Spray 3.
4.Turn Trigger Lock Note: Always set to Knob to Locking Prime mode between position. uses Tryckavlastningsprocedur Närhelst du uppmanas att avlasta trycket, sluta spruta, kontrollera eller serva utrustningen eller installera eller rengöra sprutmunstycket. 1. Aktivera avtryckarens säkerhetslås på pistolen. Stäng av strömmen och vrid sprutans tryckkontroll till lägsta tryckinställning. 2. Håll pistolen mot sidan av spolhinken. Avtrycka pistolen i hinken för att lätta på trycket. 3.
Vattenbaserad (Latex) färg: Spola med varmt rent vatten . Priming och startsteg 3. Separate smaller 2. Place Priming Tube 3. Submerge Suction Priming Tube from in waste bucket Tube in water or Suction Tube. flushing solvent 4.Turn Prime/Spray 5.Adjust Pressure 6. Plug in Sprayer switch to Prime mode Control Knob to and turn on power Prime/Clean setting 7.Sprayer will start pumping and water or 8.
9. Switch Power to On 10. Paint should work itself from Suction Tube to Sprayer to Priming Tube until paint discharges from Return Tube Point gun into waste bucket and pull trigger 11. Turn Spray/Prime 12. Stop spraying 13. Remove the Priming Switch to Spray and activate trigger Tube from the waste mode and continue lock bucket and clip to to spray into waste Suction Tube and bucket submerge in paint pail 14.
3. Once primed, 2.Start spraying at the lowest setting adjust nozzle to on the Pressure Control Knob and Spray setting increase pressure as needed byturning clockwise to create a good Målningstekniker Innan du målar, se till att sprutan har grundmålats (se stegen för primning och start) och verifiera att munstycksspetsen är korrekt inriktad och håll pistolen cirka 1 fot från ytan. 1. Keep gun 2. Do not fan the 3.
Rengöring 1.Relieve pressure 2.Separate tubes; 3. Place Priming and drain paint Tube in empty from Tubes waste bucket 4.Submerge Suction 5.Unthread Spray Tip and remove Tube in water or flushing fluid 6.Turn to Spray mode 7.Switch power to on - 30 - 8.Spray paint into paint pail.
9.Change to waste 10. Turn to Prime 11. Continue to bucket as paint thins mode flush until clear 12. Release trigger, 13. Remove trigger turn power off and guard from housing release pressure. 15. Remove filter 16.Clean all parts in warm, soapy water or flushing fluid with a bristled brush - 31 - 14.
Spraytips Rengör alltid spetsarna med kompatibel rengöringsvätska och borsta efter sprayning. Spetsar kan behöva bytas ut efter 15 gallon (57 liter) eller så kan de hålla till 60 gallon (227 liter) beroende på färgens nötningsförmåga. Lista över ersättningsdelar ARTI KEL 1 Del Hur man finfördelar delarna Pumpmontering Använd en justerbar skiftnyckel för att skruva loss den nedre pumpkroppen. 2 pistmontering Steg A. Använd en stjärnskruvmejsel för att Steg B.
3 Övertrycksventilen het Slå ut det cylindriska stiftet, ta bort omkopplarvredet och bytsätet och använd sedan en justerbar skiftnyckel för att skruva loss övertrycksventilenheten. 4 Övertrycksventilen het Använd en justerbar skiftnyckel för att skruva loss den nedre pumpkroppen. Materialkompatibilitet - Material och färger som kan användas VATTENBASERAT MATERIAL: Alla sprutor KAN användas med vattenbaserade interiör- och exteriörmaterial.
Materialkompatibilitet - Material och färger som inte kan användas LÖSNINGSMEDDELBASERAD BRANDFARLIGT MATERIAL MATERIAL SOM ÄR FÖR tjock - kräver en större kommersiell högtrycksspruta eller texturspruta ∙ Däck och betongrestaurering ∙ Elastomer ∙ Takbeläggning - tätningsmedel, färg eller primer ∙ Epoxi för betong eller snabbtorkande 1- eller 2-komponentmaterial ∙ Tvåkomponentsmaterial som limgrund, garagegolvsfärg ∙ Uppfartstätning ∙ Textur eller sandfyllt material ∙ Gips ∙ Material som inkluderar kalksten,
2. Spraymunstycket eller 2. Avlasta trycket och sedan vätskefiltret kan vara igensatta rensa igen täppa eller magert pistolfilter Grundläggande 1.Pumpa frusen eller härdad 1.Tina sprutan om vatten mekanisk smärta eller vattenbaserad smärta har frusit i sprutan. Placera sprutan varmt område att tina. Starta inte sprutan förrän den är helt tinad. Om färgen har härdat (torkat) i sprutan byt ut pumppackningen 2. Kolvpump vevstakens stift 2.
6. Förlängningssladd storlek och 6. Byt ut mot ett korrekt, längd jordat förlängningskort 7. Ledningar från motor till 7. Se till att kretskort för skadade eller lösa hananslutningsstiften är ledningskontakter. Inspektera anslutna och ordentligt ledningarnas isolering och anslutna l hona terminaler. terminal för tecken på Byt ut eventuella lösa överhettning terminaler eller skadad vridning, anslut säkert terminalen 8.Slitna motorborstar som måste 8.
Flammable materials spilled on hot, bare, motor could cause fire or explosion. To reduce risk of burns,fire or explosion, do not operate sprayer with cover removed Behåll alla skruvar. nötter. brickor. packningar och elektriska kopplingar borttagna under reparationsprocedurer . Dessa delar är vanligtvis levereras inte med ersättningssatser. Testa reparationer efter att problem har åtgärdats.· Om sprutan inte fungerar korrekt, granska reparationsproceduren för att verifiera att du gjorde det korrekt.
To reduce risk of serious injury, including electric shock: Do not touch moving or electric parts with fingers or tools while testing repair. Unplug sprayer when power is not required for testing Install all covers, gaskets, screws and washers before you operate sprayer. VARNING ·Kör inte sprutan torr i mer än 30 sekunder . Om du gör det kan pumpens packningar skadas · Skydda de interna drivdelarna i denna spruta från vatten.
beläggningsmaterial: Lack & bets: 0,007” — 0,013” Emalj: 0,011” — 0,015” Akryl: 0,015” — 0,021” MUNSTYCKE SPRAY DRICKS URVAL DIAGRAM Öppning Storlek (tum) 0,007” 0,009” 0,011” 0,013” 0,015” 0,017" 0,019” 0,021” 0,023” 0,025” 0,027” 0,029” 0,031” 0,033” 0,035" 2-4 _ 107 109 111 113 115 117 119 121 209 211 213 215 217 219 221 309 311 313 315 317 319 321 8-10 _ 409 411 413 415 417 419 10-12 _ 509 511 513 515 517 12-14 _ 609 611 613 615 711 713 813 4-6 _ Spray Bredd (
DELLISTA - 40 -
Ne Beskrivning j 1 Låg Antal Ne . j 1 20 pumphusenhet 2 Inloppsventilkula Rektangulär Kopplingsredsk Anta Ne l j 1 39 ap 1 21 (DW=12.
13 Låsmutterstyrning 1 32 PCB montering 1 51 Fotkuddar 4 1 33 Skruv 2 52 Gängad slida 1 koppar ärm 14 Låsmutter för pumphuset 15 Övertrycksventil ST3.
Adress: Baoshanqu Shuangchenglu 803long 11hao 1602A-1609shi Shanghai Importerad till AUS: SIHAO PTY LTD, 1 ROKEVA STREETEASTWOOD NSW 2122 Australien Importerad till USA: Sanven Technology Ltd.
Teknisk Support och e-garanticertifikat www.vevor.
Técnico Soporte y certificado de garantía electrónica www.vevor.com/support Pulverizador de pintura sin aire de alta presión We continue to be committed to provide you tools with competitive price. "Save Half", "Half Price" or any other similar expressions used by us only represents an estimate of savings you might benefit from buying certain tools with us compared to the major top brands and does not necessarily mean to cover all categories of tools offered by us.
HIGH PRESSURE AIRLESS PAINT SPRAYER RP8628 RP8628 MÁS NEED HELP? CONTACT US! Have product questions? Need technical support? Please feel free to contact us: Technical Support and E-Warranty Certificate www.vevor.com/support This is the original instruction, please read all manual instructions carefully before operating. VEVOR reserves a clear interpretation of our user manual. The appearance of the product shall be subject to the product you received.
4. Instrucciones de seguridad importantes Este manual de instrucciones está destinado a su beneficio . Lea y siga los pasos de seguridad, instalación, mantenimiento y solución de problemas que se describen a continuación para garantizar su seguridad y satisfacción. El contenido de este manual de instrucciones se basa en la información más reciente sobre el producto disponible en el momento de su publicación.
Advertencia: asegúrese de usar máscaras antipolvo cuando utilice este producto. Advertencia: asegúrese de usar guantes cuando utilice este producto. Riesgo de fuego Riesgo de explosión. Riesgo de inyección cutánea. Riesgo de humos tóxicos. Usar sólo en áreas bien ventiladas. Peligro de piezas de aluminio presurizadas. Evite fuentes de ignición como luces piloto, cigarrillos, lámparas portátiles, etc. Alivie la presión del sistema. Superficies calientes/peligro de quemaduras.
Este dispositivo cumple con la Parte 15 de las normas de la FCC. El funcionamiento está sujeto a las dos condiciones siguientes: (1) Este dispositivo no puede causar interferencias dañinas y (2) este dispositivo debe aceptar cualquier interferencia recibida, incluidas las interferencias que puedan causar un funcionamiento no deseado. Mantener etiquetas. Estos llevan información importante. La etiqueta de su herramienta puede incluir los siguientes símbolos.
HERRAMIENTAS ELÉCTRICAS UNA ADVERTENCIA LEA TODAS LAS ADVERTENCIAS DE SEGURIDAD Y TODAS LAS INSTRUCCIONES. El incumplimiento de las advertencias e instrucciones puede provocar descargas eléctricas, incendios, explosiones y/o lesiones graves. GUARDE TODAS LAS ADVERTENCIAS E INSTRUCCIONES PARA FUTURAS CONSULTAS. El término "herramienta eléctrica" en las advertencias se refiere a su herramienta eléctrica alimentada por red eléctrica (con cable).
levantar o transportar la herramienta. Llevar herramientas eléctricas con el dedo El interruptor o la activación de herramientas eléctricas que tienen el interruptor encendido invitan a sufrir accidentes. No te excedas. Mantenga siempre una posición y un equilibrio adecuados para permitir un mejor control de la herramienta eléctrica en situaciones inesperadas. Vístete apropiadamente. No use ropa suelta o joyas. Mantenga el cabello, la ropa y los guantes alejados de las piezas móviles.
medidas de seguridad preventivas reducen el riesgo de poner en marcha accidentalmente la herramienta eléctrica. Guarde las herramientas eléctricas inactivas fuera del alcance de los niños y no permita que personas que no estén familiarizadas con la herramienta eléctrica o con estas instrucciones la operen. Las herramientas eléctricas son peligrosas en manos de usuarios no capacitados. Mantener herramientas eléctricas.
Este rociador no está diseñado para usarse con materiales inflamables o combustibles utilizados en aplicaciones industriales o UNA ADVERTEN CIA en ubicaciones fijas, como fábricas o talleres de pintura. Siga todas las regulaciones federales, estatales o provinciales aplicables y cumpla con los requisitos de NFPA 33 y OSHA si se usa en estas aplicaciones. Siga todas las regulaciones federales, estatales o provinciales aplicables y cumpla con los requisitos de NFPA 33 y OSHA si se usa en estas aplicaciones.
o conectadas a tierra especificadas por el fabricante. Evite la descarga estática asegurándose de que todos los contenedores y sistemas de recolección estén conectados a tierra adecuadamente. Utilice siempre un tomacorriente con conexión a tierra y cables de extensión con conexión a tierra. No utilice un adaptador de enchufe de 3 a 2. No utilice pintura o disolvente que contenga hidrocarburos halogenados. Conozcaelcontenidodelas pinturas y solventes que se rocían.
tomacorriente adecuado. No utilice la herramienta si el cable de alimentación o el enchufe están dañados. Siestá dañado,lléveloa reparar a un centro de servicio antes de usarlo. El tomacorriente debe coincidir con el enchufe. Noutiliceningún tipode adaptador con un enchufe con conexión a tierra. Los enchufes no modificados y los tomacorrientes compatibles reducirán el riesgo de descarga eléctrica.
Para mantener la continuidad de la conexión a tierra al lavar o aliviar la presión: sujete la parte metálica de la pistola rociadora firmemente contra el lado de un cubo metálico conectado a tierra y luego dispare el arma. PIEL EN LA PIEL SEGURIDAD DE LA INYECCIÓN SEGURIDAD DE LAINYECCIÓN ¡EN CASO DE INYECCIÓN ACCIDENTAL EN LA PIEL, BUSQUE TRATAMIENTO MÉDICO INMEDIATO! Las salpicaduras o las fugas de alta presión pueden penetrar la piel y provocar lesiones graves o la muerte.
originales. Los componentes de repuesto deben tener una presión nominal no inferior a la presión nominal de la bomba de 3000 PSI (205 bar). Siga siempre el Procedimiento de alivio de presión para apagar y aliviar la presión. No dejela unidad energizada o bajo presión mientras esté desatendida o no esté en uso. Tenga cuidado al limpiar y cambiar mangueras, puntas de boquilla, protectores de punta o al instalar extensiones.
salpican los ojos o la piel, se inhalan o se ingieren. Utilice siempre equipo de protección personal que incluya protección para los ojos, careta, protección para los oídos y respirador o mascarilla. Revise siempre la MSDS y conozca los peligros específicos del fluido que está utilizando. No exceda la presión de trabajo máxima o la clasificación de temperatura del componente del sistema con la clasificación más baja. Utilice fluidos y disolventes que sean compatibles con el equipo.
ADVERTENCIA: Los cambios o modificaciones a este producto que no estén aprobados expresamente por la parte responsable del cumplimiento podrían anular la autoridad del usuario para operar el producto. Nota: Este producto ha sido probado y cumple con los límites para un dispositivo digital Clase B de conformidad con la Parte 15 de las reglas de la FCC. Estos límites están diseñados para brindar una protección razonable contra interferencias dañinas en una instalación residencial.
máquina 5)Hacer no usar esto máquina en a ubicación peligrosa. 6) hacer no usar cuando el máquina es no laboral adecuadamente . 7) hacer no desmontar y reparar este máquina . 8) hacer no usar un inadecuado C.A. Salida . 9)Hacer no tocar el calefacción plato cuando el la máquina se está calentando 10)Hacer No utilice en un húmedo medio ambiente o contacto con el agua Hacer no infiltrado _ _ líquido en el máquina para prevenir el fuego o descarga eléctrica causada por cortocircuito.
20) Para evitar riesgos debido al reinicio involuntario del interruptor térmico, este El aparato no debe recibir alimentación a través de un dispositivo de conmutación externo, como un temporizador, o conectado a un circuito que la empresa de servicios públicos enciende y apaga regularmente.
FEA CARACTERÍSTICAS IDENTIFICACIÓN TUREI DENTIFICACIÓN PULVERIZADOR RP8628: Número 1 Descripción Introducción a la función Perilla de ajuste de presión Controle la presión de salida de la pintura (aumente la presión en el sentido de las agujas del reloj, disminuya la presión en el - 17 -
sentido contrario a las agujas del reloj) 2 interruptor electrico Controlar el encendido o apagado del pulverizador 3 Válvula de alivio de presión La dirección horizontal significa la condición de funcionamiento de la pintura, la dirección vertical significa la condición de alivio de presión de la pintura. 4 Salida de fluido Tubo de salida de pintura 5 Tubo de succión Absorber la pintura del recipiente al pulverizador.
- 19 -
- 20 -
INSTALACIÓN No se aceptan devoluciones y la garantía quedará anulada si el pulverizador no se limpia adecuadamente inmediatamente después de cada uso. Limpie el pulverizador inmediatamente para evitar daños permanentes. Requisitos eléctricos y de conexión a tierra Instrucciones de conexión a tierra Este producto debe estar conectado a tierra. En caso de un cortocircuito eléctrico , la conexión a tierra reduce el riesgo de descarga eléctrica al proporcionar un cable de escape para la corriente eléctrica.
Nunca utilice un tomacorriente que no esté conectado a tierra o un adaptador. No utilice el pulverizador si el cable eléctrico tiene un contacto a tierra dañado. Utilice únicamente un cable de extensión con un contacto a tierra en buen estado. Un calibre más pequeño o cables de extensión más largos pueden reducir la potencia del pulverizador. actuación. Pistola pulverizadora: conexión a tierra a través de una conexión a una bomba y una manguera de fluido debidamente conectadas a tierra.
Conexión a tierra del cubo metálico: Conecte un cable de tierra al cubo sujetando un extremo al cubo y el otro extremo a tierra, como por ejemplo una tubería de agua. Bloqueo y desbloqueo de la pistola pulverizadora: Bloquee siempre el gatillo cuando coloque la punta rociadora o cuando la pistola rociadora no esté en uso. Bloquear la pistola pulverizadora La pistola está asegurada cuando el seguro del gatillo está en una posición de 90°. ángulo (perpendicular) al gatillo en cualquier dirección .
costuras, unido químicamente a múltiples capas de cubierta de poliuretano sintético resistente a la tracción. Entre las capas trenzadas está situado un elemento de drenaje estático de material flexible y eléctricamente conductor . CARACTERÍSTICAS La cubierta de poliuretano permite una mayor flexibilidad y curvaturas más cerradas . Resistente a la fatiga por flexión . Disipa la carga estática .
procedimiento . 1. Retire la punta rociadora de la pistola . 2. Coloque la manguera de entrada y el tubo de alivio de presión en el balde con un poco de agua.3. Encienda el motor y empuje la válvula de presión hacia arriba. En unos segundos, el agua comenzará a fluir a través del tubo y saldrá por la válvula de salida, apriete la válvula de salida y luego apriete la válvula de presión. 4. Cuando la presión alcanza alrededor de 207 barra, compruebe si hay alguna fuga en la manguera de salida .
3. Baje la válvula de cebado. Nuestro alivio de presión debe operarse manualmente . 4. Si sospecha que la boquilla de pulverización o la manguera están obstruidas o que la presión no se ha aliviado por completo después de seguir los pasos anteriores, afloje LENTAMENTE la tuerca de retención del protector de la boquilla o el acoplamiento del extremo de la manguera para aliviar la presión gradualmente, luego afloje completamente la manguera o la obstrucción del higo. 5.
Nota: Retire o cubra los objetos que desee proteger del exceso de pulverización (niebla de pintura). 4. Attach Paint Hose 2. Attach Paint Hose 3. Turn Pressure Control to Paint Hose Outlet Paint Gun and tighten Knob to Low Pressure and tighten with with two wrenches Spray setting. wrench. Para aliviar la presión del pulverizador 4. Tum Power Switch 2.Switch Prime/Spray 3. Point gun into paint off and unplug unit switch to Prime mode pail and activate Sprayer Trigger to from outlet.
4.Turn Trigger Lock Note: Always set to Knob to Locking Prime mode between position. uses Procedimiento de liberación de presión Siempre que se le indique aliviar la presión, deje de pulverizar, revise o dé servicio al equipo o instale o limpie la boquilla de pulverización. 1.Enganche el seguro del gatillo de la pistola. Apague la energía y gire el control de presión del pulverizador al ajuste de presión más bajo. 2.Sostenga la pistola contra el costado del cubo de lavado.
4. Separate smaller 2. Place Priming Tube 3. Submerge Suction Priming Tube from in waste bucket Tube in water or Suction Tube. flushing solvent 4.Turn Prime/Spray 5.Adjust Pressure 6. Plug in Sprayer switch to Prime mode Control Knob to and turn on power Prime/Clean setting 7.Sprayer will start pumping and water or 8.
9. Switch Power to On 10. Paint should work itself from Suction Tube to Sprayer to Priming Tube until paint discharges from Return Tube Point gun into waste bucket and pull trigger 11. Turn Spray/Prime 12. Stop spraying 13. Remove the Priming Switch to Spray and activate trigger Tube from the waste mode and continue lock bucket and clip to to spray into waste Suction Tube and bucket submerge in paint pail 14.
4. Once primed, 2.Start spraying at the lowest setting adjust nozzle to on the Pressure Control Knob and Spray setting increase pressure as needed byturning clockwise to create a good Técnicas de pintura Antes de pintar, asegúrese de que el pulverizador haya sido cebado (consulte los pasos de cebado y puesta en marcha) y verifique que la punta de la boquilla esté alineada correctamente y mantenga la pistola aproximadamente a 1 pie de la superficie. 1. Keep gun 2. Do not fan the 3.
Limpieza 1.Relieve pressure 2.Separate tubes; 3. Place Priming and drain paint Tube in empty from Tubes waste bucket 4.Submerge Suction 5.Unthread Spray Tip and remove Tube in water or flushing fluid 6.Turn to Spray mode 7.Switch power to on - 32 - 8.Spray paint into paint pail.
9.Change to waste 10. Turn to Prime 11. Continue to bucket as paint thins mode flush until clear 12. Release trigger, 13. Remove trigger turn power off and guard from housing release pressure. 15. Remove filter 16.Clean all parts in warm, soapy water or flushing fluid with a bristled brush - 33 - 14.
Consejos de pulverización Limpie siempre las puntas con un líquido de limpieza compatible y un cepillo después de pulverizar. Es posible que sea necesario reemplazar las puntas después de 15 galones (57 litros) o pueden durar hasta 60 galones (227 litros), dependiendo de la abrasividad de la pintura. Lista de piezas de repuesto ARTÍ CUL O 1 Parte Cómo multar las piezas Conjunto de la bomba Utilice una llave ajustable para desenroscar el conjunto del cuerpo inferior de la bomba.
2 conjunto de pistón Paso A. Utilice un destornillador Phillips Paso B. Utilice un para desatornillar los 4 destornillador de estrella tornillos y quitar la tapa para quitar el tornillo de de la bomba . fijación y la placa límite del pasador de conexión, luego extraiga el pasador de conexión de la varilla del émbolo y extraiga el conjunto de la varilla del émbolo desde abajo.
4 Conjunto de válvula de alivio de presión Utilice una llave ajustable para desenroscar el conjunto del cuerpo inferior de la bomba. Compatibilidad de materiales : materiales y pinturas que se pueden utilizar MATERIAL A BASE DE AGUA: Todos los pulverizadores PUEDEN usarse con materiales interiores y exteriores a base de agua. Antes de rociar materiales a base de agua, enjuague su rociador con agua. Ejemplo: laca para madera, látex, tintes...
garaje. ∙ Sellador de caminos de entrada ∙ Material texturizado o relleno de arena ∙ Yeso ∙ Materiales que incluyen piedra caliza, vidrio, arcilla y cuarzo, como mampostería especial, estuco y pintura para ladrillos. ∙ Pintura metalizada ∙ Pintura o imprimación magnética MATERIALES PELIGROSOS ∙ Decapante de pintura y tintes ∙ Lejía o cualquier material que incluya lejía. ∙ Herbicida ∙ Insecticida o pesticida ∙ Desinfectante Solución de problemas 1.
Mecánica 1. Dolor congelado o endurecido 1. Descongela el pulverizador Básica por la bomba. si tienes dolor a base de agua o agua. se ha congelado en el rociador. Coloque el rociador en un lugar tibio. área para descongelar. No arranque el pulverizador hasta que se haya descongelado por completo. Si la pintura se endureció (seca) en el pulverizador reemplazar el empaque de la bomba 2.Bomba de desplazamiento 2.
5.Suministro eléctrico con 5.Restablecer el disyuntor del voltímetro edificio. Reemplace Mater debe leer 220-240 Vac.bajo el fusible del edificio. Repare Los voltajes reducen el el tomacorriente o pruebe con rendimiento del pulverizador. otro tomacorriente. 6.Tamaño y longitud del cable de 6.Reemplácela con una extensión tarjeta de extensión correcta y conectada a tierra. 7. Cables del motor a la placa de 7.
Mantenimiento diario La vida útil del equipo depende del mantenimiento diario. Se deben respetar los siguientes respetos: 1. Lea atentamente el manual antes de usarlo por primera vez. 2. Verifique los requisitos eléctricos antes de cada trabajo. 3.Limpieza a fondo del equipo y los accesorios después de su uso. 4.Enrolle el tubo después de limpiarlo, en caso de cualquier daño. 5. Añade un poco de lubricante si no lo usas durante mucho tiempo.
Reemplace si está dañado. La cubierta del motor dirige el aire de refrigeración alrededor del motor para evitar el sobrecalentamiento y aísla el tablero de control de descargas eléctricas accidentales . To reduce risk of serious injury, including electric shock: Do not touch moving or electric parts with fingers or tools while testing repair. Unplug sprayer when power is not required for testing Install all covers, gaskets, screws and washers before you operate sprayer.
•El primer dígito, cuando se multiplica por dos, da el ancho de pulverización en pulgadas (con la punta de pulverización a 1 pie (30 cm) de distancia de la superficie que se está pulverizando). •Los dos últimos dígitos especifican el tamaño del orificio en miles de pulgadas (Nota: un orificio más grande aumenta el flujo de pintura).
LISTA DE PARTES - 43 -
No 1 Descripción Conjunto del Cant N . o 1 20 Descripción engranaje Cantida N d o 1 39 Descripción Cantida d Fuerza anillo cuerpo de la de de retención bomba Lowe acoplamient del cordón 1 o 2 Bola de válvula 3 1 21 Engranaje 1 40 Placa base de entrada del cigüeñal para (DW=12.
11 Piel de vacuno 2 30 pequeña en Cable de 1 49 conexión Tubo de 1 alivio de forma de V presión anillo de sellado 12 anillo de 1 31 sellado 13 Guía de tuerca almohadilla 1 50 de PCB 1 32 de seguridad ensamblaje Componente 1 s del marco 1 51 de PCB almohadillas 4 para los pies de cobre manga 14 Contratuerca 1 33 del cuerpo de Tornillo 2 52 ST3.
Dirección: Baoshanqu Shuangchenglu 803long 11hao 1602A-1609shi Shanghai Importado a AUS: SIHAO PTY LTD, 1 ROKEVA STREETEASTWOOD NSW 2122 Australia Importado a EE. UU.: Sanven Technology Ltd.
- 47 -
Técnico Certificado de soporte y garantía electrónica www.vevor.
Tecnico Supporto e certificato di garanzia elettronica www.vevor.com/support Spruzzatore di vernice airless ad alta pressione We continue to be committed to provide you tools with competitive price. "Save Half", "Half Price" or any other similar expressions used by us only represents an estimate of savings you might benefit from buying certain tools with us compared to the major top brands and does not necessarily mean to cover all categories of tools offered by us.
HIGH PRESSURE AIRLESS PAINT SPRAYER RP8628 RP8628 PIÙ NEED HELP? CONTACT US! Have product questions? Need technical support? Please feel free to contact us: Technical Support and E-Warranty Certificate www.vevor.com/support This is the original instruction, please read all manual instructions carefully before operating. VEVOR reserves a clear interpretation of our user manual. The appearance of the product shall be subject to the product you received.
5. Importanti istruzioni di sicurezza Questo manuale di istruzioni è inteso a vostro vantaggio . Si prega di leggere e seguire le fasi di sicurezza, installazione, manutenzione e risoluzione dei problemi descritte all'interno per garantire la vostra sicurezza e soddisfazione. Il contenuto di questo manuale di istruzioni si basa sulle informazioni più recenti sul prodotto disponibili al momento della pubblicazione.
Avvertenza: assicurarsi di indossare maschere antipolvere quando si utilizza questo prodotto. Avvertenza: assicurarsi di indossare guanti quando si utilizza questo prodotto. Rischio di incendio Rischio di esplosione. Rischio di iniezione cutanea. Rischio di fumi tossici. Utilizzare solo in aree ben ventilate. Pericolo legato alle parti in alluminio pressurizzate. Evitare fonti di accensione come fiamme pilota, sigarette, lampade portatili, ecc. Alleviare la pressione del sistema.
Questo dispositivo è conforme alla Parte 15 delle norme FCC. Il funzionamento è soggetto alle seguenti due condizioni: (1) Questo dispositivo non può causare interferenze dannose e (2) questo dispositivo deve accettare qualsiasi interferenza ricevuta, comprese le interferenze che potrebbero causare un funzionamento indesiderato. Mantenere le etichette. Questi contengono informazioni importanti. L'etichetta sullo strumento può includere i seguenti simboli.
ELETTROUTENSILI UN AVVERTIMENTO LEGGERE TUTTE LE AVVERTENZE DI SICUREZZA E TUTTE LE ISTRUZIONI. La mancata osservanza delle avvertenze e delle istruzioni può provocare scosse elettriche, incendi, esplosioni e/o lesioni gravi. CONSERVARE TUTTE LE AVVERTENZE E LE ISTRUZIONI PER RIFERIMENTO FUTURO. Il termine "utensile elettrico" nelle avvertenze si riferisce all'utensile elettrico alimentato dalla rete elettrica (con cavo).
l'interruttore o gli utensili elettrici che hanno l' interruttore acceso possono provocare incidenti. Non esagerare. Mantenere sempre la posizione e l'equilibrio corretti per consentire un migliore controllo dell'utensile elettrico in situazioni impreviste. Vestiti adeguatamente. Non indossare abiti larghi o gioielli. Tenere i capelli, gli indumenti e i guanti lontani dalle parti in movimento. Abiti larghi, gioielli o capelli lunghi possono rimanere impigliati nelle parti in movimento.
consentire a persone che non hanno familiarità con l'utensile elettrico o con queste istruzioni di utilizzare l'utensile elettrico. Gli utensili elettrici sono pericolosi nelle mani di utenti inesperti. Mantenere gli utensili elettrici. Verificare la presenza di disallineamento o inceppamento delle parti mobili, rottura di parti e qualsiasi altra condizione che possa influire sul funzionamento dell'utensile elettrico. Se danneggiato, far riparare l'utensile elettrico prima dell'uso.
Questo spruzzatore non è destinato all'uso con materiali infiammabili o combustibili utilizzati in applicazioni industriali o in UN AVVERTIME NTO postazioni fisse come fabbriche o negozi di verniciatura. Seguire tutte le normative federali, statali o provinciali applicabili e conformarsi ai requisiti NFPA 33 e OSHA se utilizzati in queste applicazioni. Seguire tutte le normative federali, statali o provinciali applicabili e conformarsi ai requisiti NFPA 33 e OSHA se utilizzati in queste applicazioni.
Prevenire le scariche elettrostatiche assicurandosi che tutti i contenitori e i sistemi di raccolta siano adeguatamente messi a terra. Utilizzare sempre una presa con messa a terra e prolunghe con messa a terra. Non utilizzare un adattatore per spina 3 a 2. Non utilizzare vernici o solventi contenenti idrocarburi alogenati. Conoscereil contenutodellevernici e dei solventi spruzzati.
La presa deve corrispondere alla spina. Nonutilizzarealcuntipodi adattatore con una spina con messa a terra (messa a terra). Le spine non modificate e le prese corrispondenti ridurranno il rischio di scosse elettriche. Evitare ilcontatto del corpo con superfici messe a terra o collegate a terra come tubi, radiatori, cucine e frigoriferi. Ilrischio di scosse elettriche aumenta se il corpo è collegato a terra o collegato a terra. Nonesporrequesto prodotto allapioggia o a condizioni umide.
PELLE NELLASICUREZZA DELL'INIEZIONE NELLA PELLE SICUREZZADELL'INIEZIONE IN CASO DI INIEZIONE ACCIDENTALE NELLA PELLE CONSULTARE IMMEDIATAMENTE UN TRATTAMENTO MEDICO! Spruzzi o perdite ad alta pressione possono penetrare nella pelle provocando lesioni gravi o mortali. Per ridurre il rischio di iniezione cutanea: Verificare che tutti i collegamenti siano serrati PRIMA di accendere l'unità. Non puntare la pistola né spruzzare contro persone o animali.
Seguire sempre la procedura di scarico della pressione per disattivare e scaricare la pressione. Non lasciarel'unità sotto tensione o sotto pressione mentre è incustodita o non in uso. Prestare attenzione durante la pulizia e la sostituzione dei tubi flessibili, delle punte degli ugelli, delle protezioni delle punte o durante l' installazione delle prolunghe. Seguirelaprocedura di scarico della pressione per spegnere e scaricare la pressione prima di tentare la modifica.
facciale. Esamina sempre la scheda di sicurezza e conosci i rischi specifici del fluido che stai utilizzando. Non superare la pressione di esercizio massima o la temperatura nominale del componente del sistema con la classificazione più bassa. Utilizzare fluidi e solventi compatibili con l'apparecchiatura. Leggere sempre le avvertenze del produttore del fluido e del solvente. Le apparecchiature pressurizzate possono avviarsi senza preavviso.
espressamente approvati dalla parte responsabile della conformità potrebbero annullare l'autorità dell'utente a utilizzare il prodotto. Nota: Questo prodotto è stato testato ed è risultato conforme ai limiti di un dispositivo digitale di Classe B ai sensi della Parte 15 delle norme FCC. Questi limiti sono progettati per fornire una protezione ragionevole contro interferenze dannose in un'installazione residenziale.
6) Fai non utilizzo Quando IL macchina È non lavorando correttamente . 7) Fai non smontare E riparazione Questo macchina . 8) Fai non utilizzo UN inadatto AC Sbocco . 9) Fallo non toccare il riscaldamento piatto quando IL la macchina si sta riscaldando 10) Fallo non usare in un ambiente umido ambiente o contatto con l'acqua Fare non inf ltrato _ liquido In IL macchina a prevenire il fuoco o scossa elettrica causata per cortocircuito.
tramite un dispositivo di commutazione esterno, come un timer, o collegato ad un circuito che viene regolarmente acceso e spento dall'utenza.
FEA FEATUREI DENTIFICA TUREI DENTIFICA SPRUZZATORE RP8628: Numero 1 Descrizione Introduzione alla funzione Manopola di regolazione della pressione Controllare la pressione di uscita della vernice (in senso orario aumentare la pressione, in senso antiorario diminuire la pressione) - 17 -
Interruttore elettrico Controlla l'accensione o lo spegnimento dello spruzzatore 3 Valvola di sovrappressione La direzione orizzontale indica la condizione operativa della vernice, la direzione verticale indica la condizione di scarico della pressione della vernice 4 Uscita del fluido Tubo di uscita della vernice 5 Tubo di aspirazione Assorbire la vernice dal contenitore allo spruzzatore 6 Tubo di scarico Quando si rilascia la pressione, la vernice scorre da questo tubo 2 PISTOLA A SPRUZZO AI
- 19 -
- 20 -
INSTALLAZIONE Non si accettano resi e la garanzia è nulla se lo spruzzatore non viene pulito adeguatamente immediatamente dopo ogni utilizzo. Pulire immediatamente lo spruzzatore per evitare danni permanenti. Requisiti elettrici e di messa a terra Istruzioni per la messa a terra Questo prodotto deve essere collegato a terra. In caso di cortocircuito elettrico , la messa a terra riduce il rischio di scosse elettriche fornendo un filo di fuga per la corrente elettrica.
Non utilizzare mai una presa priva di messa a terra o un adattatore. Non utilizzare lo spruzzatore se il cavo elettrico presenta un contatto di terra danneggiato. Utilizzare solo una prolunga con un contatto di terra non danneggiato. Un manometro più piccolo o prolunghe più lunghe possono ridurre la potenza dello spruzzatore prestazione. Pistola a spruzzo: collegare a terra tramite il collegamento a un tubo del fluido e a una pompa adeguatamente messi a terra.
Bloccare sempre il grilletto quando si collega l'ugello di spruzzatura o quando la pistola a spruzzo non è in uso. Bloccare la pistola a spruzzo La pistola è fissata quando la sicura del grilletto è a 90 angolo (perpendicolare) al grilletto in entrambe le direzioni . Sblocco della pistola a spruzzo Per sbloccare la pistola, ruotare la sicura del grilletto per allinearla il grilletto . _ Applicabile per pittura murale, pulire con acqua.
La copertura in poliuretano consente una maggiore flessibilità e curve più strette . Resistente alla fatica da flessione . Dissipa la carica statica . Non si gonfia né si degrada a contatto con la maggior parte delle vernici chimiche, degli oli e della maggior parte degli altri solventi . Leggero: circa la metà di un tubo in gomma o filo comparabile .
perdite sul tubo di scarico . Se c'è una perdita, controlla . Non fermare o deviare le perdite con le mani, il corpo, guanti o stracci. 5. Se non ci sono perdite, aprire la pistola a spruzzo e fare uno spruzzo di prova. Pulire l'olio nella pompa. Cambiare l'acqua saponata e utilizzare acqua pulita quando lo spray è pulito 6. Spegnere l'alimentazione . Continuare a spruzzare finché non esce più acqua . 7. Sbloccare il blocco del grilletto.
4. Se si sospetta che l'ugello di spruzzatura o il tubo siano ostruiti o che la pressione non sia stata completamente scaricata dopo aver seguito i passaggi precedenti, allentare LENTAMENTE il dado di fissaggio della protezione dell'ugello o il raccordo dell'estremità del tubo per scaricare gradualmente la pressione, quindi allentare completamente il tubo o eliminare l'ostruzione. 5.Inserire il grilletto in modo sicuro sulla pistola se l'unità viene spenta o lasciata incustodita.
5. Attach Paint Hose 2. Attach Paint Hose 3. Turn Pressure Control to Paint Hose Outlet Paint Gun and tighten Knob to Low Pressure and tighten with with two wrenches Spray setting. wrench. Per alleviare la pressione dello spruzzatore 5. Tum Power Switch 2.Switch Prime/Spray 3. Point gun into paint off and unplug unit switch to Prime mode pail and activate Sprayer Trigger to from outlet. relieve pressure. 4.
1.Inserire la sicura del grilletto sulla pistola. Spegnere l'alimentazione e impostare il controllo della pressione dello spruzzatore sull'impostazione della pressione più bassa. 2.Tenere la pistola contro il lato del secchio di lavaggio. Azionare la pistola nel secchio per alleviare la pressione. 3. Spegnere la pompa e rilasciare la pressione del fluido ruotando verso il basso la valvola di adescamento limitatrice della pressione situata sul lato della pompa.
4.Turn Prime/Spray 5.Adjust Pressure 6. Plug in Sprayer switch to Prime mode Control Knob to and turn on power Prime/Clean setting 7.Sprayer will start pumping and water or 8. Remove Suction Tube flushing solvent well as air bubbles will be from water or flushing purged from system let fluids discharge solvent and submerge in from Priming Tube into waste bucket for 30 paint pail to 60 seconds then switch Power to Off 9. Switch Power to On 10.
11. Turn Spray/Prime 12. Stop spraying 13. Remove the Priming Switch to Spray and activate trigger Tube from the waste mode and continue lock bucket and clip to to spray into waste Suction Tube and bucket submerge in paint pail 14. Se il motore si ferma, la pompa e i tubi vengono adescati, altrimenti ripetere le fasi di adescamento. 15.
Tecniche pittoriche Prima di verniciare, assicurarsi che lo spruzzatore sia stato adescato (vedere le fasi di adescamento e avvio) e verificare che la punta dell'ugello sia allineata correttamente, mantenendo la pistola a circa 1 piede dalla superficie. 1. Keep gun 2. Do not fan the 3.
1.Relieve pressure 2.Separate tubes; 3. Place Priming and drain paint Tube in empty from Tubes waste bucket 4.Submerge Suction 5.Unthread Spray Tip and remove Tube in water or flushing fluid 6.Turn to Spray mode 7.Switch power to on - 32 - 8.Spray paint into paint pail.
9.Change to waste 10. Turn to Prime 11. Continue to bucket as paint thins mode flush until clear 12. Release trigger, 13. Remove trigger turn power off and guard from housing 14. Unscrew nut release pressure. 15. Remove filter 16.Clean all parts in warm, soapy water or flushing fluid with a bristled brush Suggerimenti per lo spruzzo Pulire sempre le punte con liquido detergente e pennello compatibili dopo la spruzzatura.
Elenco delle parti di ricambio ARTI COL O 1 Parte Come multare le parti Assemblaggio della pompa Utilizzare una chiave regolabile per svitare il gruppo inferiore del corpo della pompa. 2 gruppo pistone Passaggio A. Utilizzare un cacciavite Phillips Passo B. Utilizzare un per svitare le 4 viti e cacciavite a croce per rimuovere il coperchio rimuovere la vite di della pompa .
3 Gruppo valvola limitatrice di pressione Estrarre il perno cilindrico, rimuovere la manopola dell'interruttore e la sede dell'interruttore, quindi utilizzare una chiave regolabile per svitare il gruppo della valvola limitatrice di pressione. 4 Gruppo valvola limitatrice di pressione Utilizzare una chiave regolabile per svitare il gruppo inferiore del corpo della pompa.
Compatibilità dei materiali : materiali e vernici che non possono essere utilizzati MATERIALE INFIAMMABILE A BASE SOLVENTE MATERIALI TROPPO SPESSI: richiede uno spruzzatore airless o per texture commerciale più grande ∙ Ripristino della copertura e del calcestruzzo ∙ Elastomerico ∙ Rivestimento del tetto: sigillante, vernice o primer ∙ Epossidico per calcestruzzo o materiali mono o bicomponenti a rapida essiccazione ∙ Materiale bicomponente come primer adesivo, vernice per pavimenti di garage ∙ Sigillante p
Pressione 1. Manopola di controllo della 1. Aumentare lentamente del fluido di pressione collocamento. Il motore l'impostazione della base lo farà non eseguito f impostato al pressione per vedere se minimo (completamente il motore si avvia Antiorario) 2.L'ugello di spruzzatura o il filtro 2. Alleviare la pressione, del fluido potrebbero essere quindi eliminare l'ostruzione o ostruiti filtro della pistola magro Meccanica 1. Pompare il dolore congelato o 1.
rilascia il grilletto della pistola 3.La valvola di adescamento perde 3. Scaricare la pressione, quindi riparare la valvola di adescamento 4.Collegamenti del tubo di 4.Serrare eventuali aspirazione collegamenti allentati.Controllare l'o-ring sul tubo di aspirazione 5.Alimentazione elettrica con 5. Ripristinare l'interruttore voltmetro. automatico dell'edificio, La lettura del contatore deve sostituire essere 220-240 Vuoto basso le il fusibile dell'edificio.
10. Bassa pressione di stallo. 10.Sostituire il gruppo di Pressione di rotazione manopola controllo della pressione di controllo completamente in senso orario 11.Indotto motore per riprese 11, Sostituire il motore mediante an tester di armatura (coltivatore) o eseguire la rotazione test Manutenzione quotidiana La durata dell'attrezzatura dipende dalla manutenzione quotidiana. Dovrebbero essere rispettati i seguenti aspetti: 1. Leggere attentamente il manuale prima del primo utilizzo. 2.
Testare le riparazioni dopo aver corretto i problemi.· Se lo spruzzatore non funziona correttamente, rivedere la procedura di riparazione per verificare di averla eseguita correttamente. Vedere Risoluzione dei problemi. Potrebbe accumularsi una quantità eccessiva di spray nei passaggi dell'aria. Rimuovere eventuali spruzzi eccessivi e residui dai passaggi dell'aria e dalle aperture negli involucri ogni volta che si esegue la manutenzione dello spruzzatore.
·Non far funzionare lo spruzzatore a secco per più di 30 secondi . Ciò potrebbe danneggiare le guarnizioni della pompa. ·Proteggere le parti interne della trasmissione di questo spruzzatore dall'acqua. Le aperture nel coperchio consentono il raffreddamento ad aria delle parti meccaniche ed elettroniche all'interno. Se entra acqua in queste aperture, lo spruzzatore potrebbe malfunzionamento o essere danneggiato in modo permanente . ·Prevenire la corrosione della pompa e i danni dovuti al congelamento.
14-16 _ 16-18 _ 711 713 715 717 719 721 723 725 727 729 731 733 735 813 815 817 819 821 823 825 827 829 831 833 835 931 933 935 18-20 _ 923 SCHEMA DELLE PARTI(RP8628) - 42 - 927
ELENCO DELLE PARTI - 43 -
NO Descrizione 1 Assemblaggio Qtà. NO Descrizione 1 20 Ingranaggio di corpo pompa Lowe 2 Sfera valvola di Qtà NO Descrizione 1 39 Energia anello di accoppiamento 1 21 Ingranaggio ingresso dell'albero (DW=12.
12 Anello di tenuta 1 31 Tampone PCB 1 50 Componenti del 1 telaio 13 Guida controdado 1 32 in rame manica 14 Dado di bloccaggio Valvola limitatrice 1 51 Rilievi del piede 4 2 52 Guaina filettata 1 1 53 Estensione 1 2 54 Spruzzatore di 1 PCB 1 33 del corpo pompa 15 Assemblaggio Vite ST3.
Indirizzo: Baoshanqu Shuangchenglu 803long 11hao 1602A-1609shi Shanghai Importato in AUS: SIHAO PTY LTD, 1 ROKEVA STREETEASTWOOD NSW 2122 Australia Importato negli Stati Uniti: Sanven Technology Ltd.
- 47 -
Tecnico Supporto e certificato di garanzia elettronica www.vevor.
Techniczny Certyfikat wsparcia i e-gwarancji www.vevor.com/support Wysokociśnieniowy, bezpowietrzny agregat do natryskiwania farby We continue to be committed to provide you tools with competitive price. "Save Half", "Half Price" or any other similar expressions used by us only represents an estimate of savings you might benefit from buying certain tools with us compared to the major top brands and does not necessarily mean to cover all categories of tools offered by us.
HIGH PRESSURE AIRLESS PAINT SPRAYER RP8628 RP8628 PLUS NEED HELP? CONTACT US! Have product questions? Need technical support? Please feel free to contact us: Technical Support and E-Warranty Certificate www.vevor.com/support This is the original instruction, please read all manual instructions carefully before operating. VEVOR reserves a clear interpretation of our user manual. The appearance of the product shall be subject to the product you received.
6. Ważne instrukcje dotyczące bezpieczeństwa Niniejsza instrukcja obsługi została stworzona dla Twojej korzyści . Aby zapewnić sobie bezpieczeństwo i satysfakcję, przeczytaj i postępuj zgodnie z opisanymi poniżej krokami dotyczącymi bezpieczeństwa, instalacji, konserwacji i rozwiązywania problemów. Treść niniejszej instrukcji obsługi opiera się na najnowszych informacjach o produkcie dostępnych w momencie publikacji.
Ostrzeżenie — podczas korzystania z tego produktu należy nosić okulary ochronne. Ostrzeżenie — podczas korzystania z tego produktu należy nosić maski przeciwpyłowe. Ostrzeżenie — podczas korzystania z tego produktu należy nosić rękawiczki. Ryzyko pożaru Ryzyko eksplozji. Ryzyko wstrzyknięcia pod skórę. Ryzyko toksycznych oparów. Stosować wyłącznie w dobrze wentylowanych pomieszczeniach. Zagrożenie częściami aluminiowymi pod ciśnieniem.
Informacje o utylizacji: Ten produkt podlega przepisom Dyrektywy Europejskiej 2012/19/EC. Symbol przekreślonego kosza na śmieci oznacza, że produkt wymaga selektywnej zbiórki śmieci na terenie Unii Europejskiej. Dotyczy to produktu i wszystkich akcesoriów oznaczonych tym symbolem. Produktów oznaczonych jako takie nie można wyrzucać razem ze zwykłymi odpadami domowymi, lecz należy je oddać do punktu zbiórki w celu recyklingu urządzeń elektrycznych i elektronicznych .
MPa Megapaskale obr./min Obroty na minutę min Minuty S sekundy OGÓLNE ZASADY BEZPIECZEŃSTWA ELEKTRONARZĘDZI OSTRZEŻENIE PRZECZYTAJ WSZYSTKIE OSTRZEŻENIA DOTYCZĄCE BEZPIECZEŃSTWA I WSZYSTKIE INSTRUKCJE. Niezastosowanie się do ostrzeżeń i instrukcji może spowodować porażenie prądem, pożar, eksplozję i/lub poważne obrażenia. ZACHOWAJ WSZYSTKIE OSTRZEŻENIA I INSTRUKCJE DO WYKORZYSTANIA W PRZYSZŁOŚCI.
jesteś zmęczony lub pod wpływem narkotyków, alkoholu lub leków. Chwila nieuwagi podczas obsługi elektronarzędzia może skutkować poważnymi obrażeniami ciała. Stosować środki ochrony osobistej. Zawsze noś okulary ochronne z bocznymi osłonami. Sprzęt ochronny, taki jak maski oddechowe, maski przeciwpyłowe, antypoślizgowe obuwie ochronne, kask i ochronniki słuchu zmniejszą obrażenia ciała. Zapobiegaj niezamierzonemu uruchomieniu.
ELEKTRONARZĘDZI PO KAŻDYM UŻYCIU CZYŚĆ SPRYSKIWACZ. Nie używaj elektronarzędzia na siłę. Użyj odpowiedniego elektronarzędzia do swojego zastosowania. Właściwe elektronarzędzie wykona pracę lepiej i bezpieczniej, przy prędkości, do której zostało zaprojektowane. Nie używaj elektronarzędzia, jeżeli włącznik go nie włącza i nie wyłącza. Każde elektronarzędzie, którego nie można sterować za pomocą wyłącznika, jest niebezpieczne i należy je naprawić.
pożaru lub poważnych obrażeń. Okresowo sprawdzaj przewód elektronarzędzia, a jeśli jest uszkodzony, może go wymienić wyłącznie producent lub autoryzowany serwis, aby uniknąć ryzyka. Przestrzeganie tej zasady zmniejszy ryzyko porażenia prądem lub pożaru. Oddaj elektronarzędzie do naprawy wykwalifikowanemu serwisantowi, który używa wyłącznie identycznych części zamiennych. Zapewni to zachowanie bezpieczeństwa elektronarzędzia.
jest łatwopalna ciecz albo do płukania lub czyszczenia, należy trzymać opryskiwacz w odległości co najmniej 20 stóp (6 m) od wybuchowych oparów. Nie rozpylać materiałów łatwopalnych lub palnych w pobliżu otwartego płomienia lub źródeł zapłonu, takich jak podgrzewacze wody, papierosy, silniki i sprzęt elektryczny z lampkami kontrolnymi. Używaj wyłącznie materiałów na bazie wody lub spirytusu mineralnego o temperaturze zapłonu wyższej niż 70°F (21°C).
Aby zmniejszyć ryzyko porażenia prądem: Ten produkt wymaga odpowiednio uziemionego gniazdka, aby zmniejszyć ryzyko porażenia prądem. Upewnij się, że gniazdko elektryczne jest prawidłowo uziemione, zgodnie ze wszystkimi lokalnymi przepisami i rozporządzeniami. Wtyczka i gniazdko powinny wyglądać jak te na rys. A.
Wybierając wiadro z rozpuszczalnikiem do płukania, postępuj zgodnie z lokalnymi przepisami. Należy używać wyłącznie przewodzących metalowych wiader umieszczonych na uziemionej powierzchni, takiej jak beton. Nie umieszczaj wiadra na nieprzewodzącej powierzchni, takiej jak papier lub karton. Podłącz przewód uziemiający pomiędzy wiadrem a uziemieniem, np. metalową rurą.
wysokim ciśnieniem mogą przedostać się przez skórę, powodując poważne obrażenia lub śmierć. Aby zmniejszyć ryzyko wstrzyknięcia podskórnego: PRZED włączeniem urządzenia sprawdź, czy wszystkie połączenia są dokręcone . Nie kieruj pistoletu ani sprayu na jakąkolwiek osobę ani zwierzę. Trzymaj ręce i inne części ciała z dala od końcówki natryskowej i wycieków. Nie próbuj zatrzymywać wycieków jakąkolwiek częścią ciała. Zawsze używaj osłony końcówki dyszy.
Powierzchnie sprzętu i płyn pod ciśnieniem mogą się nagrzewać podczas pracy. Unikaj oparzeń, nie dotykając gorącego płynu ani sprzętu. WYPOSAŻYĆ BEZPIECZEŃSTWO URZĄDZEŃ BEZPIECZEŃSTWO _ _ NIEWŁAŚCIWE UŻYCIE TEGO SPRZĘTU MOŻE SPOWODOWAĆ ŚMIERĆ LUB POWAŻNE OBRAŻENIA. Nie obsługuj urządzenia będąc zmęczonym lub pod wpływem narkotyków lub alkoholu. Toksyczne płyny lub opary mogą spowodować poważne obrażenia lub śmierć w przypadku dostania się do oczu lub skóry, wdychania lub połknięcia.
zastosowanie się do tego ostrzeżenia może skutkować śmiercią, poważnymi obrażeniami lub uszkodzeniem mienia. Nie stosować 1,1,1 - trichloroetanu, metylenu chlorek lub inny halogenowany węglowodór rozpuszczalniki lub płyny zawierające takie rozpuszczalniki. Wiele innych płynów może zawierać substancje chemiczne, które może reagować z aluminium.
· Podłącz produkt do gniazdka w innym obwodzie niż ten, do którego podłączony jest odbiornik. · Skonsultuj się ze sprzedawcą lub doświadczonym technikiem radiowo-telewizyjnym w celu uzyskania pomocy. WARNING Przed użyciem tego produktu należy przeczytać i zrozumieć wszystkie instrukcje i ostrzeżenia dotyczące bezpieczeństwa. Niewłaściwe użycie może spowodować poważne obrażenia lub uszkodzenie mienia. 1. Ostrzeżenia _ musieć Być podążał ostrożnie _ _ Do unikać ciało obrażenia.
15) Do nie używać maszynę podczas burzy lub oświetlenie Do unikać uszkodzenie the maszyna . 16 ) Umieścić maszynę płynnie na stole trudnopalnym I trzymać z dala od Jestem zdolny i _ materiał wybuchowy rzeczy. 17) P dzierżawa zatrzymywać się za pomocą To Jeśli the maszyna pali , emituje A osobliwy zapach , Lub staje się hałaśliwy I W inne nienormalne warunki.
MES FUNKCJA DENTYFIKACJA I DENTYFIKACJA - 17 -
OPRYSKIWACZ RP8628: Numer Opis Wprowadzenie do funkcji 1 Pokrętło regulacji ciśnienia Kontroluj ciśnienie wyjściowe farby (zwiększ ciśnienie zgodnie z ruchem wskazówek zegara, zmniejsz ciśnienie w kierunku przeciwnym do ruchu wskazówek zegara) 2 Przełącznik elektryczny Steruj włączaniem i wyłączaniem opryskiwacza 3 Zawór nadmiarowy ciśnienia Kierunek poziomy oznacza warunki pracy farby.
8628 PLUS - 19 -
- 20 -
INSTALACJA Zwroty nie są akceptowane, a gwarancja traci ważność, jeśli opryskiwacz nie zostanie odpowiednio wyczyszczony natychmiast po każdym użyciu. Natychmiast wyczyścić opryskiwacz , aby zapobiec trwałym uszkodzeniom. Wymagania dotyczące uziemienia i prądu Instrukcje dotyczące uziemienia Ten produkt musi być uziemiony. W przypadku zwarcia elektrycznego uziemienie zmniejsza ryzyko porażenia prądem elektrycznym, zapewniając przewód odprowadzający prąd elektryczny.
Nigdy nie używaj gniazdka, które nie jest uziemione, ani adaptera. Nie używaj opryskiwacza, jeśli przewód elektryczny ma uszkodzony kontakt z masą. Używaj wyłącznie przedłużacza z nieuszkodzonym kontaktem z masą. Mniejszy przekrój lub dłuższe przedłużacze mogą zmniejszyć zużycie opryskiwacza wydajność. Pistolet natryskowy: uziemić poprzez podłączenie do prawidłowo uziemionego węża cieczy i pompy. Pojemnik na płyn: postępuj zgodnie z lokalnymi przepisami.
Uziemienie metalowego kubła: Podłącz przewód uziemiający do kubła, zaciskając jeden koniec do kubła, a drugi koniec do uziemienia, np. rury wodnej. Blokowanie i odblokowywanie pistoletu natryskowego: Zawsze blokuj spust podczas mocowania końcówki natryskowej lub gdy pistolet natryskowy nie jest używany . Blokowanie pistoletu natryskowego Pistolet jest zabezpieczony, gdy blokada spustu znajduje się w położeniu 90 kąt (prostopadły) do spustu w dowolnym kierunku .
wielowarstwowymi powłokami z poliuretanu o wysokiej wytrzymałości na rozciąganie i odporności na rozciąganie. Pomiędzy warstwami oplotu znajduje się statyczny element drenażowy z elastycznego, przewodzącego elektrycznie materiału . CECHY Osłona poliuretanowa pozwala na większą elastyczność i ciaśniejsze zagięcia . Odporny na zmęczenie spowodowane zginaniem . Rozprasza ładunek statyczny .
1. Zdjąć końcówkę natryskową z pistoletu . 2. Włóż wąż wejściowy i rurkę nadmiarową do wiadra z niewielką ilością wody,3. Włącz silnik i popchnij zawór ciśnieniowy do pozycji pionowej. Po kilku sekundach woda zacznie przepływać przez rurkę i wypływać z zaworu wylotowego. Dokręć mocno zawór wylotowy, a następnie mocno dokręć zawór ciśnieniowy. 4. Gdy ciśnienie osiągnie około 207 barze, sprawdź, czy nie ma wycieków na wężu wylotowym . Jeśli to wyciek, sprawdź leasing .
3. Obróć zawór zalewowy w dół. Nasz reduktor ciśnienia powinien być obsługiwany ręcznie . 4. Jeśli podejrzewasz, że końcówka natryskowa lub wąż są zatkane lub ciśnienie nie zostało całkowicie uwolnione po wykonaniu powyższych kroków, POWOLI poluzuj nakrętkę ustalającą osłony końcówki lub złączkę końcówki węża, aby stopniowo uwolnić ciśnienie, a następnie całkowicie poluzuj wąż lub rys. zatkany. 5. Włączyć spust i bezpiecznie zablokować pistolet, jeśli urządzenie jest wyłączane lub pozostawiane bez nadzoru.
rozpryskiem (mgłą farby). 6. Attach Paint Hose 2. Attach Paint Hose 3. Turn Pressure Control to Paint Hose Outlet Paint Gun and tighten Knob to Low Pressure and tighten with with two wrenches Spray setting. wrench. Aby zmniejszyć ciśnienie w opryskiwaczu 6. Tum Power Switch 2.Switch Prime/Spray 3. Point gun into paint off and unplug unit switch to Prime mode pail and activate Sprayer Trigger to from outlet. relieve pressure.
4.Turn Trigger Lock Note: Always set to Knob to Locking Prime mode between position. uses Procedura uwalniania ciśnienia Za każdym razem, gdy pojawi się polecenie usunięcia ciśnienia, należy przerwać natryskiwanie, sprawdzić lub serwisować sprzęt albo zainstalować lub oczyścić końcówkę natryskową. 1. Włączyć blokadę spustową pistoletu. Wyłącz zasilanie i ustaw regulator ciśnienia opryskiwacza na najniższe ciśnienie. 2.Przytrzymać pistolet przy boku wiadra do płukania.
6. Separate smaller 2. Place Priming Tube 3. Submerge Suction Priming Tube from in waste bucket Tube in water or Suction Tube. flushing solvent 4.Turn Prime/Spray 5.Adjust Pressure 6. Plug in Sprayer switch to Prime mode Control Knob to and turn on power Prime/Clean setting 7.Sprayer will start pumping and water or 8.
9. Switch Power to On 10. Paint should work itself from Suction Tube to Sprayer to Priming Tube until paint discharges from Return Tube Point gun into waste bucket and pull trigger 11. Turn Spray/Prime 12. Stop spraying 13. Remove the Priming Switch to Spray and activate trigger Tube from the waste mode and continue lock bucket and clip to to spray into waste Suction Tube and bucket submerge in paint pail 14. Jeśli silnik się zatrzyma, pompa i przewody zostaną zalane.
6. Once primed, 2.Start spraying at the lowest setting adjust nozzle to on the Pressure Control Knob and Spray setting increase pressure as needed byturning clockwise to create a good Techniki malarskie Przed malowaniem upewnij się, że agregat natryskowy został zagruntowany (patrz etapy zalewania i uruchomienia) i sprawdź, czy końcówka dyszy jest prawidłowo ustawiona, trzymaj pistolet w odległości około 1 stopy od powierzchni. 1. Keep gun 2. Do not fan the 3.
Czyszczenie 1.Relieve pressure 2.Separate tubes; 3. Place Priming and drain paint Tube in empty from Tubes waste bucket 4.Submerge Suction 5.Unthread Spray Tip and remove Tube in water or flushing fluid 6.Turn to Spray mode 7.Switch power to on - 32 - 8.Spray paint into paint pail.
9.Change to waste 10. Turn to Prime 11. Continue to bucket as paint thins mode flush until clear 12. Release trigger, 13. Remove trigger turn power off and guard from housing release pressure. 15. Remove filter 16.Clean all parts in warm, soapy water or flushing fluid with a bristled brush - 33 - 14.
Wskazówki dotyczące sprayu Po natryskiwaniu należy zawsze czyścić końcówki odpowiednim płynem czyszczącym i szczoteczką. Końcówki mogą wymagać wymiany po zużyciu 15 galonów (57 litrów) lub mogą wystarczyć na 60 galonów (227 litrów), w zależności od ścieralności farby. Lista części zamiennych PRZ EDM IOT 1 Część Jak dopracować części Zespół pompy Za pomocą klucza nastawnego odkręcić dolny zespół korpusu pompy.
2 zespół tłokowy Krok A. Za pomocą śrubokręta Krok B. Za pomocą krzyżakowego odkręć 4 śrubokręta krzyżowego śruby i zdejmij pokrywę wyjmij śrubę mocującą i pompy . płytkę ograniczającą sworzeń łączący, następnie wyciągnij sworzeń łączący tłoczysko i wyjmij zespół tłoczyska od dołu. 3 Zespół zaworu nadmiarowego ciśnienia Wybić cylindryczny sworzeń, zdjąć pokrętło przełącznika i gniazdo przełącznika, a następnie za pomocą klucza nastawnego odkręcić zespół ciśnieniowego zaworu bezpieczeństwa.
4 Zespół zaworu nadmiarowego ciśnienia Za pomocą klucza nastawnego odkręcić dolny zespół korpusu pompy. Zgodność materiałów — materiały i farby, których można użyć MATERIAŁY NA BAZIE WODY: Wszystkie opryskiwacze MOGĄ być używane do malowania materiałów wewnętrznych i zewnętrznych na bazie wody. Przed natryskiem materiałów na bazie wody przepłucz opryskiwacz wodą. Przykład: lakier do drewna, lateks, bejce...
∙ Materiał teksturowany lub wypełniony piaskiem ∙ Gips ∙ Materiały zawierające wapień, szkło, glinę, kwarc, takie jak specjalne mury, sztukaterie, farby do cegieł ∙ Farba metaliczna ∙ Farba magnetyczna lub podkład NIEBEZPIECZNE MATERIAŁY ∙ Środek do usuwania farb i plam ∙ Wybielacz lub inny materiał zawierający wybielacz ∙ Herbicyd ∙ Insektycyd lub pestycyd ∙ Środek dezynfekujący Rozwiązywanie problemów 1. Powszechny problem sprzętu Problem Co Do Sprawdź.
miejscu obszar do odwilży. Nie uruchamiać urządzenia natryskowego przed całkowitym rozmrożeniem. Jeśli farba stwardniała (wyschła) w urządzeniu natryskowym wymienić uszczelnienie pompy 2. Pompa wyporowa sworzeń 2. Wciśnij sworzeń na korbowodu Sworzeń miejsce i zabezpiecz musi być całkowicie wciśnięty sprężyną wynajęcie korbowód i mocowanie sprężyna musi być mocno osadzona rowek lub sworzeń pompy zespół obudowy napędu 3.Wymień silnik, jeśli wentylator się nie obraca Niska moc 1.
uziemioną kartę rozszerzeń 7.Przewody od silnika do płytki 7.Upewnij się, że męskie drukowanej w przypadku styki zacisków są podłączone uszkodzenia lub luźne złącza i dobrze przewodów. Sprawdź izolację podłączone. l żeńskie przewodów i terminal pod kątem terminale. Wymień luźne oznak przegrzania zaciski lub uszkodzone zaciski. Bezpiecznie podłącz ponownie zacisk 8.Zużyte szczotki silnika, które 8.Wymień szczotki muszą być większa niż 1/4 cala (6 mm) 9.Wiązanie szczotek silnika w 9.
4. Po czyszczeniu zwiń rurkę, w przypadku jakichkolwiek uszkodzeń. 5. Dodaj trochę smaru, jeśli nie będziesz go używać przez długi czas Ogólne informacje dotyczące naprawy Flammable materials spilled on hot, bare, motor could cause fire or explosion. To reduce risk of burns,fire or explosion, do not operate sprayer with cover removed Zachowaj wszystkie śruby. orzechy. podkładki. uszczelki i osprzęt elektryczny usunięte podczas napraw . Te części zazwyczaj są nie są dostarczane z zestawami wymiennymi.
To reduce risk of serious injury, including electric shock: Do not touch moving or electric parts with fingers or tools while testing repair. Unplug sprayer when power is not required for testing Install all covers, gaskets, screws and washers before you operate sprayer. OSTROŻNOŚĆ ·Nie uruchamiaj opryskiwacza na sucho dłużej niż 30 sekund . Może to spowodować uszkodzenie uszczelnień pompy. ·Chroń wewnętrzne części napędu opryskiwacza przed wodą.
•Poniżej podano zalecane rozmiary kryzy końcówki natryskowej dla różnych typów materiałów powłokowych: Lakier i bejca: 0,007” – 0,013” Emalia: 0,011” – 0,015” Akryl: 0,015” – 0,021” DYSZA ROZPYLAĆ WSKAZÓWKA WYBÓR WYKRES Otwór Rozmiar (Cale) 0,007” 0,009” 0,011” 0,013” 0,015” 0,017" 0,019” 0,021” 0,023” 0,025” 0,027” 0,029” 0,031” 0,033” 0,035" 2- 4 107 109 111 113 115 117 119 121 209 211 213 215 217 219 221 309 311 313 315 317 319 321 8-10 _ 409 411 413 415 417 419 10-12 _ 509
LISTA CZĘŚCI - 43 -
NIE Opis 1 Zespół korpusu Ilość NIE Opis 1 20 Przekładnia pompy Lowe 2 Kula zaworu Ilość NIE Opis 1 39 Moc pierścień sprzęgająca 1 21 Koło zębate wlotowego wału (DW=12.
uszczelka 12 Uszczelka 1 31 Podkładka 1 50 Elementy ramy 1 1 51 Podkładki pod stopy 4 2 52 Gwintowana osłona 1 1 53 Rozszerzenie 1 2 54 Bezpowietrzny 1 PCB 13 Prowadnica 1 32 nakrętki Montaż PCB zabezpieczającej, miedź rękaw 14 Nakrętka 1 33 zabezpieczająca Śruba ST3.
Adres: Baoshanqu Shuangchenglu 803long 11hao 1602A-1609shi Szanghaj Import do AUS: SIHAO PTY LTD, 1 ROKEVA STREETEASTWOOD NSW 2122 Australia Import do USA: Sanven Technology Ltd.
- 47 -
Techniczny Certyfikat wsparcia i e-gwarancji www.vevor.
Technisch Support- und E-Garantie-Zertifikat www.vevor.com/support Hochdruck-Airless-Farbspritzgerät We continue to be committed to provide you tools with competitive price. "Save Half", "Half Price" or any other similar expressions used by us only represents an estimate of savings you might benefit from buying certain tools with us compared to the major top brands and does not necessarily mean to cover all categories of tools offered by us.
HIGH PRESSURE AIRLESS PAINT SPRAYER RP8628 RP8628 PLUS NEED HELP? CONTACT US! Have product questions? Need technical support? Please feel free to contact us: Technical Support and E-Warranty Certificate www.vevor.com/support This is the original instruction, please read all manual instructions carefully before operating. VEVOR reserves a clear interpretation of our user manual. The appearance of the product shall be subject to the product you received.
7. Wichtige Sicherheitsanweisungen Diese Bedienungsanleitung dient Ihrem Nutzen . Bitte lesen und befolgen Sie die darin beschriebenen Sicherheits-, Installations-, Wartungs- und Fehlerbehebungsschritte, um Ihre Sicherheit und Zufriedenheit zu gewährleisten. Der Inhalt dieser Bedienungsanleitung basiert auf den neuesten Produktinformationen, die zum Zeitpunkt der Veröffentlichung verfügbar waren. Der Hersteller behält sich das Recht vor, jederzeit und ohne Vorankündigung Produktänderungen vorzunehmen.
Warnung: Tragen Sie bei der Verwendung dieses Produkts unbedingt Staubmasken. Warnung: Tragen Sie bei der Verwendung dieses Produkts unbedingt Handschuhe. Brandgefahr Explosionsgefahr. Gefahr einer Hautinjektion. Gefahr giftiger Dämpfe. Nur in gut belüfteten Bereichen verwenden. Gefahr durch unter Druck stehende Aluminiumteile. Vermeiden Sie Zündquellen wie Zündflammen, Zigaretten, tragbare Lampen usw. Systemdruck entlasten. Heiße Oberflächen/Verbrennungsgefahr.
Elektronikgeräten abgegeben werden . Dieses Gerät entspricht Teil 15 der FCC-Bestimmungen. Der Betrieb unterliegt den folgenden beiden Bedingungen: (1) Dieses Gerät darf keine schädlichen Störungen verursachen und (2) dieses Gerät muss alle empfangenen Störungen akzeptieren, einschließlich Störungen, die einen unerwünschten Betrieb verursachen können. Etiketten pflegen. Diese enthalten wichtige Informationen. Das Etikett Ihres Werkzeugs kann die folgenden Symbole enthalten.
PSI Pfund pro Quadratzoll MPa Megapascal U/min Revolutionen pro Minute Mindest Protokoll S Sekunden ALLGEMEINE SICHERHEITSVORSCHRIFTEN FÜR ELEKTROWERKZEUGE EINE WARNUNG LESEN SIE ALLE SICHERHEITSHINWEISE UND ANWEISUNGEN. Die Nichtbeachtung der Warnungen und Anweisungen kann zu Stromschlägen, Bränden, Explosionen und/oder schweren Verletzungen führen. Bewahren Sie alle Warnhinweise und Anweisungen zum späteren Nachschlagen auf.
Ihren gesunden Menschenverstand, wenn Sie ein Elektrowerkzeug bedienen. Benutzen Sie ein Elektrowerkzeug nicht, wenn Sie müde sind oder unter dem Einfluss von Drogen, Alkohol oder Medikamenten stehen. Ein Moment der Unaufmerksamkeit beim Betrieb von Elektrowerkzeugen kann zu schweren Verletzungen führen. Persönliche Schutzausrüstung verwenden. Tragen Sie immer einen Augenschutz mit Seitenschutz.
oder in der Bedienung des Geräts geschult für ihre Sicherheit verantwortlich. Kinder sollten beaufsichtigt werden , um sicherzustellen, dass sie das Gerät nicht als Spielzeug verwenden. LEISTUNG GEBRAUCH UND PFLEGE VON ELEKTROWERKZEUGEN GEBRAUCH UND PFLEGE VON ELEKTROWERKZEUGEN REINIGEN SIE DAS SPRÜHGERÄT NACH JEDEM GEBRAUCH. Üben Sie beim Arbeiten mit dem Elektrowerkzeug keine Gewalt aus. Verwenden Sie das richtige Elektrowerkzeug für Ihre Anwendung.
als die vorgesehenen Zwecke kann zu einer gefährlichen Situation führen. Überprüfen Sie vor jedem Gebrauch, ob beschädigte Teile vorhanden sind. Überprüfen Sie , ob die Schutzvorrichtungen ordnungsgemäß funktionieren und ihre beabsichtigte Funktion erfüllen. Überprüfen Sie die Ausrichtung der beweglichen Teile, das Festsitzen der beweglichen Teile, den Bruch von Teilen, die Montage und alle anderen Bedingungen, die den Betrieb beeinträchtigen könnten.
Um die Brand- oder Explosionsgefahr zu verringern: Lösungsmittel- und Lackdämpfe sind brennbar und können sich entzünden oder explodieren. Nur in einem gut belüfteten Bereich verwenden und frische Luft durch den Arbeitsbereich strömen lassen . Halten Sie die Pumpe gut belüftet und besprühen Sie die Pumpenbaugruppe nicht mit Wasser. Sprühgerät erzeugt Funken.
Halten Sie immer einen funktionsfähigen Feuerlöscher in der Nähe. Im Arbeitsbereich nicht rauchen. Betätigen Sie im Sprühbereich keine Lichtschalter, Motoren oder ähnliche funkenerzeugende Produkte . Halten Sie den Arbeitsbereich sauber und frei von Farb- oder Lösungsmittelbehältern, Lappen und anderen brennbaren Materialien.
Wenn ein Verlängerungskabel benötigt wird, verwenden Sie mindestens ein 12 AWG (2,5 mm) Kabel, um die richtige Strommenge für das Werkzeug bereitzustellen. EinunterdimensioniertesKabel führt zu einem Spannungsabfall und damit zu einem Stromausfall und Überhitzung. Verwenden Sie nur ein 3-adriges Verlängerungskabel mit einem Erdungsstecker, das über eine ordnungsgemäß geerdete Steckdose verfügt , die den Stecker dieses Werkzeugs akzeptiert .
HAUT IN DER HAUT INJEKTIONSSICHERHEIT JEKTIONSSICHERHEIT IM FALLE EINER UNBEABSICHTIGTEN HAUTINJEKTION SUCHEN SIE SOFORT EINE MEDIZINISCHE BEHANDLUNG! Hochdruckspray oder Lecks können in die Haut eindringen und zu schweren oder tödlichen Verletzungen führen. Um das Risiko einer Hautinjektion zu verringern: Überprüfen Sie, ob alle Verbindungen festgezogen sind, BEVOR Sie das Gerät einschalten. Richten Sie die Pistole oder das Spray nicht auf Personen oder Tiere.
Seien Sie vorsichtig beim Reinigen und Wechseln von Schläuchen, Düsenspitzen, Spitzenschutz oder beim Installieren von Verlängerungen. BefolgenSiedasVerfahrenzurDruckentlastung, um den Druck auszuschalten und zu entlasten, bevor Sie versuchen, Änderungen vorzunehmen. HEISS S HEISSE OBERFLÄCHENSICHERHEIT OBERFLÄCHENSICHERHEIT Unter Druck stehende Geräteoberflächen und Flüssigkeiten können während des Betriebs heiß werden.
Lösungsmittelherstellers. Unter Druck stehende Geräte können ohne Vorwarnung starten. Bevor Sie das Gerät inspizieren, bewegen oder warten, befolgen Sie die Vorgehensweise zur Druckentlastung in diesem Handbuch und trennen Sie die Stromversorgung. DRUCK IZ DRUCKALUMINIUM-SICHERHEIT ED ALUMINIUM-SICHERHEIT Verwendung von Flüssigkeiten, die mit Aluminium nicht kompatibel sind in unter Druck stehenden Geräten kann zu schweren Verletzungen führen chemische Reaktion und Gerätebruch.
Notiz: Dieses Produkt wurde getestet und entspricht den Grenzwerten für ein digitales Gerät der Klasse B gemäß Teil 15 der FCC-Bestimmungen. Diese Grenzwerte sollen einen angemessenen Schutz vor schädlichen Störungen in einer Wohnanlage bieten. Dieses Produkt erzeugt und verwendet Hochfrequenzenergie und kann diese ausstrahlen. Wenn es nicht gemäß den Anweisungen installiert und verwendet wird, kann es schädliche Störungen der Funkkommunikation verursachen.
5) Tun Sie es Verwenden Sie dies nicht Maschine In A Gefahrenstelle. 6) Tun Sie es nicht verwenden Wann Die Maschine Ist nicht Arbeiten richtig . 7) Tun Sie es nicht zerlegen Und Reparatur Das Maschine . 8) Tun Sie es nicht verwenden ein ungeeignet Wechselstrom Auslauf .
werden 25) Typ Z : Wenn das Netzkabel nicht ausgetauscht werden kann . Wenn das Kabel beschädigt ist, sollte das Gerät verschrottet werden. 20) Um eine Gefahr durch unbeabsichtigtes Zurücksetzen der Thermosicherung zu vermeiden, ist dies Das Gerät darf nicht über ein externes Schaltgerät, z. B. eine Zeitschaltuhr, versorgt werden an einen Stromkreis angeschlossen, der vom Energieversorger regelmäßig einund ausgeschaltet wird.
FEA FEATUREI DENTIFICATION TUREI DENTIFICATION - 18 -
RP8628 SPRÜHGERÄT: Nummer Beschreibung Funktionseinführung 1 Druckeinstellknopf Kontrollieren Sie den Ausgangsdruck der Farbe (Druck im Uhrzeigersinn erhöhen, Druck gegen den Uhrzeigersinn verringern).
8628 PLUS - 20 -
- 21 -
INSTALLATION Rücksendungen werden nicht akzeptiert und die Garantie erlischt, wenn das Spritzgerät nicht sofort nach jedem Gebrauch ordnungsgemäß gereinigt wird. Reinigen Sie das Spritzgerät sofort, um dauerhafte Schäden zu vermeiden. Erdung und elektrische Anforderungen Erdungsanweisungen Dieses Produkt muss geerdet werden. Im Falle eines elektrischen Kurzschlusses verringert die Erdung das Risiko eines Stromschlags, indem sie einen Ableitungsdraht für den elektrischen Strom bereitstellt.
Verwenden Sie niemals eine nicht geerdete Steckdose oder einen Adapter. nicht , wenn das Stromkabel einen beschädigten Erdungskontakt hat. Verwenden Sie nur ein Verlängerungskabel mit unbeschädigtem Erdungskontakt. Kleinere oder längere Verlängerungskabel können die Leistung des Spritzgeräts beeinträchtigen Leistung. Spritzpistole: Erdung durch Anschluss an einen ordnungsgemäß geerdeten Materialschlauch und eine ordnungsgemäß geerdete Pumpe.
an, indem Sie ein Ende am Eimer und das andere Ende an der Erde, beispielsweise an einer Wasserleitung, festklemmen. Verriegeln und Entriegeln der Spritzpistole: Verriegeln Sie immer den Abzug, wenn Sie die Spritzdüse anbringen oder wenn die Spritzpistole nicht verwendet wird . Verriegeln der Spritzpistole Die Waffe ist gesichert, wenn die Abzugssperre auf 90 steht Winkel (senkrecht) zum Auslöser in beide Richtungen .
chemisch mit mehreren Schichten einer hochfesten, synthetischen, widerstandsfähigen Polyurethan-Ummantelung verbunden ist. Zwischen den Geflechtschichten befindet sich ein statisches Abflusselement aus flexiblem, elektrisch leitfähigem Material . MERKMALE Der Polyurethan-Überzug ermöglicht eine größere Flexibilität und engere Biegungen . Beständig gegen Biegeermüdung . Leitet statische Aufladung ab .
1. Spritzdüse von der Pistole abnehmen . 2. Geben Sie den Zulaufschlauch und das Druckentlastungsrohr mit etwas Wasser in den Eimer.3. Schalten Sie den Motor ein und schieben Sie das Druckventil nach oben. In wenigen Sekunden beginnt Wasser durch das Rohr nach oben zu fließen und aus dem Auslassventil auszuströmen. Ziehen Sie das Auslassventil fest und dann das Druckventil fest. 4. Wenn der Druck etwa 207 erreicht Überprüfen Sie, ob der Auslassschlauch undicht ist .
3. Drehen Sie das Entlüftungsventil nach unten. Unsere Druckentlastung sollte von Hand erfolgen. 4. Wenn Sie den Verdacht haben, dass die Spritzdüse oder der Schlauch verstopft ist oder der Druck nicht vollständig entlastet wurde, nachdem Sie die oben genannten Schritte ausgeführt haben, lösen Sie LANGSAM die Haltemutter des Düsenschutzes oder die Schlauchendkupplung, um den Druck allmählich zu entlasten, und lösen Sie dann die Schlauch- oder Feigenverstopfung vollständig. 5.
Hinweis: Entfernen oder decken Sie Gegenstände ab, die Sie vor Overspray (Farbnebel) schützen möchten. 7. Attach Paint Hose 2. Attach Paint Hose 3. Turn Pressure Control to Paint Hose Outlet Paint Gun and tighten Knob to Low Pressure and tighten with with two wrenches Spray setting. wrench. Zur Entlastung des Sprühdrucks 7. Tum Power Switch 2.Switch Prime/Spray 3. Point gun into paint off and unplug unit switch to Prime mode pail and activate Sprayer Trigger to from outlet.
4.Turn Trigger Lock Note: Always set to Knob to Locking Prime mode between position. uses Verfahren zur Druckentlastung Wenn Sie aufgefordert werden, den Druck zu entlasten, hören Sie mit dem Spritzen auf, überprüfen oder warten Sie die Ausrüstung oder installieren oder reinigen Sie die Spritzdüse. 1. Aktivieren Sie die Abzugssperre an der Pistole. Schalten Sie die Stromversorgung aus und stellen Sie den Druckregler des Spritzgeräts auf die niedrigste Druckeinstellung. 2.
abspülen . Vorbereitungs- und Startschritte 7. Separate smaller 2. Place Priming Tube 3. Submerge Suction Priming Tube from in waste bucket Tube in water or Suction Tube. flushing solvent 4.Turn Prime/Spray 5.Adjust Pressure 6. Plug in Sprayer switch to Prime mode Control Knob to and turn on power Prime/Clean setting 7.Sprayer will start pumping and water or 8.
9. Switch Power to On 10. Paint should work itself from Suction Tube to Sprayer to Priming Tube until paint discharges from Return Tube Point gun into waste bucket and pull trigger 11. Turn Spray/Prime 12. Stop spraying 13. Remove the Priming Switch to Spray and activate trigger Tube from the waste mode and continue lock bucket and clip to to spray into waste Suction Tube and bucket submerge in paint pail 14. Wenn der Motor stoppt, werden die Pumpe und die Schläuche vorgefüllt.
und Farbnebel schützen möchten 7. Once primed, 2.Start spraying at the lowest setting adjust nozzle to on the Pressure Control Knob and Spray setting increase pressure as needed byturning clockwise to create a good Maltechniken Stellen Sie vor dem Lackieren sicher, dass das Spritzgerät grundiert ist (siehe Schritte „Grundierung und Inbetriebnahme“) und stellen Sie sicher, dass die Düsenspitze richtig ausgerichtet ist. Halten Sie die Pistole etwa 30 cm von der Oberfläche entfernt. 1. Keep gun 2.
Reinigung 1.Relieve pressure 2.Separate tubes; 3. Place Priming and drain paint Tube in empty from Tubes waste bucket 4.Submerge Suction 5.Unthread Spray Tip and remove Tube in water or flushing fluid 6.Turn to Spray mode 7.Switch power to on - 33 - 8.Spray paint into paint pail.
9.Change to waste 10. Turn to Prime 11. Continue to bucket as paint thins mode flush until clear 12. Release trigger, 13. Remove trigger turn power off and guard from housing release pressure. 15. Remove filter 16.Clean all parts in warm, soapy water or flushing fluid with a bristled brush - 34 - 14.
Sprühtipps Reinigen Sie die Spitzen nach dem Sprühen immer mit einer verträglichen Reinigungsflüssigkeit und einer Bürste. Je nach Abrasivität der Farbe müssen die Spitzen möglicherweise nach 15 Gallonen (57 Liter) ausgetauscht werden, oder sie halten bis zu 60 Gallonen (227 Liter). Ersatzteilliste _ _ ARTI KEL 1 Teil So verfeinern Sie die Teile Pumpenmontage Schrauben Sie die untere Pumpenkörperbaugruppe mit einem verstellbaren Schraubenschlüssel ab.
2 Kolbenbaugruppe Schritt A. Lösen Sie die 4 Schrauben mit einem Schritt B: Entfernen Sie Kreuzschlitzschrauben mit einem dreher und entfernen Kreuzschraubendreher Sie die die Pumpenabdeckung . Befestigungsschraube und die Verbindungsstift-Begrenz ungsplatte, ziehen Sie dann den Verbindungsstift der Kolbenstange heraus und nehmen Sie die Kolbenstangenbaugruppe von unten heraus.
4 Druckbegrenzung sventilbaugruppe Schrauben Sie die untere Pumpenkörperbaugruppe mit einem verstellbaren Schraubenschlüssel ab. Materialverträglichkeit – Verwendbare Materialien und Farben WASSERBASIERTES MATERIAL: Alle Sprühgeräte können mit wasserbasierten Innen- und Außenmaterialien verwendet werden. Bevor Sie Materialien auf Wasserbasis sprühen, spülen Sie Ihr Spritzgerät mit Wasser. Beispiel: Holzlack, Latex, Beizen ...
∙ Einfahrtsversiegelung ∙ Mit Textur oder Sand gefülltes Material ∙ Gips ∙ Materialien wie Kalkstein, Glas, Ton, Quarz wie Spezialmauerwerk, Stuck, Ziegelfarbe ∙ Metallic-Lackierung ∙ Magnetfarbe oder Grundierung GEFAHRSTOFFE ∙ Farb- und Fleckenentferner ∙ Bleichmittel oder jedes Material, das Bleichmittel enthält ∙ Herbizid ∙ Insektizid oder Pestizid ∙ Desinfektionsmittel Fehlerbehebung 1.
Grundlegende 1.Pumpen Sie eingefrorene oder 1. Tauen Sie das mechanische verhärtete Schmerzen Sprühgerät auf, wenn Wasser oder wasserbasierte Schmerzen auftreten ist im Spritzgerät eingefroren. Spritzgerät warm stellen Bereich zum Auftauen. Starten Sie das Spritzgerät erst, wenn es vollständig aufgetaut ist. Wenn die Farbe im Spritzgerät ausgehärtet (getrocknet) ist Ersetzen Sie die Pumpenpackung 2.Verdrängerpumpe Pleuelbolzen 2.
reparieren 4.Ansaugschlauchanschlüsse 4. Ziehen Sie alle losen Verbindungen fest. Überprüfen Sie den O-Ring am Saugrohr 5.Stromversorgung mit Voltmeter. 5. Der Wert muss 220-240 betragen Gebäudeschutzschalte Vakuum.Niedrig Spannungen r zurücksetzen, verringern die Leistung des Ersetzen Sie die Spritzgeräts Gebäudesicherung . Reparieren Sie die Steckdose oder versuchen Sie es mit einer anderen Steckdose 6.Größe und Länge des 6.
8. Abgenutzte Motorbürsten, die 8. Bürsten austauschen entfernt werden müssen größer als 1/4 Zoll (6 mm) 9.Motorbürsten klemmen in 9.Pinsel reinigen Bürstenhaltern Inhaber. Kohlenstoffstaub entfernen durch Bürstenstaub mit Druckluft ausblasen 10.Niedriger Strömungsabrissdruck. 10. Drehdruck Drehen Sie den Druckregelbaugruppe Bedienknopf vollständig im austauschen Uhrzeigersinn 11.
Flammable materials spilled on hot, bare, motor could cause fire or explosion. To reduce risk of burns,fire or explosion, do not operate sprayer with cover removed Bewahren Sie alle Schrauben auf. Nüsse. Unterlegscheiben. Dichtungen und elektrische Anschlüsse, die während Reparaturarbeiten entfernt wurden . Diese Teile sind normalerweise vorhanden nicht im Lieferumfang der Ersatzkits enthalten. Probereparaturen nach Behebung der Probleme.
VORSICHT · Lassen Sie das Spritzgerät nicht länger als 30 Sekunden trocken laufen . Andernfalls könnten die Pumpenpackungen beschädigt werden. ·Schützen Sie die internen Antriebsteile dieses Spritzgeräts vor Wasser. Öffnungen in der Abdeckung ermöglichen eine Luftkühlung der mechanischen Teile und der Elektronik im Inneren. Wenn Wasser in diese Öffnungen eindringt, das Spritzgerät könnte zu Fehlfunktionen oder dauerhaften Schäden führen . ·Verhindern Sie Korrosion der Pumpe und Schäden durch Einfrieren.
8-10 _ 409 411 413 415 417 419 421 423 425 427 429 431 433 435 10-12 _ 509 511 513 515 517 519 521 523 525 527 529 531 533 535 12-14 _ 609 611 613 615 617 619 621 623 625 627 629 631 633 635 711 713 715 717 719 721 723 725 727 729 731 733 735 813 815 817 819 821 823 825 827 829 831 833 835 931 933 935 14-16 _ 16-18 _ 18-20 _ 923 TEILEDIAGRAMM (RP8628) - 44 - 927
LISTE DER EINZELTEILE - 45 -
NE Beschreibung IN 1 - Men NE Beschreibun ge. IN 1 20 Pumpenkörperb Men NE g ge IN Kupplungsge 1 39 triebe Beschreibung Men ge Leistung 1 Kabelhaltering augruppe 2 Einlassventilkug 1 21 el Kurbelwellenr 1 40 Basis-Crimpplatte 1 ad Montage (DW=12.
Siegelring 12 Siegelring 1 31 PCB-Pad 1 50 Rahmenkomponenten 1 13 Kontermutterfüh 1 32 Leiterplatten 1 51 Fußpolster 4 2 52 Gewindehülle 1 rung aus Kupfer montage Ärmel 14 Kontermutter 1 33 Schraube ST3,5X13F des Pumpengehäus es 15 Druckbegrenzun 1 34 Netzstecker 1 53 Verlängerung 1 1 35 Sicherungssc 2 54 Airless-Farbspritzgerät 1 2 55 Hochdruckschlauch 1 2 56 Schlüssel 2 gsventil Montage 16 Druckentlastung aus Aluminium heiben Beschläge 17 Auslassan
Adresse: Baoshanqu Shuangchenglu 803long 11hao 1602A-1609shi Shanghai Importiert nach AUS: SIHAO PTY LTD, 1 ROKEVA STREETEASTWOOD NSW 2122 Australien In die USA importiert: Sanven Technology Ltd.
- 49 -
Technisch Support- und E-Garantiezertifikat www.vevor.
Technique Assistance et certificat de garantie électronique www.vevor.
We continue to be committed to provide you tools with competitive price. "Save Half", "Half Price" or any other similar expressions used by us only represents an estimate of savings you might benefit from buying certain tools with us compared to the major top brands and does not necessarily mean to cover all categories of tools offered by us. You are kindly reminded to verify carefully when you are placing an order with us if you are actually saving half in comparison with the top major brands.
HIGH PRESSURE AIRLESS PAINT SPRAYER RP8628 RP8628 PLUS NEED HELP? CONTACT US! Have product questions? Need technical support? Please feel free to contact us: Technical Support and E-Warranty Certificate www.vevor.com/support This is the original instruction, please read all manual instructions carefully before operating. VEVOR reserves a clear interpretation of our user manual. The appearance of the product shall be subject to the product you received.
8. Consignes de sécurité importantes Ce manuel d'instructions est destiné à votre bénéfice . Veuillez lire et suivre les étapes de sécurité, d'installation, de maintenance et de dépannage décrites ci-dessous pour garantir votre sécurité et votre satisfaction. Le contenu de ce manuel d'instructions est basé sur les dernières informations sur le produit disponibles au moment de la publication. Le fabricant se réserve le droit d'apporter des modifications au produit à tout moment et sans préavis.
Avertissement - Assurez-vous de porter des gants lorsque vous utilisez ce produit. Risque d'incendie Risque d'explosion. Risque d'injection cutanée. Risque de vapeurs toxiques. Utiliser uniquement dans des zones bien ventilées. Risque lié aux pièces en aluminium sous pression. Évitez les sources d'inflammation telles que les veilleuses, les cigarettes, les lampes portatives, etc. Soulager la pression du système. Surfaces chaudes/risque de brûlure.
Cet appareil est conforme à la partie 15 des règles FCC. Son fonctionnement est soumis aux deux conditions suivantes : (1) Cet appareil ne doit pas provoquer d'interférences nuisibles et (2) cet appareil doit accepter toute interférence reçue, y compris les interférences susceptibles de provoquer un fonctionnement indésirable. Maintenir les étiquettes. Ceux-ci contiennent des informations importantes. L'étiquette de votre outil peut inclure les symboles suivants.
ÉLECTRIQUES UN AVERTISSEMENT LISEZ TOUS LES AVERTISSEMENTS DE SÉCURITÉ ET TOUTES LES INSTRUCTIONS. Le non-respect des avertissements et des instructions peut entraîner un choc électrique, un incendie, une explosion et/ou des blessures graves. CONSERVEZ TOUS LES AVERTISSEMENTS ET INSTRUCTIONS POUR RÉFÉRENCE FUTURE. Le terme « outil électrique » dans les avertissements fait référence à votre outil électrique alimenté sur secteur (avec fil).
interrupteur est en position d'arrêt avant de vous connecter à une source d'alimentation, de ramasser ou de transporter l' outil. Transporter des outils électriques avec le doigt dessus l'interrupteur ou les outils électriques sous tension qui ont l' interrupteur allumé invitent aux accidents. N’allez pas trop loin. Gardez toujours une bonne position et un bon équilibre pour permettre un meilleur contrôle de l'outil électrique dans des situations inattendues. Habillez-vous correctement.
pas. Tout outil électrique qui ne peut pas être contrôlé avec l'interrupteur est dangereux et doit être réparé. Débranchez la fiche de la source d'alimentation avant d'effectuer des réglages, de changer d'accessoires ou de ranger des outils électriques. De telles mesures de sécurité préventives réduisent le risque de démarrage accidentel de l'outil électrique.
l’ outil électrique est maintenue. AVERTISSEMENTS DE SÉCURITÉ SPÉCIFIQUES Ce pulvérisateur n'est pas destiné à être utilisé avec des matériaux inflammables ou combustibles utilisés dans des applications UN AVERTISSE MENT industrielles ou fixes telles que des usines ou des ateliers de peinture. Respectez toutes les réglementations fédérales, étatiques ou provinciales applicables et respectez les exigences NFPA 33 et OSHA s'il est utilisé dans ces applications.
l’électricité statique. L'électricité statique crée un risque d'incendie ou d'explosion en présence de vapeurs de peinture ou de solvants . Toutes les pièces du système de pulvérisation, y compris la pompe, le flexible, le pistolet pulvérisateur et les objets dans et autour de la zone de pulvérisation, doivent être correctement mis à la terre pour se protéger contre les décharges statiques et les étincelles.
maintenance si les instructions de mise à la terre ne sont pas comprises ou s'il y a des doutes quant à la mise à la terre correcte de l'équipement. Ne modifiez pas la fiche du cordon d’alimentation fournie avec l’outil. Neretirez jamaislabroche de mise à la terre de la fiche. Si la fiche ne rentre pas dans la prise, faites installer une prise appropriée par un électricien qualifié. N'utilisez pas l'outil si le cordon d'alimentation ou la fiche est endommagé.
une terre telle qu'un tuyau métallique. Lors du rinçage ou du relâchement de la pression, maintenez une partie métallique du pistolet pulvérisateur contre le seau pour assurer la continuité avec la terre, puis pulvérisez. Pour maintenir la continuité de la mise à la terre lors du rinçage ou de la décompression : maintenez fermement la partie métallique du pistolet pulvérisateur contre le côté d’un seau métallique mis à la terre, puis actionnez le pistolet.
L'équipement maintient la pression après la coupure de courant. Inspectez les tuyaux et les pièces pour déceler tout dommage avant chaque utilisation. Remplacez touttuyau ou pièce endommagée uniquement par des pièces de rechange d'origine. Les composants de remplacement doivent avoir une pression nominale non inférieure à celle de la pompe de 3 000 PSI (205 bars). Suivez toujours la procédure de décompression pour arrêter et relâcher la pression.
UNE MAUVAISE UTILISATION DE CET ÉQUIPEMENT PEUT PROVOQUER LA MORT OU DES BLESSURES GRAVES. N'utilisez pas l'appareil lorsque vous êtes fatigué ou sous l'influence de drogues ou d'alcool. Les liquides ou vapeurs toxiques peuvent provoquer des blessures graves, voire la mort, en cas d'éclaboussure dans les yeux ou sur la peau, d'inhalation ou d'ingestion.
approuvés par la partie responsable de la conformité pourraient annuler le droit de l'utilisateur à utiliser l'équipement ! Cet appareil est conforme à la partie 15 des règles FCC. L’exploitation est soumise aux deux conditions suivantes : 1) Ce produit peut provoquer des interférences nuisibles. 2) Ce produit doit accepter toute interférence reçue, y compris les interférences susceptibles de provoquer un fonctionnement indésirable.
blessure. Non conforme utiliser peut résultat dans choc électrique, incendie, blessures corporelles et autres dommages : 1 ) Gardez débrancher quand déplacer le machine. 2 ) Gardez débrancher quand installation _ accessoires 3 ) Placer un appartement et écurie plate-forme et fonctionner sous ventilé conditions 4) Porter des vêtements spéciaux é q u i p e m e n t de protection lorsque en fonctionnement le machine 5)Faire ne pas utiliser ça machine dans un emplacement dangereux.
au-dessus de et personnes avec réduit physique , sensoriel ou mental capacités ou manque d'expérience et connaissance _ s'ils ont reçu une surveillance ou des instructions concernant l'utilisation de l'appareil dans un environnement sûr. façon et comprendre les dangers encourus. Les enfants ne doivent pas jouer avec l'appareil. Le nettoyage et l'entretien par l'utilisateur ne doivent pas être effectués par des enfants sans surveillance. 26) de type Z : si le cordon d'alimentation ne peut pas être remplacé.
FEA CARACTÉRISTIQUESI DENTIFICATION TUREI DENTIFICATION - 17 -
PULVÉRISATEUR RP8628 : Nombre Description Présentation de la fonction 1 Bouton de réglage de la pression Contrôler la pression de sortie de la peinture (augmenter la pression dans le sens horaire, diminuer la pression dans le sens inverse des aiguilles d'une montre) 2 Interrupteur électrique Contrôler l'allumage ou l'arrêt du pulvérisateur 3 Soupape de limitation de pression La direction horizontale signifie la condition de fonctionnement de la peinture, la direction verticale signifie la condit
8628 PLUS - 19 -
- 20 -
INSTALLATION Les retours ne sont pas acceptés et la garantie est annulée si le pulvérisateur n'est pas correctement nettoyé immédiatement après chaque utilisation. Nettoyez immédiatement le pulvérisateur pour éviter des dommages permanents. Exigences de mise à la terre et électriques Instructions de mise à la terre Ce produit doit être mis à la terre. En cas de court-circuit électrique , la mise à la terre réduit le risque de choc électrique en fournissant un fil de fuite pour le courant électrique.
N'utilisez jamais une prise qui n'est pas mise à la terre ni un adaptateur. N'utilisez pas le pulvérisateur si le cordon électrique a un contact de terre endommagé. Utilisez uniquement une rallonge dont le contact de terre n'est pas endommagé. Des rallonges de plus petit calibre ou des rallonges plus longues peuvent réduire performance. Pistolet pulvérisateur : mis à la terre via une connexion à un tuyau de produit et à une pompe correctement mis à la terre.
Mise à la terre du seau métallique : connectez un fil de terre au seau en serrant une extrémité au seau et l'autre extrémité à la terre, comme une conduite d'eau. Verrouillage et déverrouillage du pistolet pulvérisateur : Verrouillez toujours la gâchette lorsque vous fixez la buse de pulvérisation ou lorsque le pistolet pulvérisateur n'est pas utilisé .
constitué d'un tube intérieur thermoplastique extrudé et sans soudure, lié chimiquement à plusieurs couches de revêtement en polyuréthane synthétique résistant à haute résistance. Un élément de drainage statique en matériau flexible et éclectiquement conducteur est situé entre les couches de tresse. CARACTÉRISTIQUES Le revêtement en polyuréthane permet une plus grande flexibilité et des courbures plus serrées . Résistant à la fatigue de flexion . Dissipe la charge statique .
la pompe avec de l'eau chaude savonneuse . Assurez-vous que l'huile hydraulique dans la pompe est propre et en volume suffisant, puis commencez la procédure suivante . 1. Retirez la buse de pulvérisation du pistolet . 2. Mettez le tuyau d'entrée et le tube de décompression dans le seau avec un peu d'eau.3. Allumez le moteur et poussez la valve de pression vers le haut.
2. Tenir le pistolet contre le côté du seau de rinçage métallique mis à la terre. Gâchette du pistolet pour relâcher la pression. 3. Baissez la vanne d'amorçage. Notre décompression doit fonctionner à la main. 4.
d'alimentation. Installation: Remarque : Retirez ou couvrez les objets que vous souhaitez protéger des projections excessives (brouillard de peinture). 8. Attach Paint Hose 2. Attach Paint Hose 3. Turn Pressure Control to Paint Hose Outlet Paint Gun and tighten Knob to Low Pressure and tighten with with two wrenches Spray setting. wrench. Pour soulager la pression du pulvérisateur 8. Tum Power Switch 2.Switch Prime/Spray 3.
4.Turn Trigger Lock Note: Always set to Knob to Locking Prime mode between position. uses Procédure de décompression Chaque fois qu'il est demandé de relâcher la pression, arrêter la pulvérisation, vérifier ou entretenir l'équipement ou installer ou nettoyer la buse de pulvérisation. 1. Engagez le verrou de sécurité de la gâchette sur le pistolet. Coupez l’alimentation électrique et réglez la commande de pression du pulvérisateur au réglage de pression le plus bas. 2.
Rincer avec de l'essence minérale. suivi d'eau tiède et propre. AVERTISSEMENT! POUR PRÉVENIR LES INCENDIES : Lorsque vous utilisez de l'essence minérale, mettez le pistolet à la terre en le tenant contre un récipient métallique pendant le rinçage. Peinture à base d'eau (latex) : Rincer à l'eau tiède et propre . Étapes d'amorçage et de démarrage 8. Separate smaller 2. Place Priming Tube 3. Submerge Suction Priming Tube from in waste bucket Tube in water or Suction Tube. flushing solvent 4.
7.Sprayer will start pumping and water or 8. Remove Suction Tube flushing solvent well as air bubbles will be from water or flushing purged from system let fluids discharge solvent and submerge in from Priming Tube into waste bucket for 30 paint pail to 60 seconds then switch Power to Off 9. Switch Power to On 10. Paint should work itself from Suction Tube to Sprayer to Priming Tube until paint discharges from Return Tube Point gun into waste bucket and pull trigger 11. Turn Spray/Prime 12.
Avant de peindre, assurez-vous que le pulvérisateur a été amorcé (voir les étapes d'amorçage et de démarrage) et vérifiez que la pointe de la buse est correctement alignée. Remarque : Retirez ou couvrez les objets que vous souhaitez protéger des projections excessives et du brouillard de peinture. 8. Once primed, 2.
1. Keep gun 2. Do not fan the 3. Overlap strokes straight and move gun or paint will be by half, always aim arm across at a uneven stroke at bottom steady rate while edge of last stroke staying one foot from the surface Nettoyage 1.Relieve pressure 2.Separate tubes; 3. Place Priming and drain paint Tube in empty from Tubes waste bucket 4.Submerge Suction 5.
6.Turn to Spray mode 7.Switch power to on 8.Spray paint into paint pail. 9.Change to waste 10. Turn to Prime 11. Continue to bucket as paint thins mode flush until clear 12. Release trigger, 13. Remove trigger turn power off and guard from housing release pressure. - 33 - 14.
15. Remove filter 16.Clean all parts in warm, soapy water or flushing fluid with a bristled brush Conseils de pulvérisation Nettoyez toujours les pointes avec un liquide de nettoyage et une brosse compatibles après la pulvérisation. Les embouts peuvent nécessiter un remplacement après 15 gallons (57 litres) ou ils peuvent durer jusqu'à 60 gallons (227 litres) en fonction de l'abrasivité de la peinture.
2 ensemble de piston Étape A. Utilisez un tournevis cruciforme Étape B. Utilisez un pour dévisser les 4 vis tournevis cruciforme pour et retirer le couvercle retirer la vis de fixation et de la pompe . la plaque de limite de la broche de connexion, puis retirez la broche de connexion de la tige de piston et retirez l'ensemble de tige de piston par le bas.
4 Ensemble soupape de surpression Utilisez une clé à molette pour dévisser l’ensemble inférieur du corps de pompe. Compatibilité des matériaux - Matériaux et peintures pouvant être utilisés MATÉRIAU À BASE D'EAU : Tous les pulvérisateurs PEUVENT être utilisés avec des matériaux intérieurs et extérieurs à base d'eau. Avant de pulvériser des matériaux à base d'eau, rincez votre pulvérisateur avec de l'eau. Exemple : laque à bois, latex, teintures...
∙ Scellant pour allée ∙ Matériau texturé ou rempli de sable ∙ Plâtre ∙ Matériaux comprenant du calcaire, du verre, de l'argile et du quartz tels que la maçonnerie spécialisée, le stuc et la peinture pour brique ∙ Peinture métallisée ∙ Peinture ou apprêt magnétique MATIÈRES DANGEREUSES ∙ Décapant pour peinture et teinture ∙ Eau de Javel ou tout autre matériau contenant de l'eau de Javel ∙ Herbicides ∙ Insecticide ou pesticide ∙ Désinfectant Dépannage 1.
Mécanique 1. Pomper la douleur gelée ou 1. Décongeler le de base durcie pulvérisateur en cas de douleur à base d'eau ou d'eau. a gelé dans le pulvérisateur. Placez le pulvérisateur dans un endroit chaud. zone à décongeler. Ne démarrez pas le pulvérisateur avant qu'il ne soit complètement décongelé. Si la peinture a durci (séché) dans le pulvérisateur remplacer la garniture de la pompe 2. Pompe volumétrique axe de 2.
5. L'alimentation électrique avec 5. Réinitialisez le disjoncteur voltmètre du bâtiment, remplacez Mater doit lire 220-240 Vac.Bas les le fusible du bâtiment. tensions réduisent les Réparez la prise électrique ou performances du pulvérisateur essayez une autre prise. 6. Taille et longueur de la rallonge 6. Remplacez par une carte d'extension correcte et mise à la terre. 7. Fils du moteur au circuit imprimé 7.
Entretien quotidien La durée de vie de l'équipement dépend de son entretien quotidien. Les respects suivants doivent être respectés : 1. Lisez attentivement le manuel avant la première utilisation. 2. Vérifiez les exigences électriques avant chaque travail. 3. Équipement de nettoyage approfondi et accessoires après utilisation 4.Enroulez le tube après le nettoyage, en cas de dommage. 5. Ajoutez un peu de lubrifiant si vous ne l'utilisez pas pendant une longue période.
pulvérisateur. N'utilisez pas le pulvérisateur sans le carénage du moteur en place. Remplacez-le s’il est endommagé. Le carénage du moteur dirige l'air de refroidissement autour du moteur pour éviter la surchauffe et isole le tableau de commande des chocs électriques accidentels . To reduce risk of serious injury, including electric shock: Do not touch moving or electric parts with fingers or tools while testing repair.
SÉLECTION DES BUSES DE PULVÉRISATION Les buses de pulvérisation sont numérotées de manière à : SÉLECTION DES BUSES DE PULVÉRISATION •Le premier chiffre, multiplié par deux, donne la largeur de pulvérisation en pouces (avec la buse de pulvérisation à 1 pied (30 cm) de la surface pulvérisée). •Les deux derniers chiffres précisent la taille de l'orifice en milliers de pouces (Remarque : un orifice plus grand augmente le débit de peinture).
LISTE DES PIECES - 43 -
No Description n 1 Ensemble Qté No . n 1 20 Description Engrenage Quantit No é n 1 39 Description Quantit é Pouvoir corps de d'accouplemen anneau de pompe Lowe t retenue du 1 cordon 2 Bille de 1 21 Pignon de 1 40 Plaque de soupape vilebrequin sertissage de d'admission assemblée base 1 (DW=12.
dix Mer à anneau 3 29 Boulon M5X14 6 48 en V 11 Petit cuir de Cerceau 1 (8-12) 2 30 vachette en Fil de 1 49 connexion Tuyau de 1 décompressio forme de V n bague d'étanchéité 12 Bague 1 31 Tampon PCB 1 50 d'étanchéité 13 14 Guide-écrou 1 du cadre 1 32 Assemblage de blocage en de circuits cuivre manche imprimés Contre-écrou Composants 1 51 Coussinets de 4 pieds 1 33 Vis ST3.
Adresse : Baoshanqu Shuangchenglu 803long 11hao 1602A-1609shi Shanghai Importé en Australie : SIHAO PTY LTD, 1 ROKEVA STREETASTWOOD NSW 2122 Australie Importé aux États-Unis : Sanven Technology Ltd.
- 47 -
Technique Assistance et certificat de garantie électronique www.vevor.