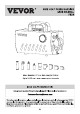
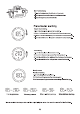
Bax. diameter 87 mm Max. length: 280mm Up to 3207 stainless testes cup oan be made NI N jet Have product questions? Need technical support? Please feel free to contact us: This is the original instruction, please read all manual instructions carefully before operating. TREVOR reserves clear interpretation of our user manual. The appearance of the product shall be subject to the product you received.
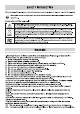
‘When using electrical appliances, basic safety precautions should always be followed including the following : 5 ‘Warning To reduce the rig of injury, user must read instructions manual carefully and save these Description of the symbols This symbol laced bettors a safety comment, Indicates a ind of precaution, warning, or danger goring this warning ta an accident. To reduce the risk of Injury, fire, or electrocution, please always follow the instrumentation son below.
if they have been given supervision or instruction conceding use of the appliance in a safe way and understand the hazards involved. Children shall not play with the appliance. Cleaning and user maintenance shall not be made by children without supervision 2, Type X attachment: If the supply cord is damaged, it must be replaced by a special cord or assembly available from the manufacturer or Its service agent.
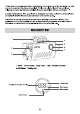
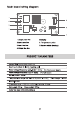
Accessories list Main machine Gloves Power cord User manual © [7 Film Transfer paper startup After power on, short press the start button fo start the machine After startup, the machine will automatically heat up 2 Shutdown Press and hold the start button for 3s to shut down 3.Auto shutdown The machine will automatically shut down If there Is no operation within minim. Temperature unit conversion shutdown state 2. Cross and hold the start button for 6s. 3.
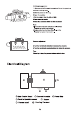
Start hot stamping 1. Plug In the power cord and turn on the power cohort pass the start button to start the machine 3 Set printing temperature and time Parameter setting Temperature setting: 1. Turn the display half a turn to the right. 2. Enter the temperature setting mode after a baps sound. 3. Tum the switch tithe right again to Increase the temperature 4. Tun the switch to the left again to reduce the temperature Time setting: 1. Turn the display half a turn to the left 2.
Hot stamping process 1. Make sure that the machine reaches the set temperature before transfer printing. ticktock the picture on the mug 3.0pen the machine 4 Put the mugs in from tha left and right 5.Press down the handle 6. Prass the countdown button to start countdown Tips: 1.Increase the transfer time If the color of the transferred pattern is too light. 2 Reduce the transfer time If the color of the transferred patter is too dark. Pressure adjustment 2.
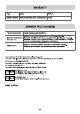
Type Items Period ‘Whole machine | Parts of machine (excl. accessories) 1 year Fault phenomenon | Faults Causes and Solutions Reason: The aviation connector wire |s not property Inserted. Machine temperature | Reason: The electric power of the mug pad is broken. Replacing the mug ped. doses not rise Reason: The main board has no went output (the main board does not supply power fo the toast coaster). Replace the motherboard. . Reasoning that the aviation connector Is not Inserted properly.