
Security Camera User Manual


VerteX RTH Series H.8 and H.16 Series
21
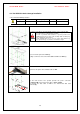
7) Reassemble the top case by reversing 1) to finalizing HDD installation.
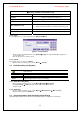
4-3. Power ON.
Check the adapter (12VDC/3.5A) and connect the power. Booting will be initiated by pressing the power button in
the front panel. Booting is progressed step by step by VGA outputting or a color bar test screen for TV outputting,
Live screen and a clock.
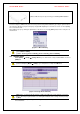
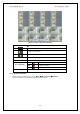
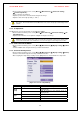
Menu widow pops up by clicking the right button of the mouse or pressing [MENU] button in the front panel as
shown below.
[Figure 4-5. Menu Window]
ID and Password are required for a initial installation. Default ID and Password are shown below.
[ Local Admin : 00000 ]
[ User1 : 1111111 ] [ User2 : 2222222 ] [ User3 : 3333333 ] [ User4 : 4444444 ]
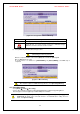
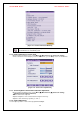
4-4. Storage Setup
Select {Menu} Æ {Setup} Æ {Storage Device}. As shown below, newly installed HDD is shown at
{NEW} tab.
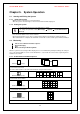
Indication of “{ }” refers to one provision of the menu. Indication of “Æ” refers to a sub-
provision. Example> {Menu} Æ {Setup} : go to Setup that is a sub-provision of Menu.
[Figure 4-6. Storage Device Window]
{New} tab is a newly introduced manager in MM series/SM-Series and it manages all storage
devices. All newly recognized devices are managed and allocated as a saving or backup storage
in {New}.
Move focus onto {NEW} tab using the arrow keys and select.
Select Hard Disk.