
Security Camera User Manual


VerteX RTH Series H.8 and H.16 Series
37
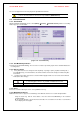
5-12-3. Recording Status View
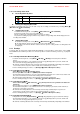
A. Recording Status by Color
Green Continuous recording is in progress.
Red Motion recording is in progress.
Blue Sensor recording is in progress.
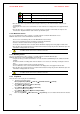
B. Starting and Stopping Record All
In real-time monitoring mode, the user can start or stop the recording of all channels by selecting {Menu} Æ
{Miscellaneous} Æ {Record On/Off}
C. Stopping Record All
In real-time monitoring mode, select {Menu} Æ {Miscellaneous} Æ {Record On/Off}
Enter the password of the local system administrator.
On the recording stop confirmation window, select the Yes button.
Any channel recording in progress will then stop, and the corresponding status will be displayed on the
recording status window.
D. Starting Record All
In real-time monitoring mode, select {Menu} Æ {Miscellaneous} Æ{Record On/Off}
On the login window, enter the password of the local system administrator.
The recording of all channels will then start based on the previous setting, and the recording status will
be displayed.
5-13. Backup
To back up data, the PC shall be equipped with CD and DVD or connected with a storage device such as HDD,
CD and DVD via the USB 2.0 port. The user can back up data in real-time monitoring, search, log, or playback
mode.
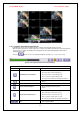
5-13-1. Backup in Real-time Monitoring Mode
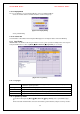
In real-time monitoring mode, select {Menu} Æ {Backup} Æ {Backup}. The backup menus will then
appear.
The automatic backup time is set to 5 minutes before the Copy (Backup) button is pressed, and the end
time, to the time the Copy (Backup) button is pressed.
All channels containing data at the time of backup are backed up automatically. Depending on the divided
screen mode, however, only those channels that can be viewed may be selected.
For the remaining backup procedures, see {Backup} Æ {Common Backup Procedure}
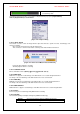
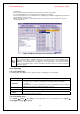
5-13-2. Backup in Search Mode
Select {Menu} Æ {Search} Æ {Calendar Search}.
Click the right-mouse button or select {MENU} button in the front panel.
The automatic backup start time is set to the year/month/date/hour/minute set in search mode, and the end
time, to the last minute/second of the data existing at the selected time.
All channels with existing data at the time of backup are backed up automatically.
For the remaining backup procedures, see {Backup} Æ {Common Backup Procedure}
5-13-3. Backup in Log Mode
Select a date in {Menu} Æ {Miscellaneous} Æ {Log Viewer} and select a log related to the data to be
backed up.
Click the right-mouse button or select {MENU} button in the front panel.
The automatic backup time is set to 5 minutes before the selected log is generated, and the end time, to
the time the selected log is generated.
All channels with existing data at the time of backup are backed up automatically. If a log has been
generated for a specific channel, however, then only that channel is selected.
For the remaining backup procedures, see {Backup} Æ {Common Backup Procedure}
5-13-4. Backup in Playback Mode
In Playback mode, select {Playback Menu} Æ {Backup}. Any playback in progress at this time will stop.
The automatic backup time is set to 5 minutes before the Copy (Backup) button is pressed, and the end
time, to the time the Copy (Backup) button is pressed.
All channels containing data at the time of backup are backed up automatically. Depending on the divided