
Operating instructions

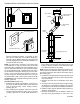

2. Install the rear log by mating the notch on the bottom of
the log with the raised notch on the back left side of the
ember bed. (Figure 47) Ensure the cutout in the right
side of the log is sitting around the pilot assembly and
pilot is not obstructed. (Figure 48)
For U.S. installations: The venting system must con-
form with local codes and/or the current National Fuel Gas
Code, ANSI Z22.1.
For Canadian installations: The venting system must
conform to the current CSA B149.1 installation code.
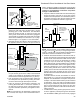
Install the Vent Pipe
Apply a bead of sealant around bottom end of inner starter
pipe (found in bag with logset) and attach to stove. Apply a
bead of sealant around top of inner starter pipe and install
the Z31B00 FSDHAG Draft Hood according to Draft Hood
instructions. (Figure 45)
Attach the rst section of venting to the draft hood. De-
pending on the length of the individual venting sections and
the lengths of the decorative pipe (if installed), you may
need to slip the decorative pipe over the venting sections
before attaching upper sections to lower ones. The sec-
tions of decorative pipe should be oriented with their seams
(if any) toward the wall; sections usually do not need to be
fastened at each joint, other than slip sections. If the layout
includes a slip section, this should be the last section of
pipe visible in the room, at the ceiling. Complete the vent-
ing according to the vent maker’s instructions.
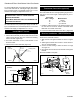
ST358
Decorative
pipe around b-vent
4/26/00 djt
Vermont Castings
Group Direct Vent
System may be
used after Draft
Hood up to the
ceiling
Decorative
7” Pipe
4” B-vent
Pipe
Draft Hood
Adapter
Figure 45 Decorative 7” pipe may be tted around the B-vent
pipe.
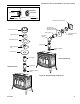
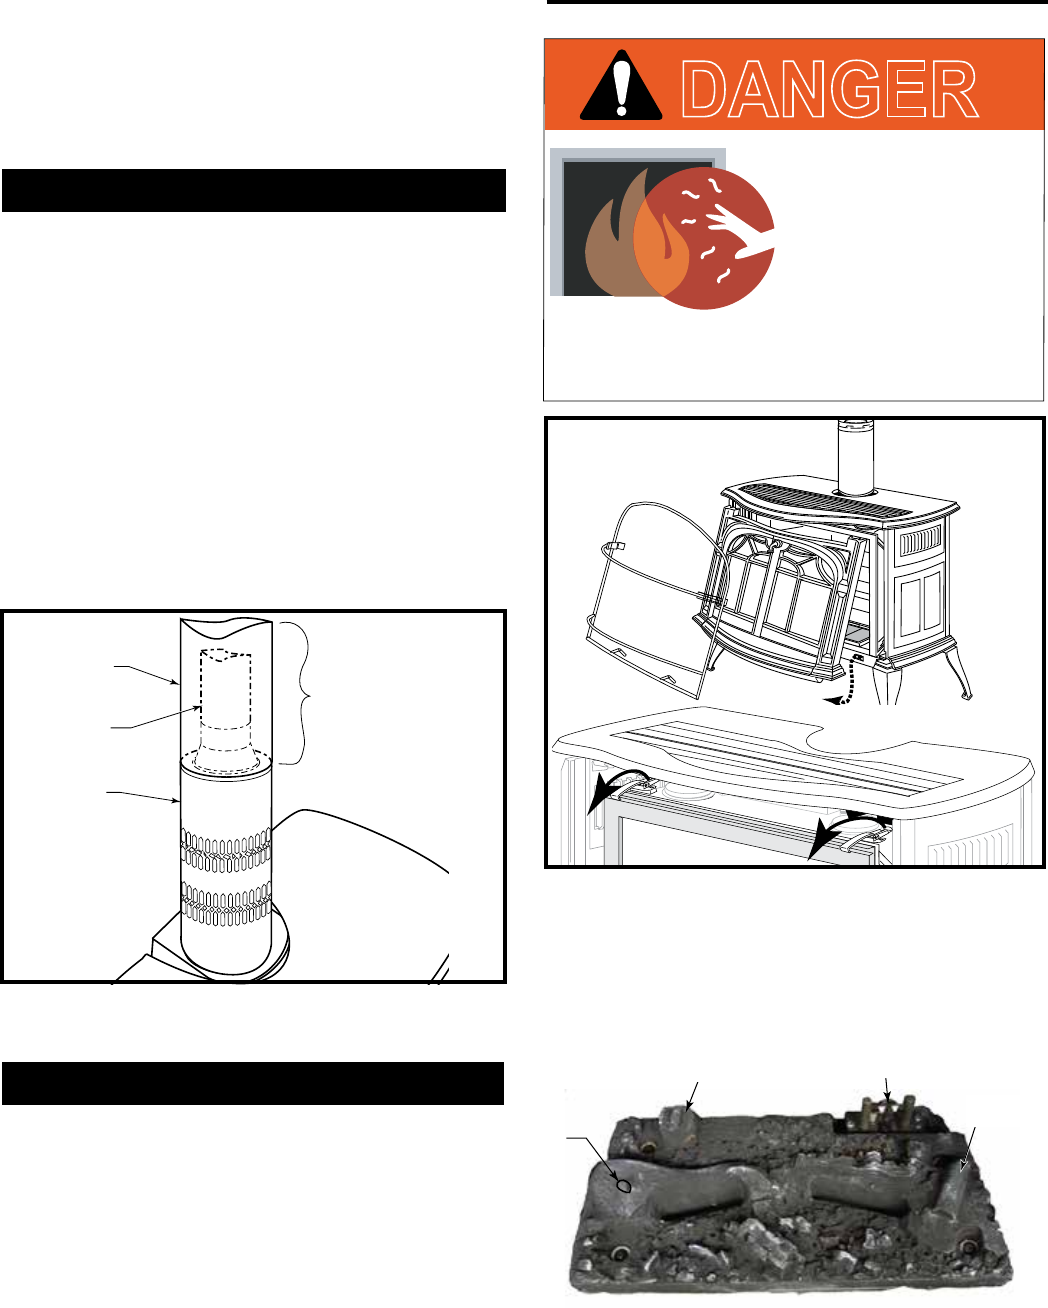
Install the Log Set
Before beginning log installation, remove stove front and
glass frame. Figure 46.
NOTE: Remove the safety barrier before you remove the
glass frame. To remove the barrier, simply lift up and pull
out until the tabs are clear of their corresponding slots on
the rebox. Then proceed to remove the glass frame by
following the steps below.
1. Remove the logs from their packaging and inspect
each piece for damage. DO NOT INSTALL DAM-
AGED LOGS.
Figure 46
ST139
Radiance
remove front
4/20/ 01 djt
ST141
pull glass latch
10/99
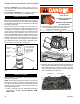
ST139
DANGER
HOT GLASS WILL
CAUSE BURNS.
DO NOT TOUCH GLASS
UNTIL COOLED.
NEVER ALLOW CHILDREN
TO TOUCH GLASS.
Un panneau vitré chaud peut
causer des brûlures.
Laissez refroidir le panneau
vitré avant d’y toucher.
Ne laisser jamais les enfants
toucher le panneau vitré.
A barrier designed to reduce the risk of burns from
the hot viewing glass is provided with this
appliance and shall be installed.
Une barrière visant à réduire le risque de brûlure
par le hublot chaude est fournie avec cet
appareil et doit être installé.
DANGER
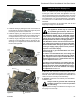
Figure 47
LG497
SDDVT ember bed
6/07
Raised Notch
Pin
Pilot Assembly
Raised
Notch
26
Stardance® Direct Vent/Natural Vent Gas Heater
20306760