PAYware Mobile™ iPhone® User Guide
Notice Copyright June 2010, VeriFone Systems, Inc. All rights reserved. VeriFone, the VeriFone logo, PAYware®, PAYware Mobile™, PAYware Connect™, and VeriShield Protect are either trademarks or registered trademarks of VeriFone in the United States and/or other countries. Apple, the Apple logo, iPhone 3G, iPhone 3GS, iPhone 4, iPod touch, and iPad are registered trademarks of Apple Inc., registered in the U.S. and other countries. App StoreSM is a service mark of Apple Inc.
Table of Contents Notice .................................................................................... 1 O ver view................................................................................ 3 Why PAYware Mobile 3 G e t ti ng S tar te d ....................................................................... 4 D ow nl oa din g PAYw are Mo bi le Ap p fro m A pp S to r e ..................... 4 L aunc h PAYwar e Mobile ..........................................................
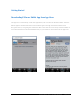
Overview PAYware Mobile is a unique mobile payment solution that works with iPhone 3G, iPhone 3GS, iPhone 4, and iPod touch running OS 3.1.2 or higher. PAYware Mobile is the perfect complement to a total bu siness operations solution by consolidating all pay ments in one centralized portal.
Getting Started Downloading PAYware Mobile App from App Store The App Store contains many credit card applications, but none like the PAYware Mobile. PAYware Mobile supports VeriShield Protect's End-to-End Encryption through the PAYware Mobile Card Encryption Sleeve, encrypting the transaction data at the time the card is swipe. PAYware Mobile is a free download and can be downloaded directly to your iPhone or iPod touch from the App Store. PAYware Mobile 1.
Launch PAYware Mobile Once the PAYware Mobile App has been installed on your iPhone, you may start the application by touching the “PAYware” icon on the iPhone home screen. PAYware Mobile 1.
After PAYware Mobile displays its splash screen, you will be asked to create a Security PIN (prior to accessing the main transaction screen). Setting Up PAYware Mobile Once you have set up your PIN, you will be directed to the Initial Setup Assistant to configure the PAYware Mobile application. PAYware Mobile 1.
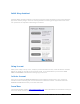
Initial Setup Assistant PAYware Mobile includes a simple-to-use setup screen that helps merchants to learn more about the app before actually using it as well as offering assistance in setting up the application. Each of the four options has an explanation describing its functions. Setup Account When you're ready to set up a live, ready-to-process merchant account, touch this button. PAYware Mobile will guide you through all the necessary steps.
Test Drive PAYware Mobile's Test Drive Mode can be used to familiarize individual merchants with the use of PAYware Mobile and transaction processing in general. Consult the section Test Drive Mode (see page 11) for more details. Merchant Settings Prior to processing transactions, you must configure your merchant settings. To access this screen from PAYware Mobile's main screen, touch the Menu button. You should now see the Menu screen.
6. Touch the Register iPhone button. Enter the User ID and Password you received from your PAYware Connect administrator. Touch the Continue button. 7. If your phone is successfully authorized, your phone will receive a Device Key. The Device Key authorizes the mobile device, and is automatically transferred to your phone (you don't need to manually enter it). PAYware Mobile will display your successful Sync/Resync to the PAYware Connect system to confirm that it has been registered.
4. You should now see a standard email screen that already contains your PAYware UDID. Fill out the To: address box with your intended recipient (should be your PAYware Connect administrator) and touch the Send button. Your phone will deliver your PAYware UDID and return you to the Merchant Settings screen. PAYware Mobile 1.
5. Touch the Back button to return to the Menu screen. Clear Account From iPhone WARNING: This will erase your PAYware Mobile Client ID and Device Key. Use this function if you need to deactivate your phone's access to your PAYware Connect account. You will not be able to use the deactivated phone unless your PAYware Connect administrator authorizes a re-sync to the account. 1. Starting from PAYware Mobile's main screen, touch the Menu button. 2. You should now see the Menu screen.
4. To disable Test Drive Mode, simply return to the Merchant Settings screen and select a different mode. Demo Mode PAYware Mobile's Demo Mode is currently only available to specific VeriFone Partners (Test Drive Mode is available to individual users). Demo Mode can be used to familiarize those merchants with the use of PAYware Mobile and transaction processing in general. Demo Mode can also be used to test the connectivity between those merchants' phones and the PAYware Connect gateway.
1. Starting from PAYware Mobile's main transaction screen, touch the Menu button. 2. You should now see the Menu screen. Scroll down to the Setup section and touch the words Application Settings. 3. You should now see the Application Settings screen. You may modify any of the following settings: ● ● ● ● ● ● Tip % -- If you enter a tip percentage (example: 20.00 for 20%) into this field, it will be applied to all applicable transactions (Sale, Pre-Auth, etc.).
● Prompt for Email on Submit -- If this is enabled, PAYware Mobile will prompt you for an Email Address during transaction. A receipt will be emailed to the address you enter. Clear Log -- Touch this button to erase all the PAYware Mobile Transaction Log entries stored on your phone. This will not affect the data stored at the PAYware Connect gateway. Change PIN -- Touch this button to change your PAYware Mobile Security PIN.
Firmware Updates ● ● ● ● Update/Restore Bootloader -- Touch this button to update the bootloader for your Secure Card Reader. If your bootloader requires updating, this button will be colored green. Otherwise, this button will be colored blue. Update/Restore Firmware -- Touch this button to update your firmware for the Secure Card Reader. If your firmware requires updating, this button will be colored green. Otherwise, this button will be colored blue.
4. You should now see the Diagnostics screen, showing information for the attached Secure Card Reader. 5. Touch the Run Diagnostics button if you have been advised to do so by a Support Representative or your PAYware Connect administrator. PAYware Mobile will prompt you for confirmation. Note: This will reset the PAYware Mobile Transaction Log. This operation cannot be undone. 6. You should now see a standard email screen that already contains your diagnostic information. Touch the Send button. 7.
Processing Transactions with PAYware Mobile Now that you have set up PAYware Mobile, you are ready to process transactions. Best Practice Note: The following instructions will provide you with steps for processing transactions with the PAYware Mobile application. However, before using PAYware Mobile to do actual "live" business, we highly recommend that you process a $1.00 transaction using a real credit card number.
Standard Transaction Processing 1. The first thing you'll need to do is select the type of transaction you would like to process. This can be done by touching the transaction type button at the top-left of the main transaction screen (shown as Sale in the screenshot above). The following list details each type of transaction available in PAYware Mobile. • • • Sale– A Sale transaction decreases the cardholder's open to buy.
• • customer's card number, transaction amount, and the authorization code you received from your merchant account provider. Refund – Use this transaction type to perform a “return,” by crediting funds back to the cardholder’s account. Clear All Transaction Data Fields – Selecting this option will clear all the data from the Transaction Screen of the transaction screen. 2. After you have selected a transaction type, you can specify the amount of the transaction.
Transaction Info Once PAYware Connect has processed your transaction, PAYware Mobile will display the results in the Transaction Info window. • • • • • • VeriShield Protect Status – on the Transaction Info Bar, either a Green or a Red shield icon will depict whether or not the transaction was encrypted by VSP. Only transactions swiped through the PAYware Mobile Secure Card Reader will have a green shield icon. Manually keyed transactions will show the red shield icon.
• VSP – If you swiped the card through the PAYware Mobile reader, VeriShield Protect (VSP) is applicable and the card data is encrypted. Applicable Transaction Types are Swiped Sales, Pre Auths, and Refunds (if swiped). VSP is NOT applicable on follow-on transaction types for example Voids, Add tips, Signatures, Completions, and Refunds all of which can be processed as a follow on of a previous Captured transaction.
VSP does not recognize 909: Unknown Command Command Card – please contact Card PAYware Mobile Support VSP could not decrypt the Track Unable to process 909: READER ENCRYPTION transaction UKNOWN Data.
PAYware Mobile Reports There are multiple reporting options available within PAYware Mobile application. PAYware Mobile 1.
Additional Information Options Additional transaction information can be included with the transaction information sent to the gateway. The information that you enter here will only be used for the active transaction and will be cleared from the Additional Info screen after it has been submitted. To enter additional transaction information: 1. Starting from PAYware Mobile's main transaction screen, touch the Menu button. 2. You should now see the Menu screen.
● ● • Enter Amount (Tip) -- If you enter a tip amount (example: 2.00 for $2) into this field, it will be applied to the active transaction. You may use either this field OR the Enter Percent (Tip) field. Enter Percent (Sales Tax) -- If you enter a sales tax percentage (example: 8.00 for 8%) into this field, it will be applied to the active transaction. You may use either this field OR the Enter Amount (Sales Tax) field. Enter Amount (Sales Tax) -- If you enter a sales tax amount (example: 1.
5. Touch the Back button to return to the main transaction screen. Transaction Search The Transaction Search feature allows you to search for previously completed transactions that reside on the PAYware Connect gateway. It does not search the local log (on your phone). Only those fields that you fill out will be used to generate the search. The application will retrieve the results from PAYware Connect and display your search in list format.
Transaction Search screen Transaction Search results 4. If you want to send the Search Results to an email address, touch the Email button to open a new email screen. Fill out the To: address box with your intended recipient and touch the Send button. Your phone will deliver your Search Results and return to the Transaction Search screen. 5. Touch the Back button to return to the main transaction screen.
4. Touch the OK button to return to the Menu screen. Transaction Log The Transaction Log is a local listing of all transactions (successful and unsuccessful) processed through your device and includes comprehensive information about each transaction. This report also allows for follow-on transactions to be performed on existing transactions (Sale/Void, PreAuth/Completion, etc.).
4. To remove a transaction from the log, touch the Edit button. Next, touch the delete symbol next to the transaction(s) you wish to delete. Touch the Delete button to remove the selected transactions from the log. Note: This does not financially delete the transaction; it is simply removed from the Transaction Log locally stored on your device. Use the Void and Refund transaction types to balance your account. 5. Touch the Back button to return to the main transaction screen.
4. PAYware Mobile will present the Merchant Portal Menu screen. From this window, you can manage your PAYware Connect users or administer your account's settlement. User Management The User Management section of the Merchant Portal allows you to create and edit u sers who will have configurable degrees of access to the PAYware Connect gateway, accessible either via a PCbased Internet connection or an Internet-ena bled cell phone. The two ma in functions are Create New User and Edit User: PAYware Mobile 1.
To create a New User, simply enter a User Name and a Full Name. Specify the Role that you want the user to have (Multi-tiered Roles can be created by accessing the full Merchant Portal from a PCBased Internet connection). Enter (then re-key) a Password that meets th e specifications shown onscreen. The red X's will turn to green checks as each requirement is met. To Edit a User, select the user you w ant to edit and PAYw are Mobile will display the Edit User screen.
The Settlement Setup screen lets you specify whether you want your bat ch to be aut omatically settled at a specific time each date. You can us e the two Sett le Email addresses t o specify who should receive emails indicating the statuses of attempted batch settlements. Note: Some payment processors have “host-initiated” settlement. When you are using a payment processor with this capability, you will not n eed to manuall y settle your transactions each day.