
User guide


19
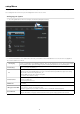
S
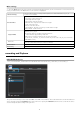
ource Press the arrow buttons to select sources. Video-IN
/
DTV
/
AT
V
S
tart Tim
e
Enter the date and time o
f
the recording.
L
en
g
th Enter the len
g
th of the recordin
g
R
e
p
ea
t
Select how often
y
ou want the schedule to record. Choose from
O
nce, Everyday, Mon-Fri, Mon-Sat or
f
or an individual day o
f
the week.
D
ev
i
ce
C
hoose the device that
y
ou want to record to. HDD/USB/USB1/USB2/CARD
Quality
Select the recordin
g
q
ualit
y
. Choose from HQ, SLP, EP, LP and SP.
T
he higher the quality the more storage space is used on the hard drive.
See HDD/USB Free Space on the le
f
t o
f
the screen giving details o
f
how long you can record
f
or using
e
ac
h
setting
.
N
i
c
a
m
Near Instantaneous Companded Audio Multiplex. Select this
f
unction on/o
ff
f
or multiplex audio
cha
nn
els
.
N
ote: the hi
g
hest
q
ualit
y
recordin
g
o
p
tion
f
or DVT is
SP
. DVT si
g
nal are MPEG-2
f
ormat which have a
q
ualit
y
o
f
SP. The hi
g
hest
q
ualit
y
is available via ATV and Video Modes
E
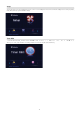
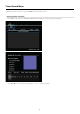
PG Recording (Electronic Program Guide)
You can set programs to record through the EPG (Electronic Program Guide). Enter DTV and press the EPG button on the remote control.
On screen you wi
ll
see t
h
e EPG. T
h
e
Ch
anne
l
Listing an
d
Date/Tim
e
listing will appear across the top section o
f
the screen. The program
an
d
time
l
istin
g
wi
ll
a
pp
ear
b
e
l
ow t
h
is
.
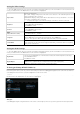
S
e
l
ect t
h
e c
h
anne
l
by
usin
g
t
h
e
N
EXT
/
BAC
K
buttons on the remote control. The preview screen will show the current program showing
K
on that channel.
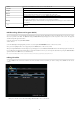
S
elect the date/day and the progra
m
you want to record using the NAVI
G
ATI
ON
buttons on the remote control
.
Once you have highlighted the correct program press the
EDIT
bu
tt
o
n
o
n th
e
r
e
m
o
t
e
co
ntr
ol
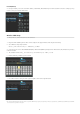
A
f
ter pressing the EDIT button the
f
ollowing message will appear on screen
Add
a new Sc
h
e
d
u
l
e. T
h
is s
h
ows t
h
at t
h
e program
h
as
b
een set
f
or recordin
g
. The
p
ro
g
ram will automaticall
y
record to the hard drive however
y
ou can chan
g
e the destination b
y
usin
g
the
Ed
it Sc
h
e
d
u
l
es
o
p
tion under the Time
R
E
C
menu
(
See details below
)
N
ote: If you switch the MediaStation off via the rocker switch on the back of the device programmed recordings will not work
E
diting Schedules
1
. Se
l
ect
Ed
it
f
rom the menu bar and then select the schedule
f
rom the list which you want to change. Press ENTER on the remote
co
ntr
ol
2
. Modi
f
y the schedule as described in Creating a New Schedul
e
in the section above.