
User manual


6
Hardware connection
Hardware connectionHardware connection
Hardware connection
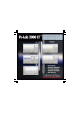
Note
NoteNote
Note:
::
:
-
--
-
At first time power
At first time powerAt first time power
At first time power-
--
-up, the oscilloscope will calibrate itself automatically.
up, the oscilloscope will calibrate itself automatically.up, the oscilloscope will calibrate itself automatically.
up, the oscilloscope will calibrate itself automatically.
-
--
- The
The The
The actual screen
actual screen actual screen
actual screens
ss
s can differ from the one shown in this manual
can differ from the one shown in this manual can differ from the one shown in this manual
can differ from the one shown in this manual.
. .
.
Hardware Set
Hardware SetHardware Set
Hardware Set-
--
-up
up up
up
(Close all programs before continuing)
(Close all programs before continuing)(Close all programs before continuing)
(Close all programs before continuing)
USB driver install:
USB driver install:USB driver install:
USB driver install:
•
Connect your PCSGU250 unit to a free USB port
•
Follow the on screen driver installation procedure.
•
If Windows asks for Windows Update, select “not at this time”
•
Install the driver from a specific location, then browse on the CD and select the
folder D:\PCSGU250Driver
D:\PCSGU250DriverD:\PCSGU250Driver
D:\PCSGU250Driver. (press “next”)
•
If Windows indicate “has not passed Windows logo testing…” select “Continue
Anyway”.
•
After finishing, you can check the driver installation in the Device Manager list.
•
It is possible that the PC asks to “restart” for proper installation
Note:
Note: Note:
Note: In case of malfunction, remove the USB driver in the control panel and
install the D:\PCSGU250Driver\PCSGU250Driver_WinUSB after reconnecting the
device.
Starting
StartingStarting
Starting the software :
the software : the software :
the software :
Locate the
Pc
PcPc
Pc-
--
-Lab2000LT
Lab2000LTLab2000LT
Lab2000LT
software shortcuts (programs..
Pc-Lab2000LT
…)
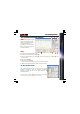
Click the icon to start the main program. “loading, please wait
loading, please waitloading, please wait
loading, please wait” should ap-
pear. Then the power LED goes ON on the unit. (*)
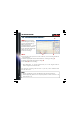
The main program automatically launches the Oscilloscope and generator
screen, which is shown on the next pages. Should you receive an error (ex. If no
unit is detected), disconnect and reconnect the USB cable and try again or, if you
want to access the demo mode (no unit is needed) :
- Click the Options menu, and select ‘Hardware Setup’ > demo mode