
Instructions / Assembly


MAKE SURE TO FOLLOW THE STEPS BELOW
FOR A SUCCESSFUL & EASY ASSEMBLY
TIP: To ensure the final unit is secure and sturdy it is highly recommended to
secure each component with the zip ties provided after connecting each
component together in the steps.
TO ASSEMBLE
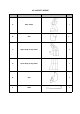
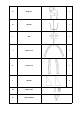
1. Remove all components from the box and lay flat on the floor.
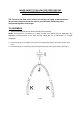
NOTE: Some parts are connected by a string of lights and should NOT be separated. Any
separation or disconnection of the light set may cause the unit to malfunction or not light
completely.
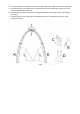
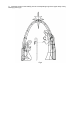
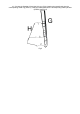
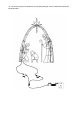
2. Insert the prongs on the Upper arch (J) into the corresponding rings of the Lower arch(K). (see
Fig.1)
3. Insert the prongs on the Star (I) into the corresponding rings of the Upper arch(J). (see Fig.1)
Fig.1